Import Contacts into Flexmls
If you have contacts in an address book in another program, you can import them into Contact Management in Flexmls.
First, export the contacts from the other program into a file. Each contact record must contain either a Full Name field or both First Name and Last Name fields, or contacts cannot be imported.
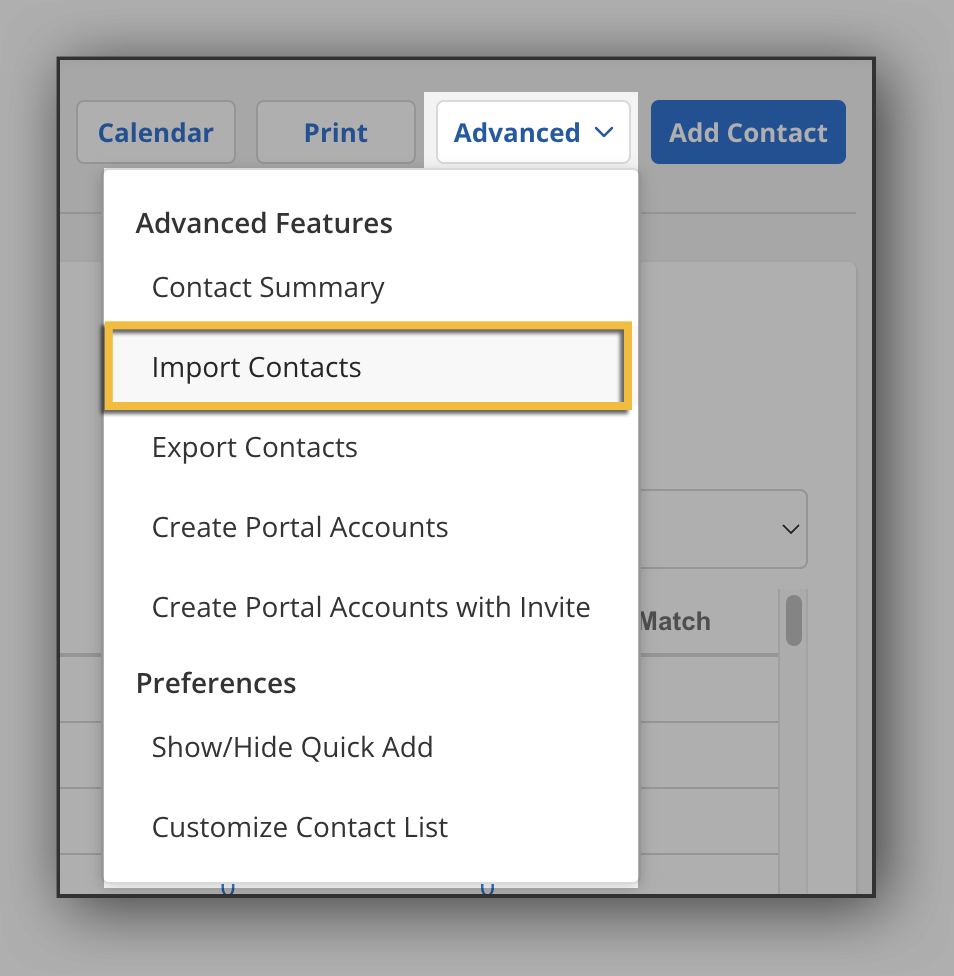
Click Contact Management under Contacts on the menu.
In the upper right corner of the page, click Advanced. In the dropdown menu, select Import Contacts.
Click the Choose File button to select the file where your contacts' information is stored. Select a delimiter of Comma, Tab, or Pipe. For example, if you are importing a .csv (comma-separated values) file, select Comma as the delimiter.
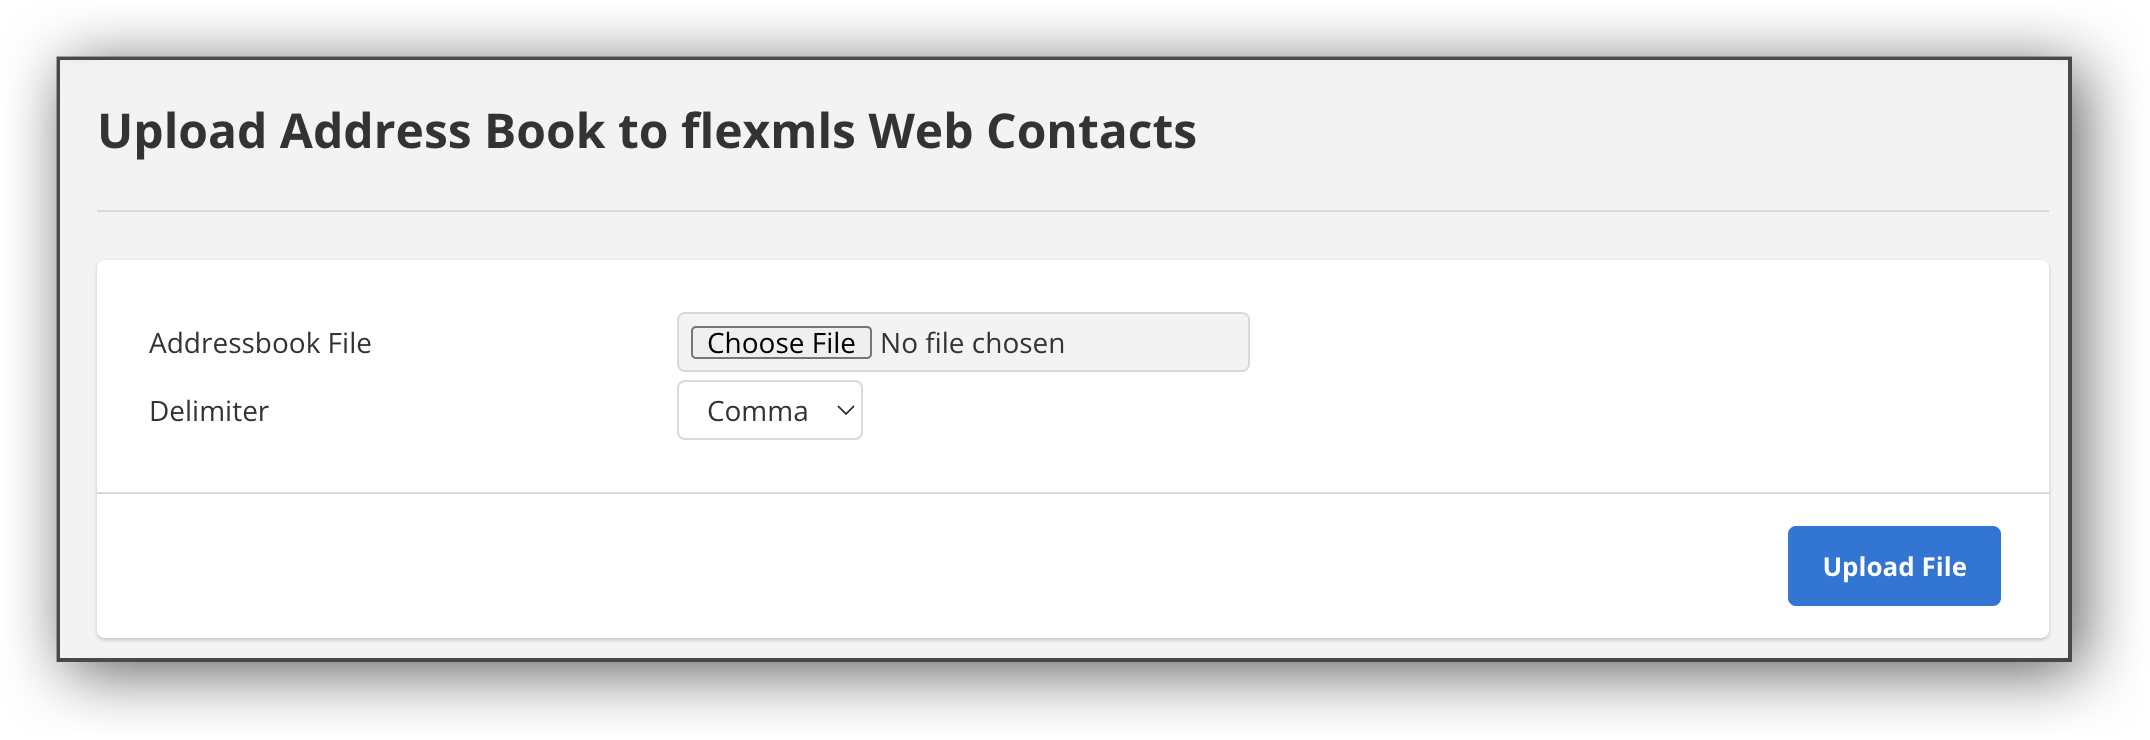
Click Upload File.
On the mapping page, match imported data to fields in Flexmls. Unmapped data will not be imported. The example below shows the mapping between some imported fields and Flexmls fields.

To exclude column headings from being imported, click Discard first record (Column Headers). If you do not know if your file has header information, look at the data in the Imported Values lists. If the first row contains a description of the data and not actual contact information (also shown in the example above), you should discard the first record.
Note
Contacts in Flexmls are identified by a Display Name, which is usually the person's full name. You can map a single field to the Display Name, if available in the exported data. If no single field is available, the contact import process will combine the Contact First Name and Contact Last Name fields to create the Display Name. Contacts must have data in the mapped name fields in order to be imported. (Contacts with data missing from other mapped fields can still be imported successfully.) Contacts for whom a Display Name already exists in Flexmls will be skipped.
The email field requires only one email address per contact when importing contacts. A comma in this field will cause an error.
Click Continue to import contacts from the file.
On the Contact Import Results page, you can review the contacts that were imported.
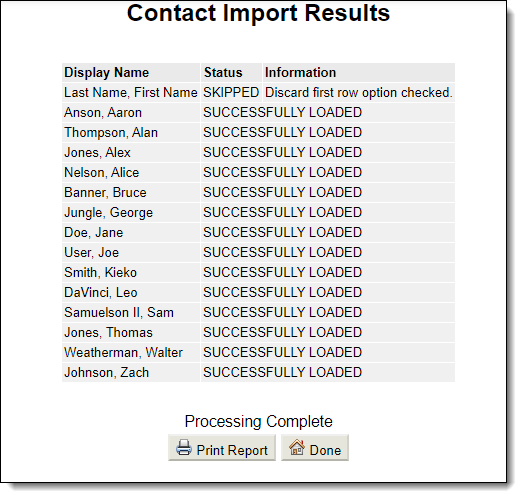
Select either Print Report or Done to exit the page. Your contacts will be available in Contact Management.