Searching on the iOS App
Refer to the video tutorial for an overview on searching for listings in the Flexmls Pro App for iOS. Refer to the information below for detailed information on modifying navigating the search function, modifying search filters, and searching with map overlays.
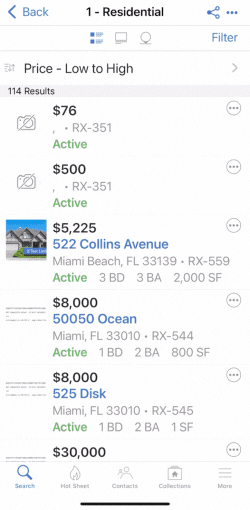
You can use the expandable and collapsible panels in the iOS app to search listings, view your search results, and take action on a listing. When you perform a listing search on mobile, you can view your search results in various formats before choosing an action to take on a listing.
To help you navigate the three-panel search experience, the chevron next to the Filter and Actions icon changes direction depending on which search panel you are in.

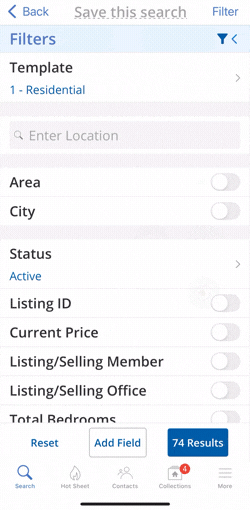
To modify search criteria, tap the Filter button. Filters display on an expandable/collapsible panel, and they are organized into sections based on relevance. For example, template-defined location fields are grouped together at the top of the search template. The location search bar is at the top of the filter screen, and it supports character-based fields. Like Flexmls Desktop, you can filter your search by multiple addresses. If your MLS participates in data sharing with other MLSs, you can filter by MLS.
Note
To specify the MLSs that are selected by default, go to General Preferences in the desktop version of Flexmls.
Each filter has a toggle button next to it, and you can use the toggles to enable or disable a filter. If you are using a search template, the default filters for the search template are enabled.
All Quick Search templates created in Flexmls are available when using the Flexmls app or mobile website. Search templates are available and accessible on the Filter screen in the iOS app. To change the search template, tap Template. You can either enter a template name, or select a checkbox next to the template you want to use.
You can use the toggles to modify your search using multiple filters at once. Enable the toggles for the filters you want to include from a search, and disable the toggles for the filters you want to exclude. Toggles that are switched off will not filter or affect search results.
To specify a filter, tap the filter to expand it. You can specify filters such as Property Type, Status, Listing/Selling Office, or Sold Date. For example, when you tap the Property Type filter, you can then use the checkboxes to select the specific property types you want included in your search results. If you select Sold Date, you can use the calendar to select a specific date range, or you can tap the arrow icon and select a specific number of days back.
You can also apply an operator (and, or, not) to a search filter. To do this, enable the toggle for the filter and tap the gear icon beneath the toggle. You can select from and, or, and not, and your selection displays under the filter.
Action buttons are located at the bottom in a single bar. To add more search filters, tap Add Field. Start typing a field name or tap a field name in the list, and then tap Done. When you add new filters, they are automatically grouped by category. To reset your filters, tap Reset. And to view your search results, tap Results. As you add filters, this button dynamically changes to show how many search results have been yielded by your search criteria.
Note
You can also tap the Filter button at the top right to view your search results.
If you want to save your search, tap the “Save this Search” bar and type the name of your search. This will save your search automatically.
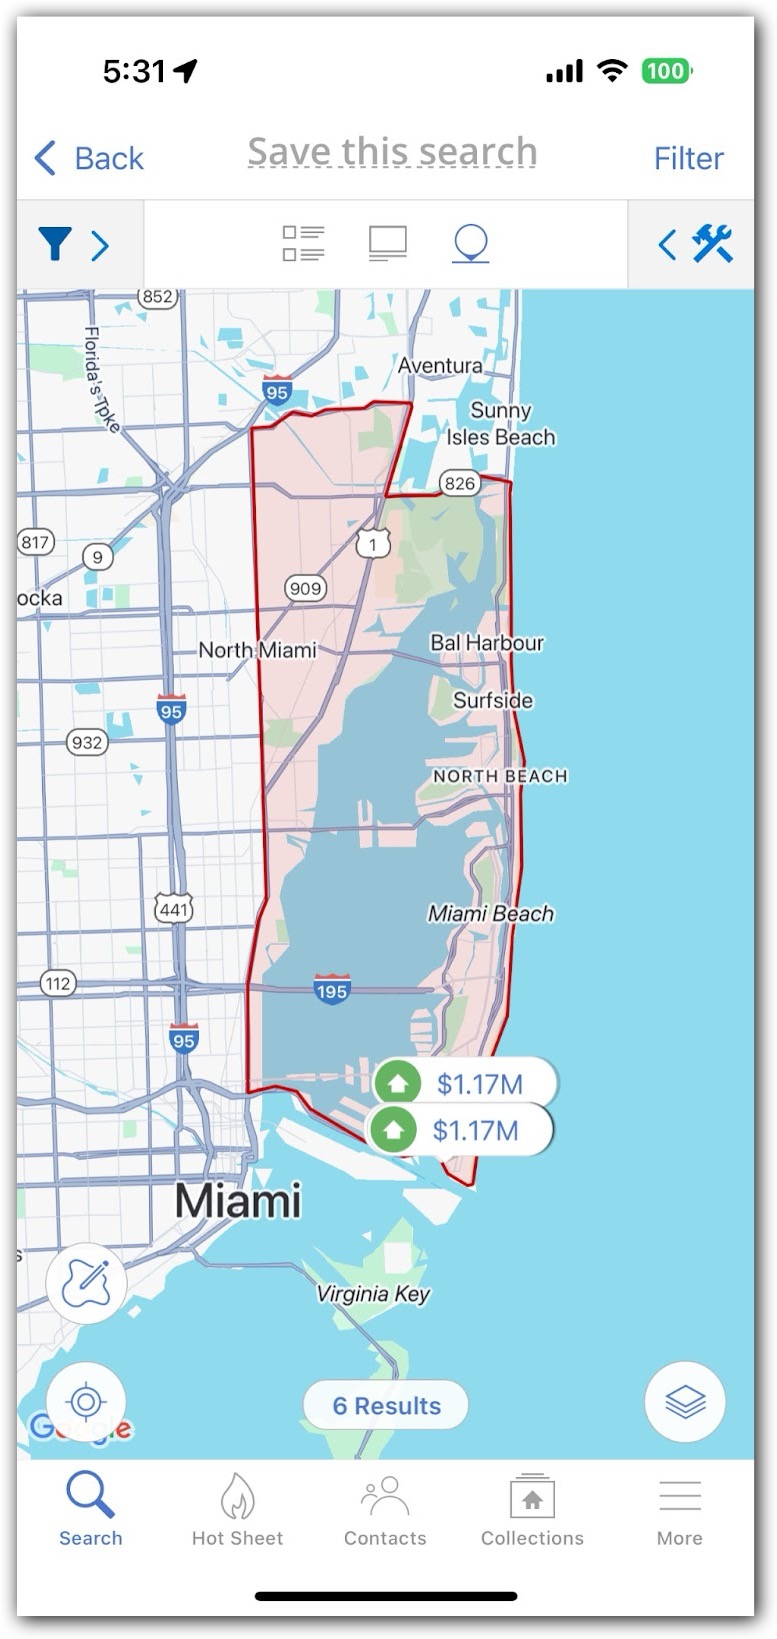
In the Flexmls Pro app for iOS, you can draw a radius on the map. After you have entered your search criteria in the Filters panel, close the Filters panel and go to the map view.
On the map, find the location around which you want to draw a radius. Then, tap the Draw icon. To draw a radius, select the shape you want to draw, then tap the area where you want to start drawing the shape. If you have chosen to draw a circle or rectangle, tap the area where you want the shape to be, then drag the shape to make it bigger or smaller. If you are drawing a circle, the radius displays at the bottom of the screen. If you have chosen to draw a custom polygon, draw the shape one segment at a time by tapping to start and stop each segment. Then close the shape by tapping the starting point again.
Once you have drawn your shape, you can modify it by tapping the shape. Tap the shape to pull up the Edit Shape menu. Use the Color Selection dropdown menu to change the shape color, tap the Edit button next to the shape name to change the shape name, or tap Edit Shape to drag the shape bigger or smaller.
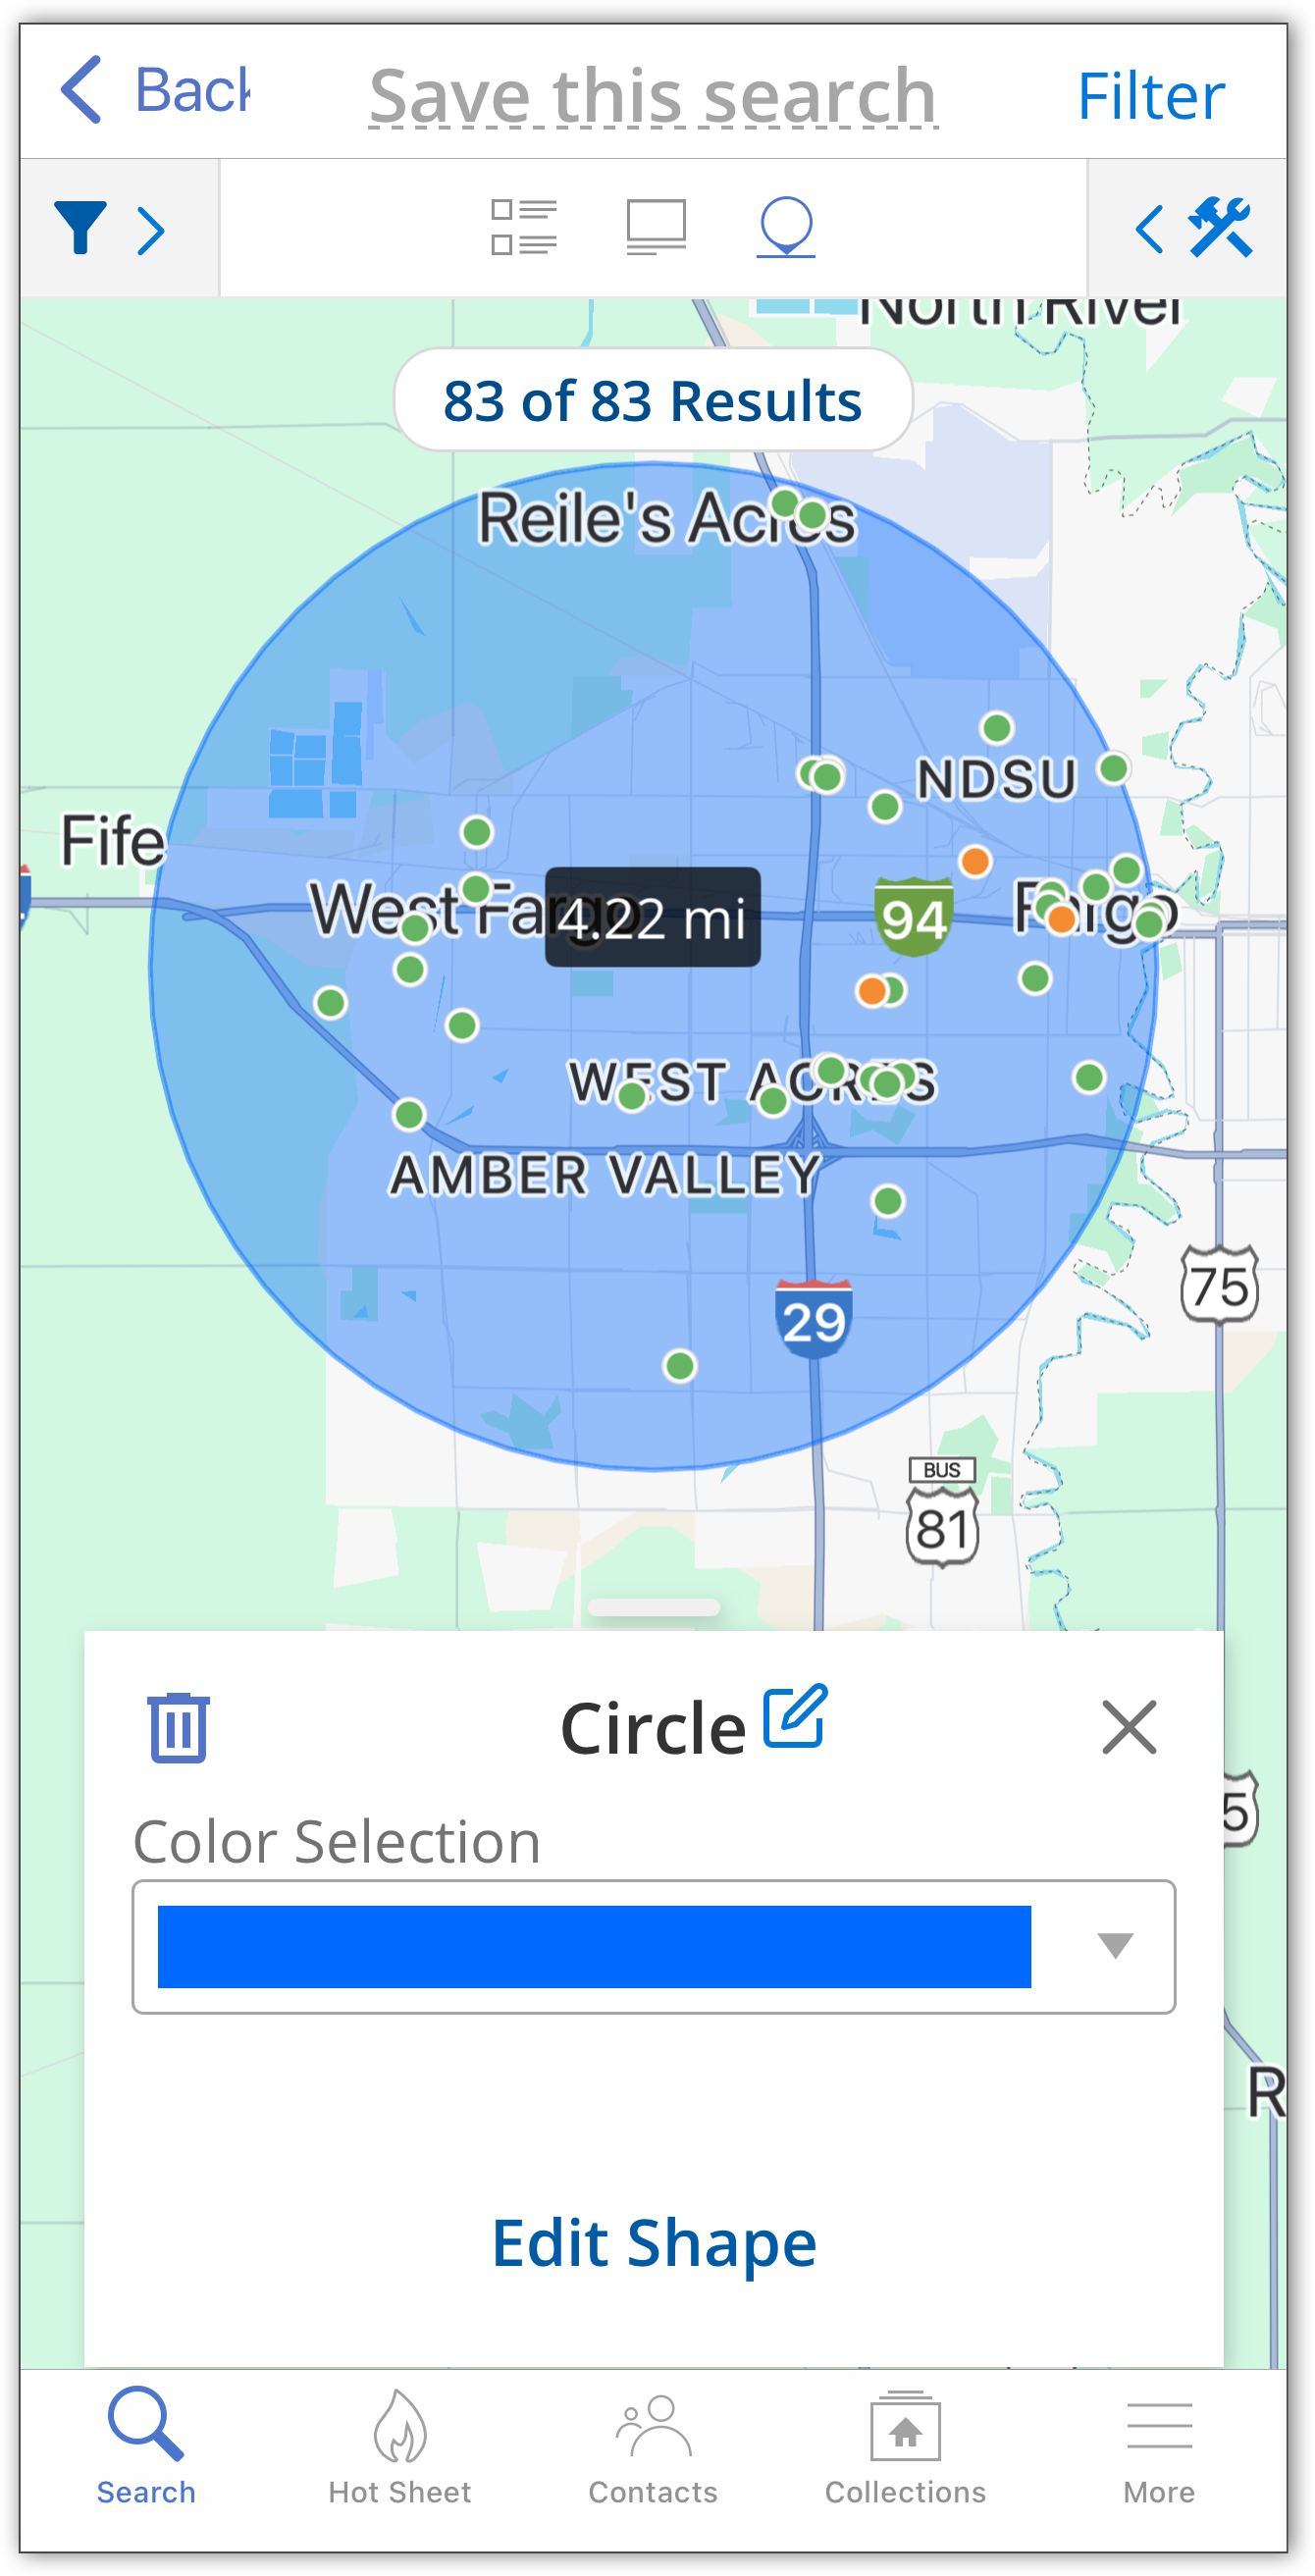 |
Once you have specified the shape you want, you can view the results from the map, summary or list view. Or if you’d like, you can further refine my search on the filters page.
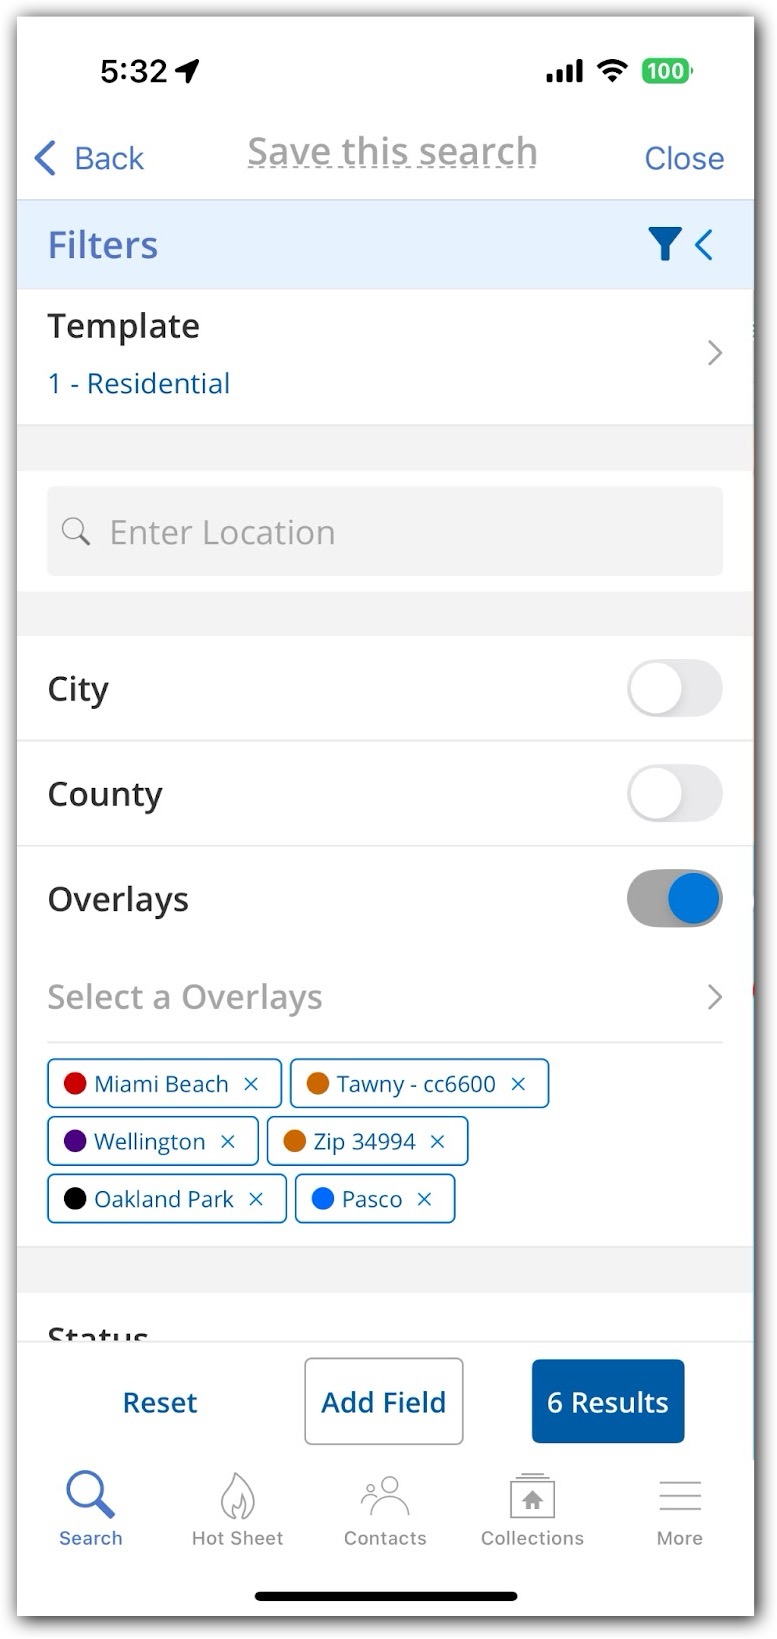
You can use map overlays and drawn shapes as a search tool. From the Filter panel, you can filter your search by adding a map overlay in the Location field or the Overlays field, in addition to drawing a new shape on the map.
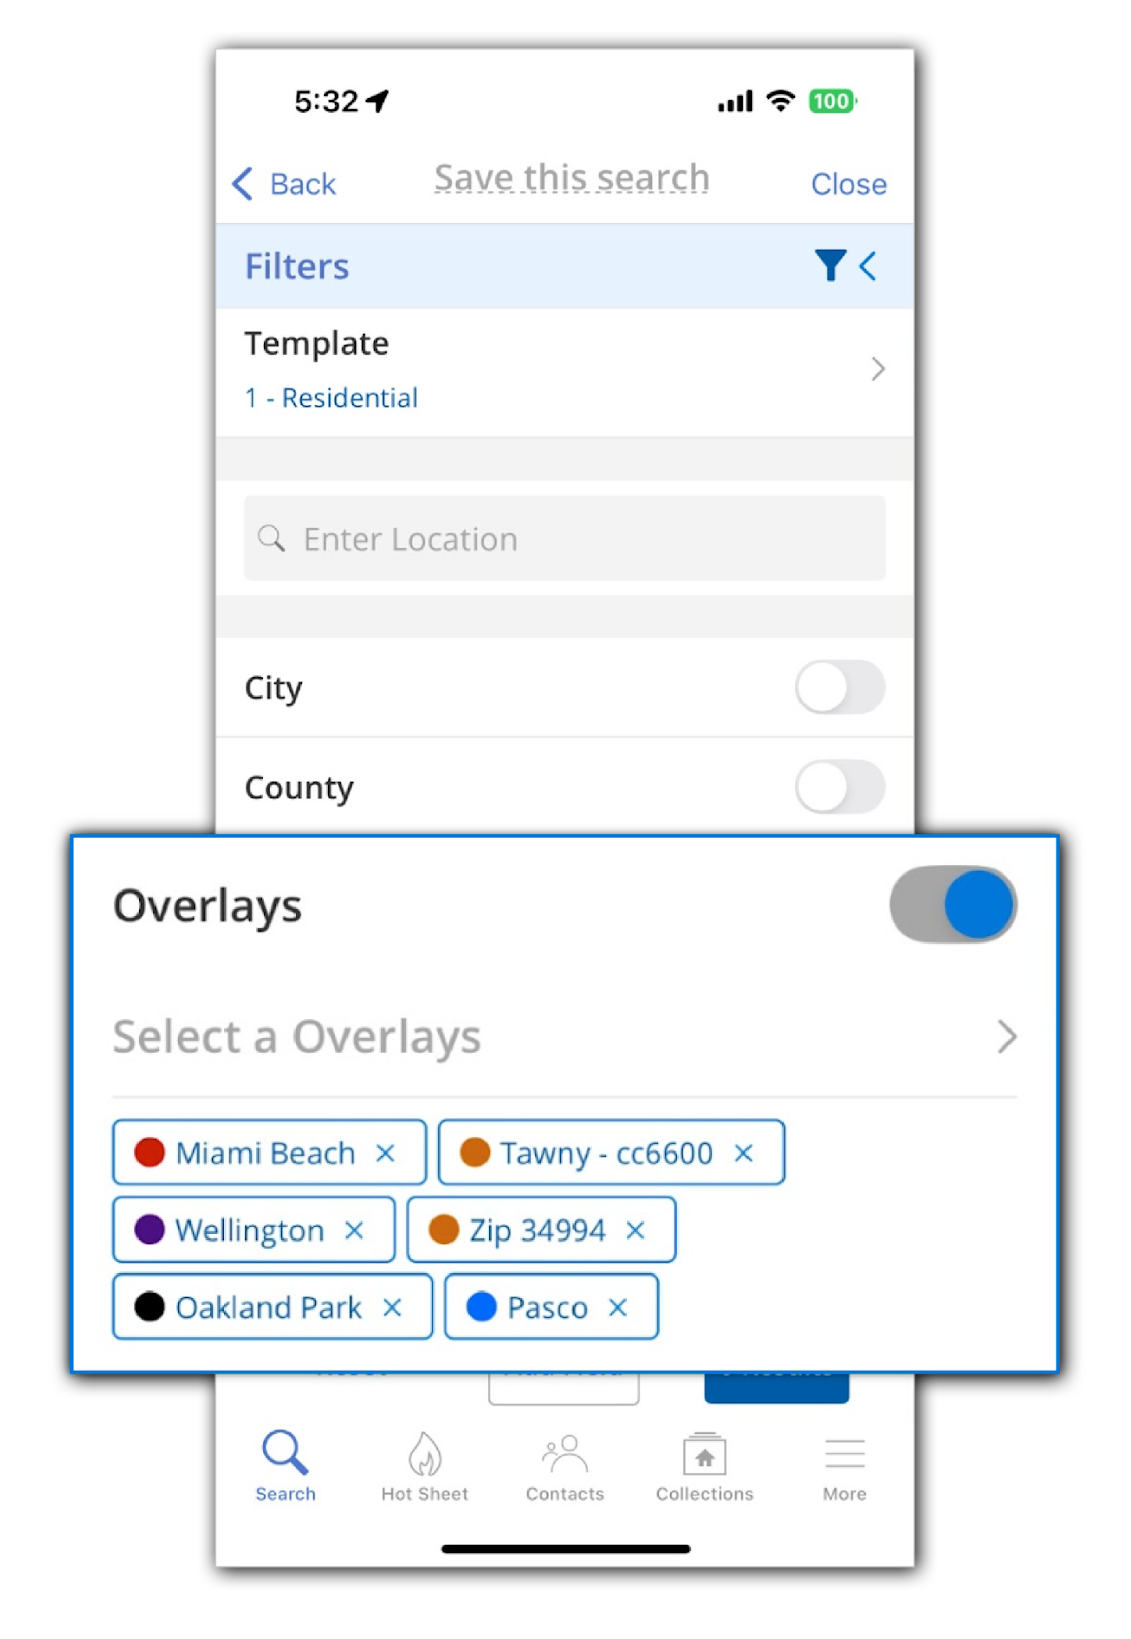 |
To use a saved overlay to filter your search, you can enter a location in the Location field and select a saved overlay from the dropdown menu. Alternatively, you can select an overlay from the Overlays field. Any shapes that you draw on the map appear as filters in the Drawn Shapes field.
 |
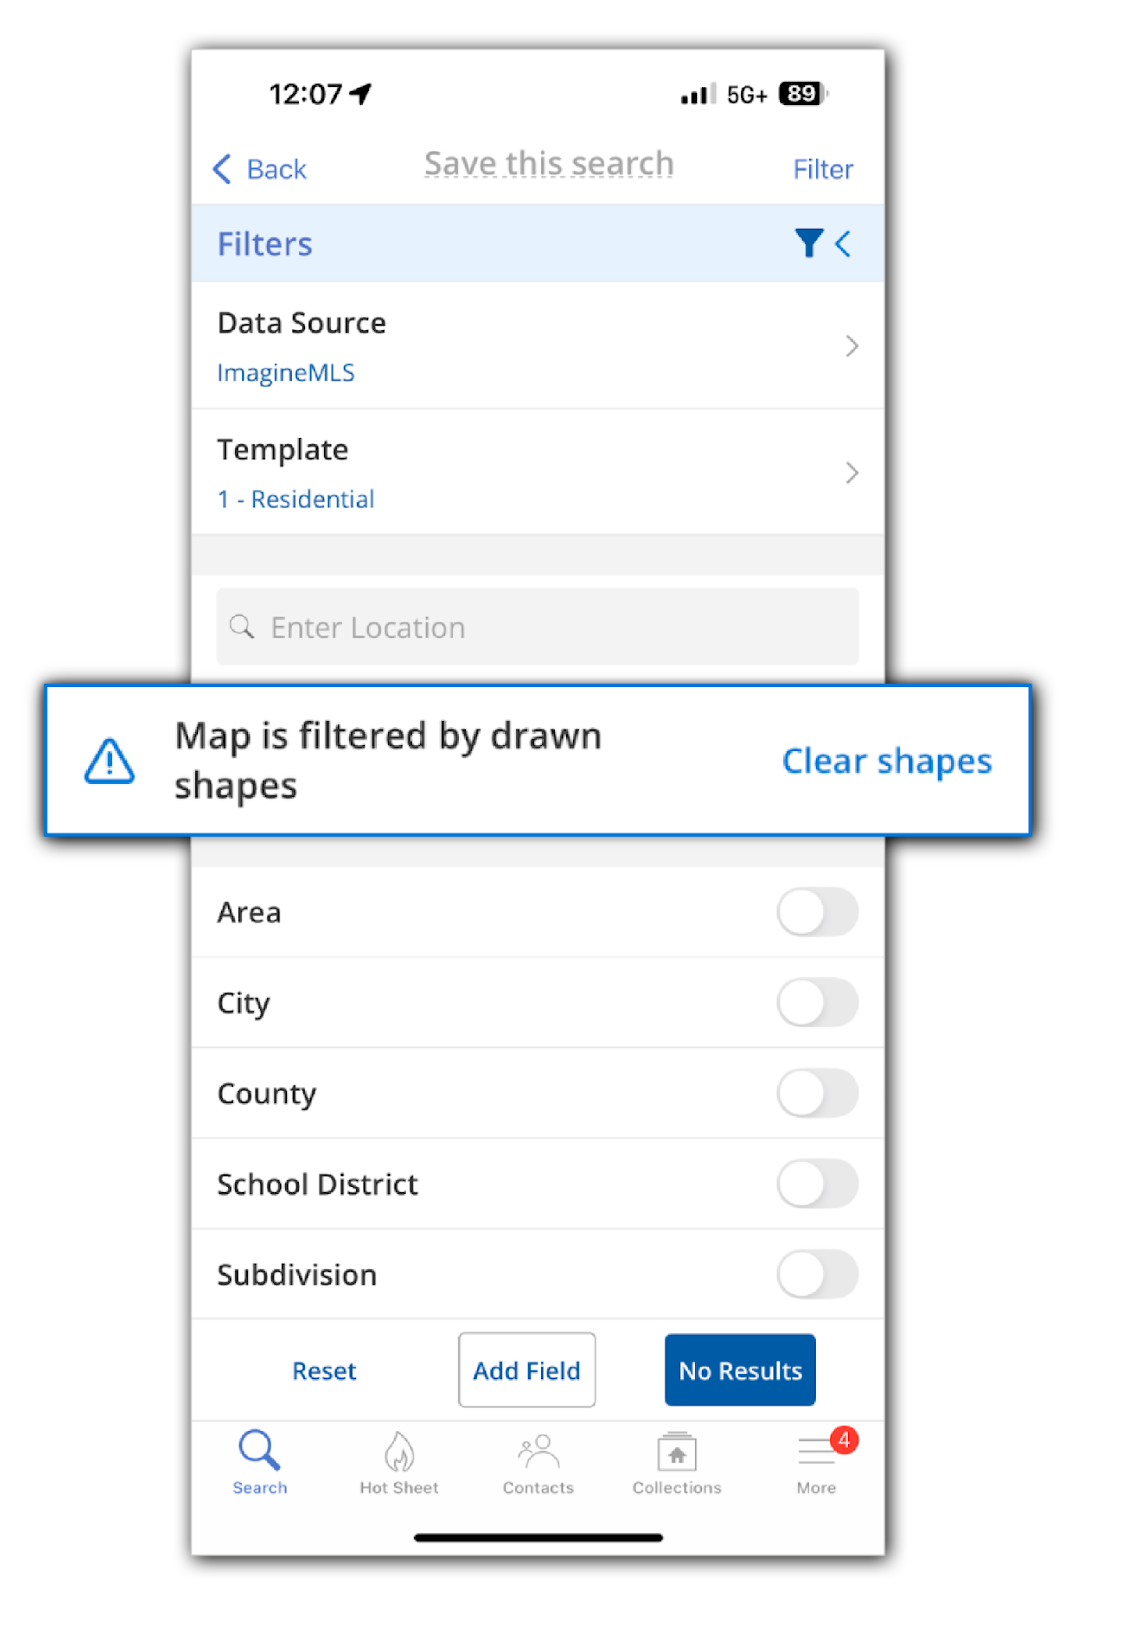
If you’ve drawn an overlay on the map, and you go back to filter your search, you will see a prompt telling you that your search is being filtered by drawn shapes. Here, you will have the option to clear those shapes and remove that criteria from your search.
 |
To delete a filter, click the X next to the filter name. Filters in the Location or Overlays field are saved, and you can select them again after deleting them. However, if you delete a Drawn Shape filter, you will need to re-draw the shape if you want to recover that filter.
 |