Input Forms Settings
When the MLS setting Enable Input Forms is turned On, printable listing input forms are available in Flexmls. Printable input forms automatically include the same fields that are available on listing entry. For information about printing a listing input form, see Input Forms on the Flexmls help website.
As an administrator (logged on as the MLS root account), you can customize the appearance of these forms using the following procedure.
Click Input Forms under Daily Functions on the menu.
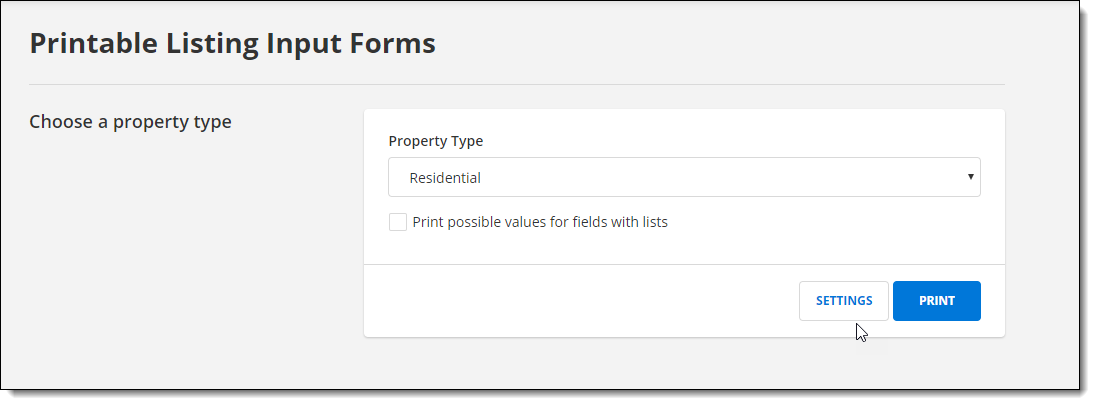
Choose a property type and click the Settings button.
In the Main List Settings section of the page, customize the appearance of Main List fields.
Setting
Description
Columns
Specify the number of columns to display Main List fields in.
Header text size
Specify the font size for Main List group headings.
Field text size
Specify the font size for Main List field names.
Page break before Main List group
Force a page break before the Main List group that is selected in this field. Select None if you do not want to force a page break.
In the Detail Settings section of the page, customize the appearance of Detail fields.
Setting
Description
Page break before detail fields
Select Yes to include a page break between Main List fields and Detail fields. Select No if you do not want Detail fields to start on a new page.
Allow groups to be split across multiple columns
Select Yes to allow the options in a detail group to be displayed in multiple columns. Select No to keep detail group options together in one column.
Columns per page
Specify the number of columns to display Detail fields in.
Header text size
Specify the font size for Detail group headings.
Text size
Specify the font size for Detail field names.
In the List Fields section of the page, select list fields to omit from the input form if Print possible values for fields with lists is selected before printing. The selected fields and their values will not be printed on the form. You may want to omit unnecessary lists to shorten the printed form.
In the Rooms/Units Settings section of the page, specify the font size for field names in the Rooms/Units section of the form.
In the List Item Settings section of the page, customize the appearance of lists.
Setting
Description
Print possible values for fields with lists
Select the default option for users who print the input form. Users will still be able to change their selection when they print the report.
Columns per page
Specify the number of columns to display list options in.
Text size
Specify the font size for list options.
In the Signature Blocks section of the page, specify whether signature lines will be included on the form. To include a page for signatures, select to show at least one signature block.
Setting
Description
Page break before signatures
Select Yes to include a page break before the signature blocks. Select No if you do not want the signatures to start on a new page.
Add Time to Signature Blocks
Select Yes to include a time field in signature blocks.
Refer to Seller as
Enter the preferred term for the seller (for example, "Seller" or "Owner").
Show Seller Signature Block
Select this option to include a location for seller signatures.
Seller Disclaimer
If you have included the seller signature block, you can enter a disclaimer to be displayed above the signature line.
Show Listing Agent Signature Block
Select this option to include a location for the listing agent's signature.
Listing Agent Disclaimer
If you have included the listing agent signature block, you can enter a disclaimer to be displayed above the signature line.
Show Listing Broker Signature Block
Select this option to include a location for the listing broker's signature.
Listing Broker Disclaimer
If you have included the listing broker signature block, you can enter a disclaimer to be displayed above the signature line.
In the Margins section of the page, customize the header, footer, left margin, and right margin sizes. You may want to adjust the margins to fit more information on the page.
In the Headers and Footers section of the page, specify the information that should be displayed in headers and footers. Headers and footers can contain up to three pieces of information each. Available positions are Header Left, Header Center, Header Right, Footer Left, Footer Center, and Footer Right.
You can select from the following options in each position:
Field Legend - An explanation of field formatting. For example, the field legend shows how required fields are indicated on the form.
Form Title - The name of the form. For example, Residential Input Form: My MLS.
Logo - If you select this option, you must also select a logo in the Options column. Logos from the MLS profile are available in the list.
Page Number - Page number in the format Page X of Y.
Seller Initial Blanks - Blank lines where the sellers can initial the document.
Text - If you select this option, type the desired text into the field in the Options column.
If you do not want anything to appear at a particular position, select the blank option for that position. Select Show on Signature Page next to each item that should also be included in the headers and footers of signature pages.
Click Save at the bottom of the page when you are finished making changes.