RETS Template Management
Click Template mgmt under RETS on the Admin menu to set up templates for RETS access. To create a new template, click Add. To edit an existing template, select it from the list of templates and modify it by using the tabs below. Be sure to click Save when you are finished making changes.
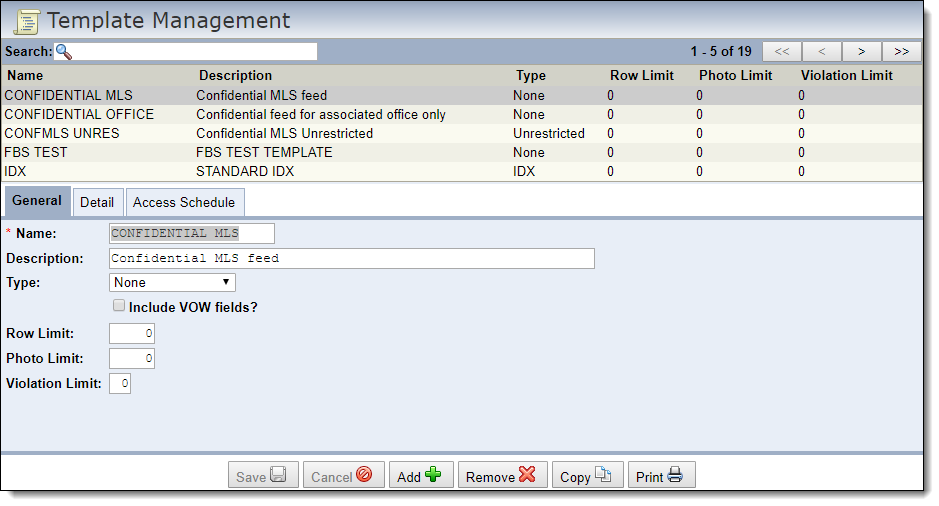
The template management page is divided into three tabs: General, Detail, and Access Schedule.
General Tab
On the General tab, enter basic information about the template. First, name the template (required). Then give the template a description that will help you identify it. Next, select the type of template from the drop-down list.
Use the Row Limit, Photo Limit, and Violation Limit fields to set constraints for the template. To constrain the number of rows that can be accessed at once, enter a number between 1 and 10,000. The row limit defaults to zero, which means that it will use the server limit (10,000). Similarly, you can set a number for the photo limit. The violation limit restricts attempts to access RETS data in violation of the constraints that you have set up. If you set a violation limit and a user exceeds that limit, the user will be denied access to the RETS data until you reset their account.
Detail Tab
On the Detail tab, select the fields that will be available through the template. Use the drop-down lists in the left panel to select a resource and class , then click the green plus sign to add it. The right panel will display the available fields. To give access to all available fields for the selected resource and class, leave the field selection panel blank. To limit access, select specific fields. Select a field and click the single arrow button to move a single field between lists. To move all available fields at one time, click the double arrow button. Click the Filter radio button to set constraints on individual fields. For example, you can select the field Status and then limit the statuses available to users of the template.
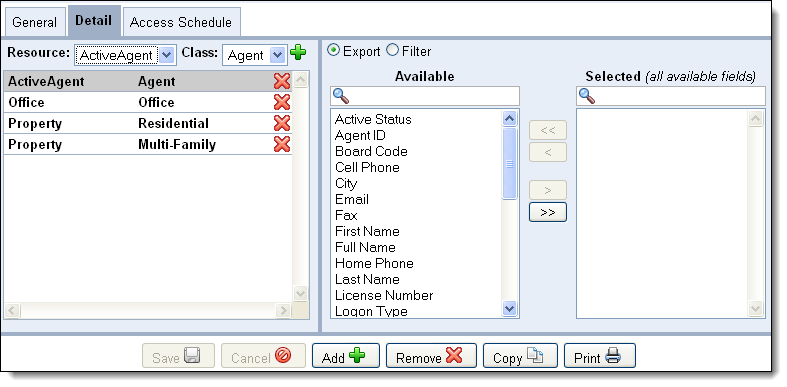
You can also set up a template that specifies which fields to include in the VOW feed for each property type. When setting up this template, first determine whether there are any fields that the rules of your MLS prohibit from being disclosed. If you do not have confidential data fields, do not select any fields on the Detail tab; this ensures that all available fields are accessible using the VOW template. If you need to exclude confidential data fields from the VOW feed, we recommend that you click on the double arrow to move all available fields into the Selected column, then click to remove the confidential fields. If you need help setting up a template according to your MLS’s policy, email rets-support@fbsdata.com.
Access Schedule Tab
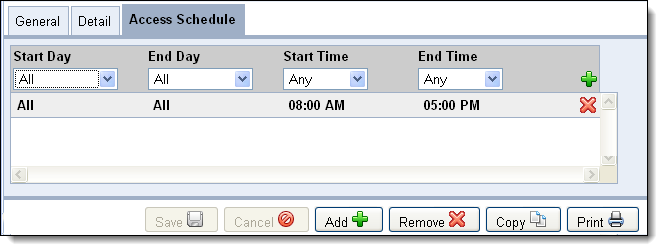
On the Access Schedule tab, set the Start Day, End Day, Start Time, and End Time for the template.
For example, to make the data available from 4:00 PM until 9:00 PM Monday through Friday, make the following selections:
Start Day: Monday
End Day: Friday
Start Time: 4:00 PM
End Time: 9:00 PM
You can add multiple access times using this method. If any scheduled times conflict with each other, the most restrictive of the times will take precedence.