Add a Comp Listing with New Listing Maintenance
A Comp Sale listing is one that is only added to the MLS for comparative purposes. Comp listings are recently sold properties that are used to help determine the market value of a property. Comp listings go straight to a Closed status, do not appear on hot sheets, and are not included in any feeds, emails or notifications.
To add a comp listing, navigate to the main menu and select Add Comp Listing under Add/Change.
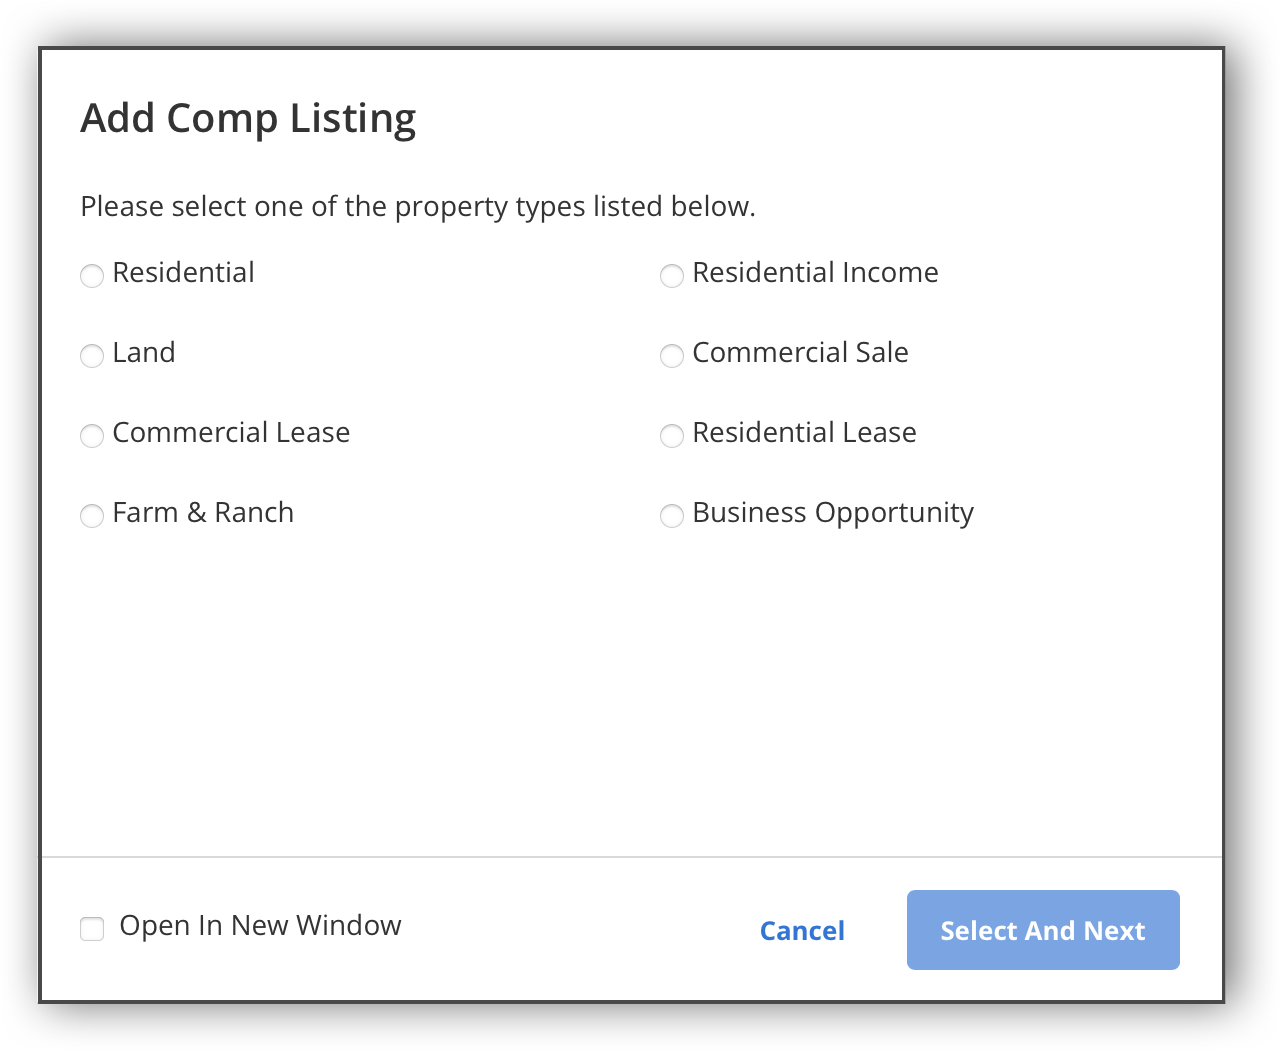
Select a property type, and click Select and Next.
Note
Auto Assistant cannot be used when adding comp listings.
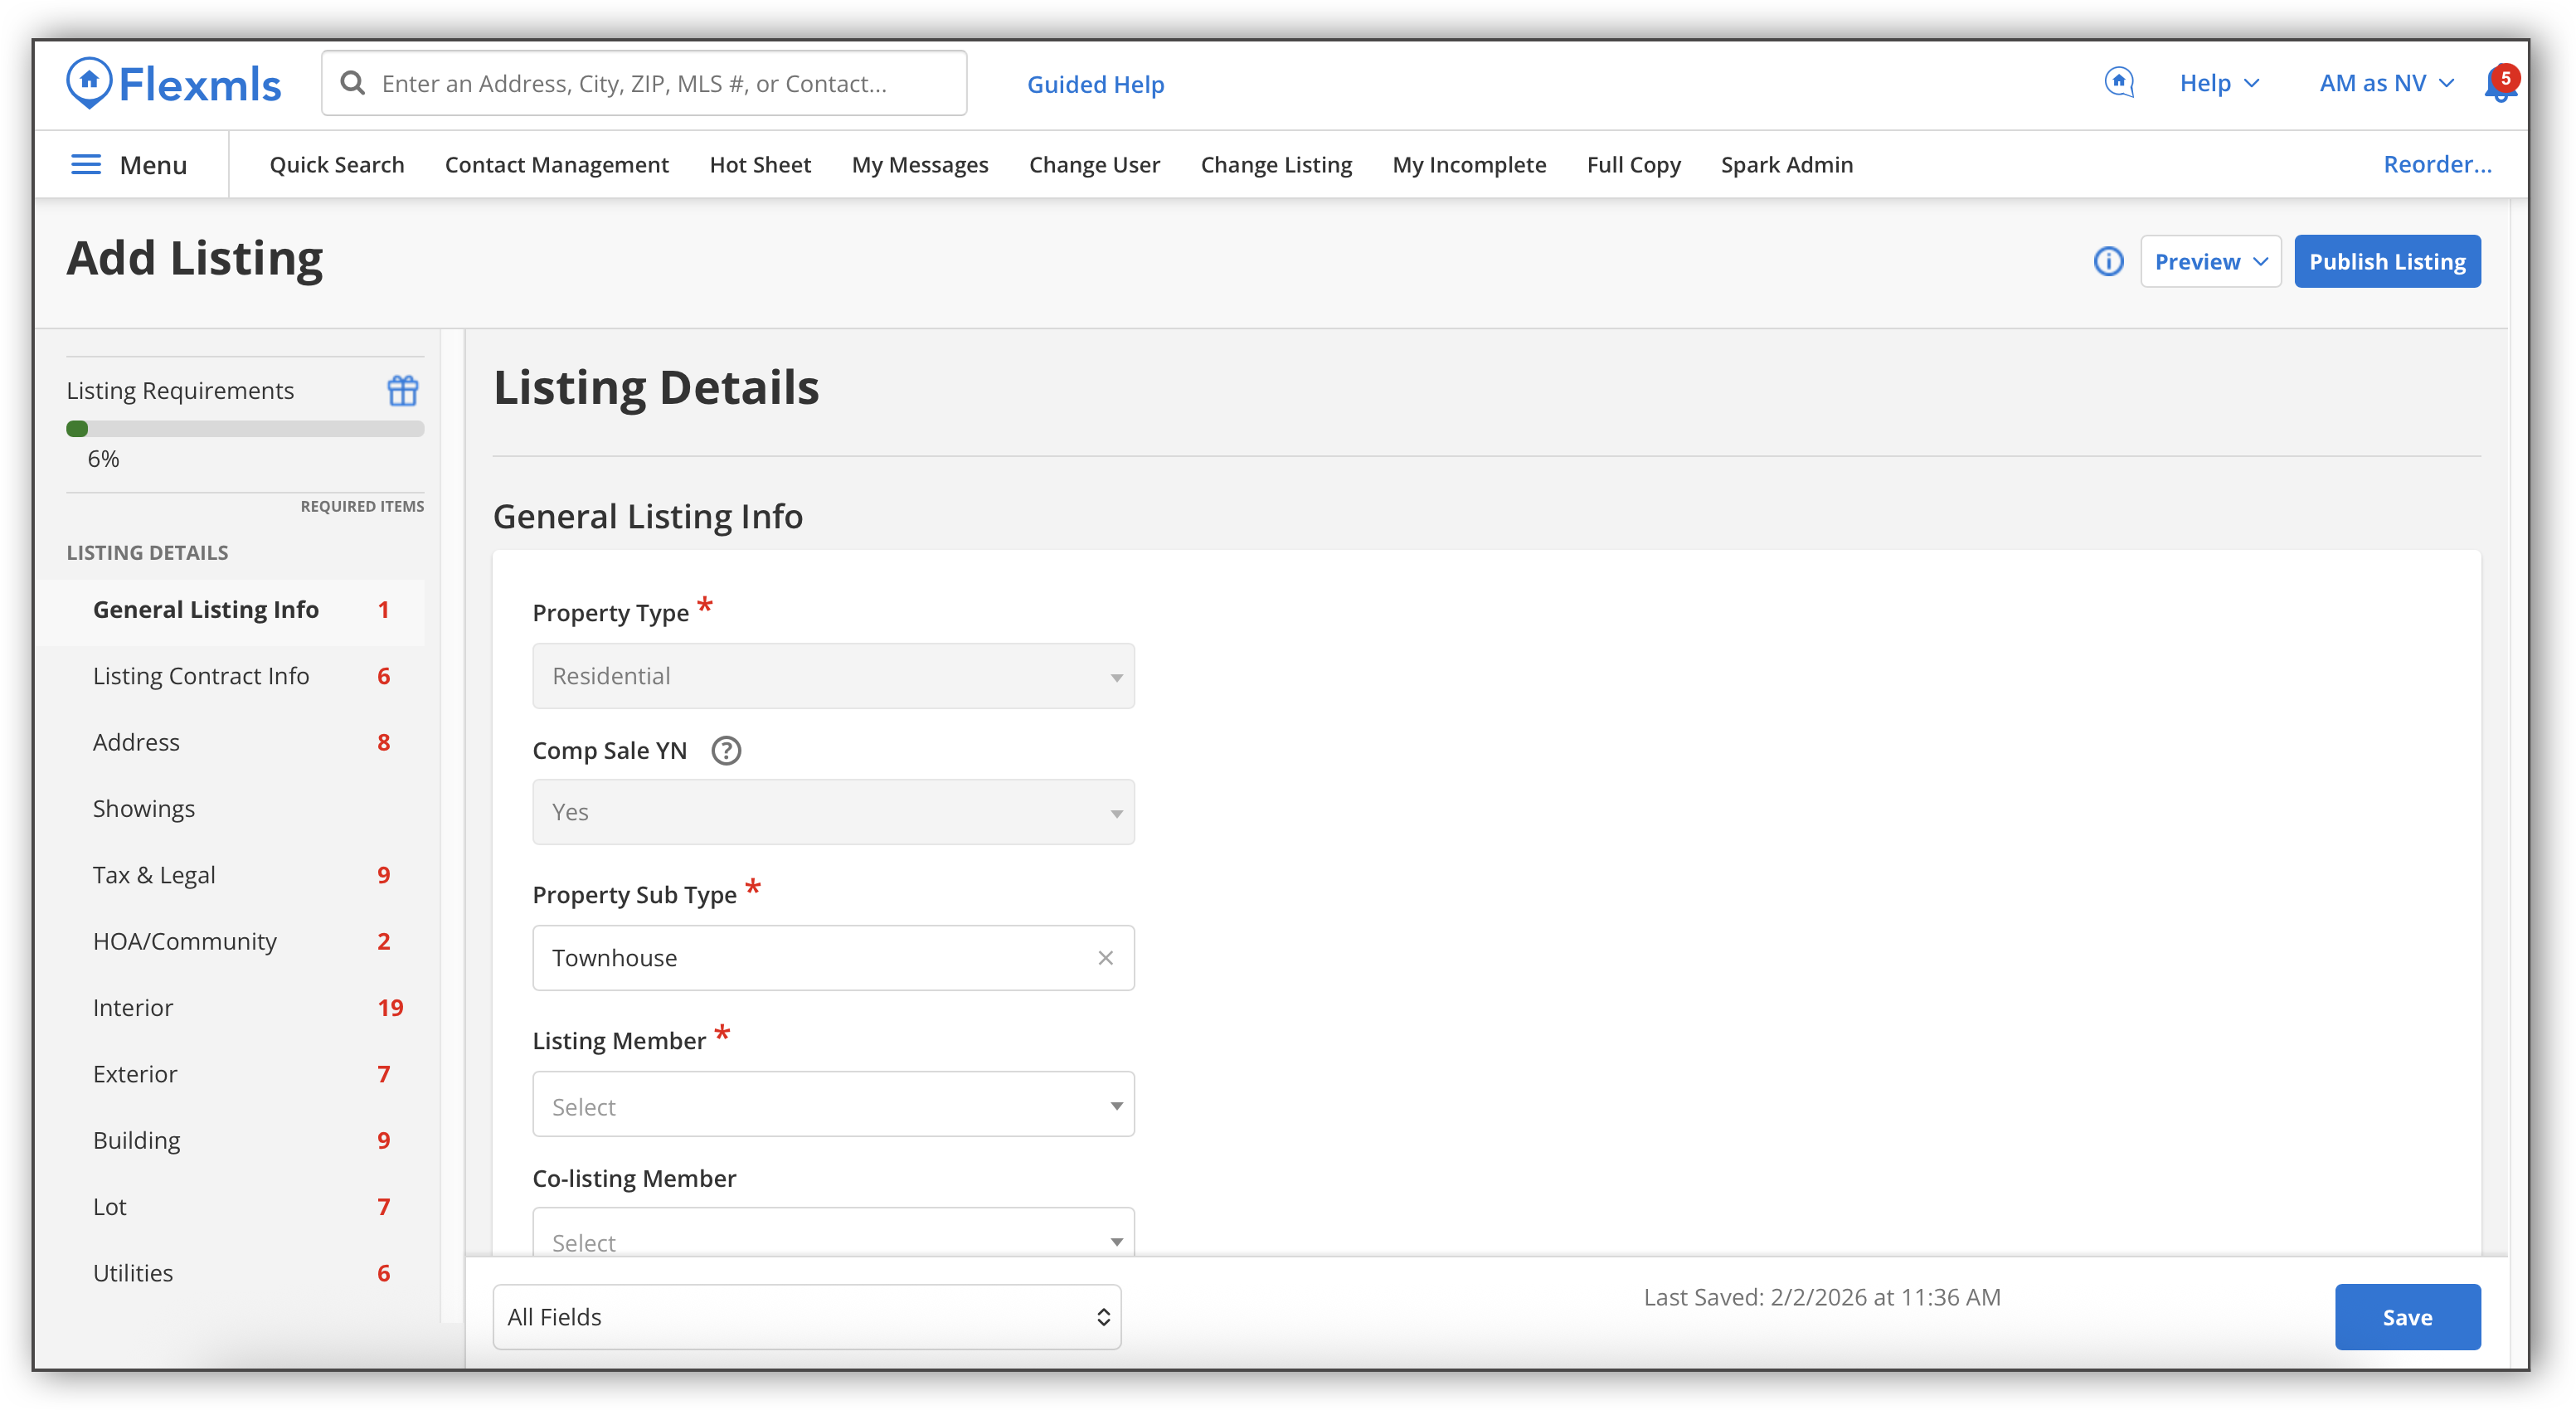
After selecting a property type, you are taken to the listing input form. You can use the navigation menu on the left side of the page to jump to specific sections of the listing input form. A progress bar shows how much of the listing input form is left to complete before you can publish your listing. Numbers next to each subsection indicate how many required fields are left to complete in that subsection. If you have completed all the required fields in a subsection, a green checkmark will display next to it.
Enter the general listing information. If you are not automatically entered as the listing member, you can either select yourself, or a non-member, depending on your MLS’s policy.
Note
When you add a comp listing, the Comp Sale field is autofilled as "Yes" and cannot be changed. When the Comp Sale field is set to Yes, it means that the listing is for comparative purposes only, goes straight to a Closed status, and does not appear on hot sheets or feeds. When adding a standard listing, the Comp Sale field is autofilled as "No" and cannot be changed. When the Comp Sale field is set to No, that means that the listing is considered standard and goes through the regular process from Active to Closed status.
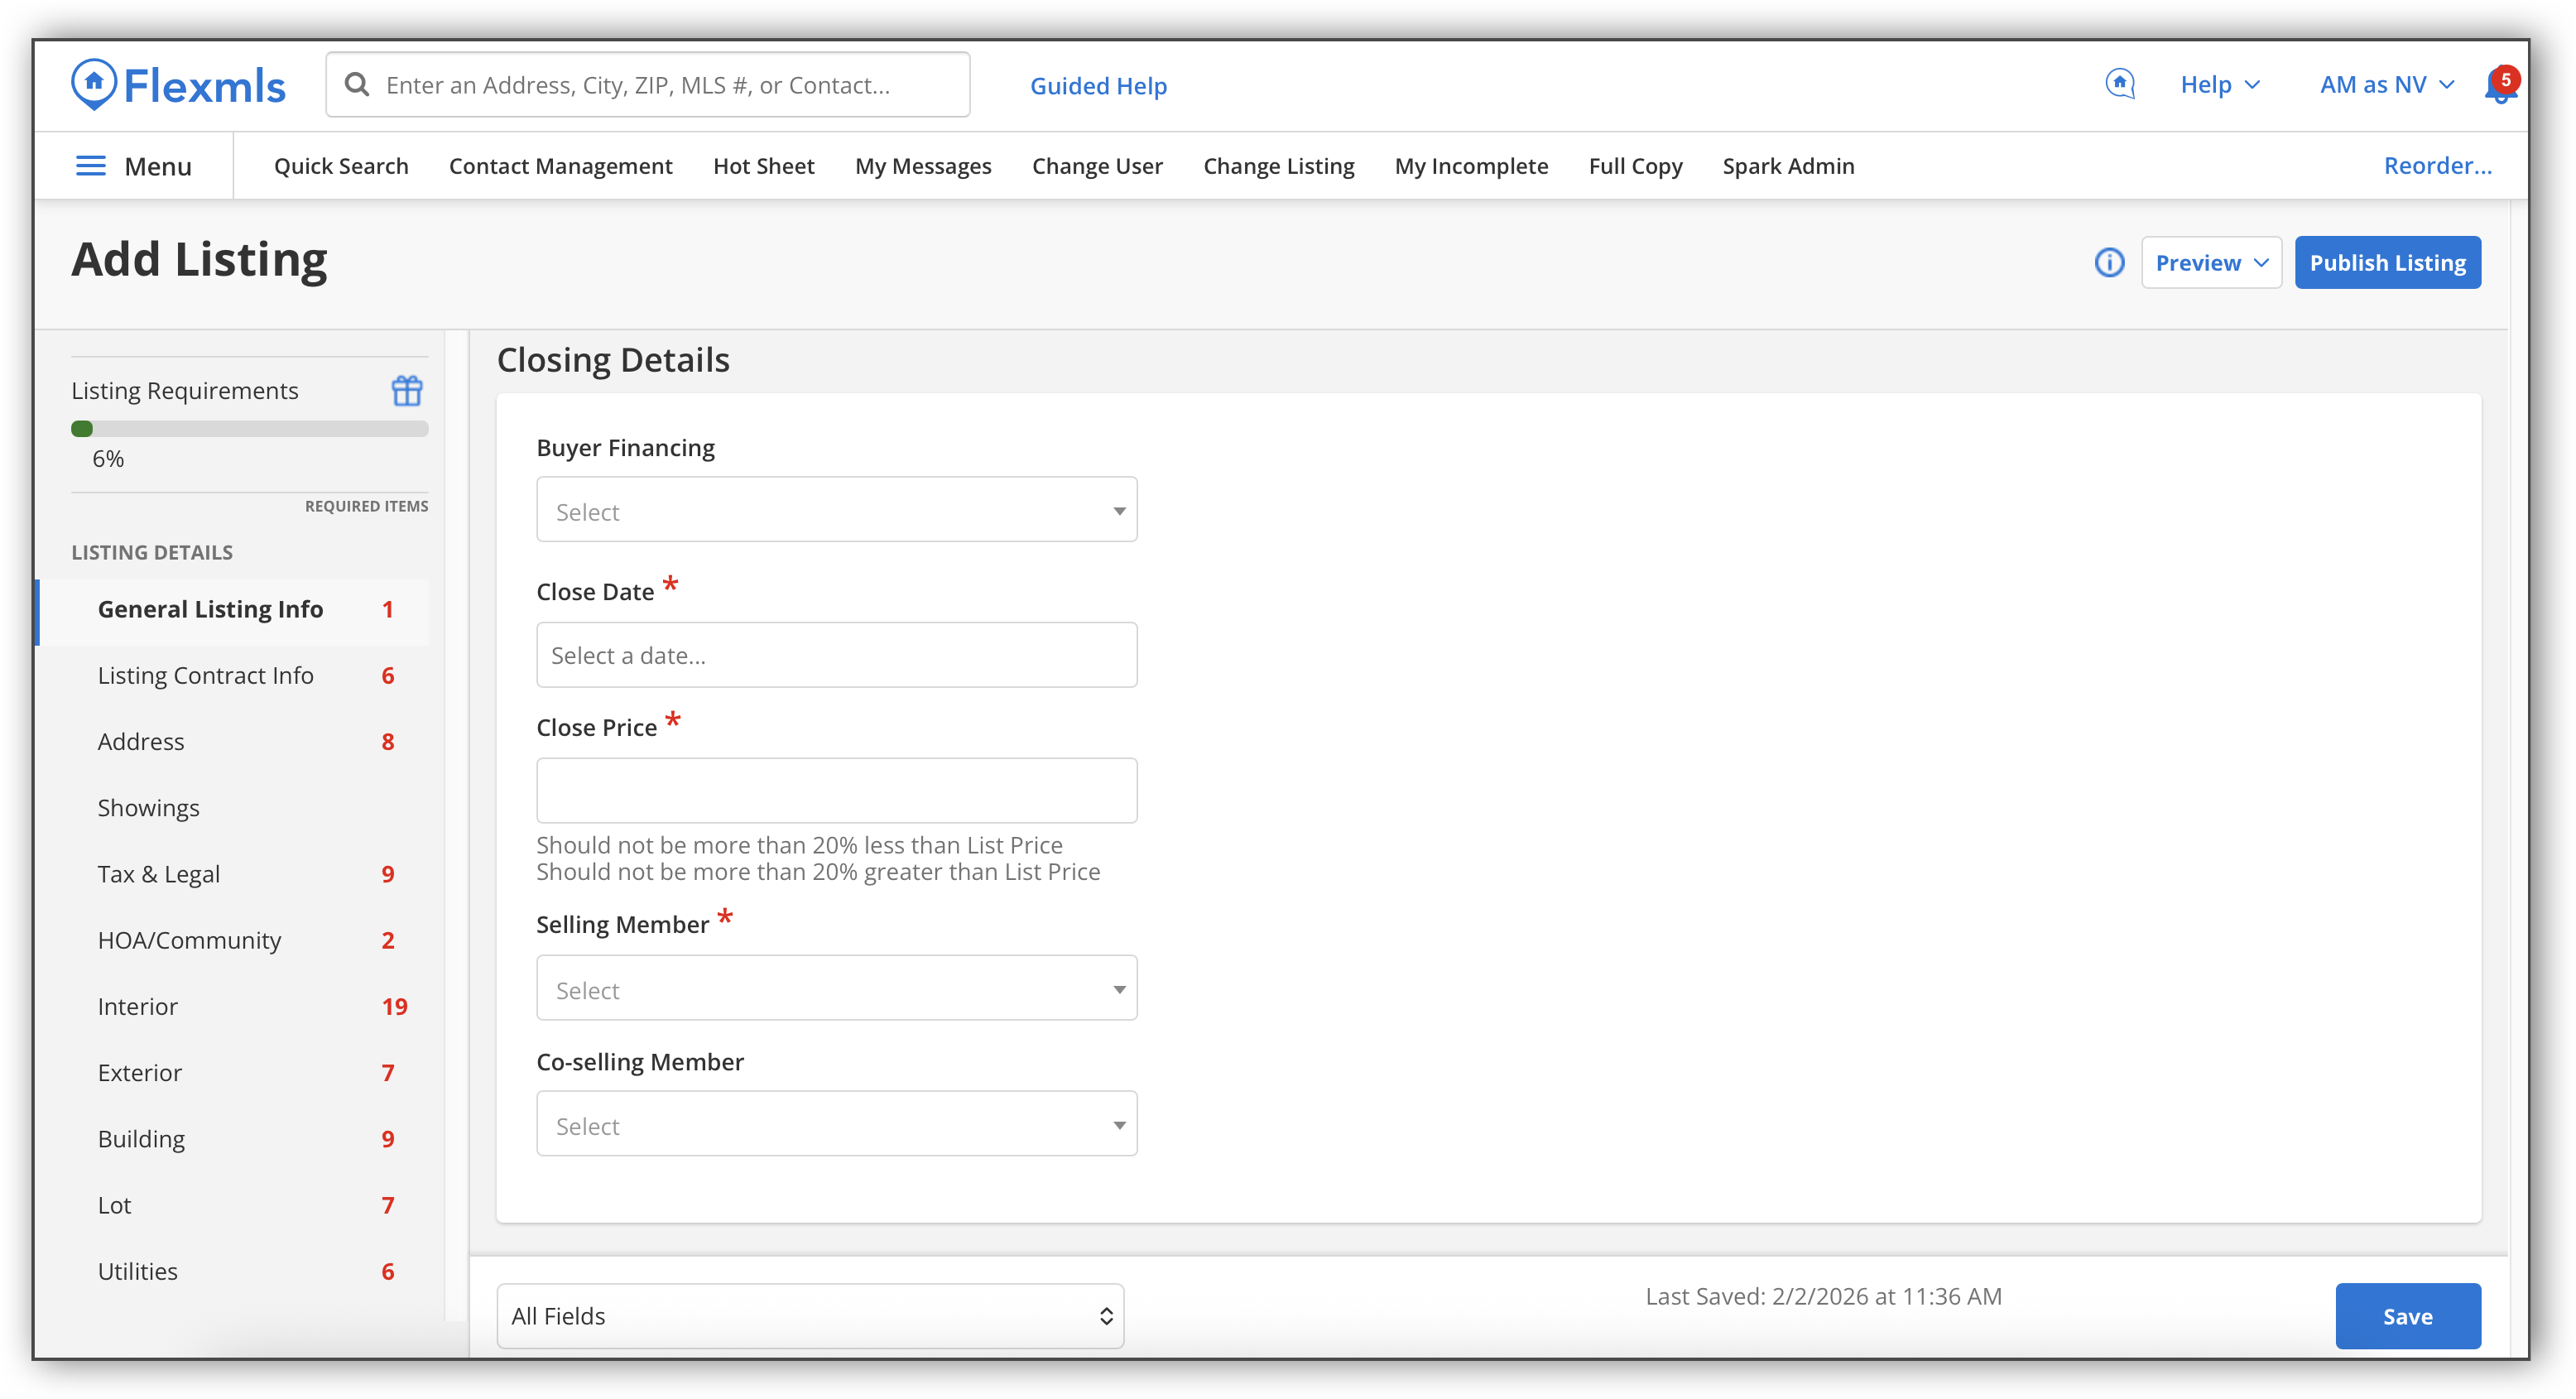
Enter the closing details.
Note
For comp listings, the Closing Details section appears right after the General Listing Info section in the listing input form. For standard listings, the Closing Details section only appears on the listing input form when the listing is changed to a Closed status.
Enter the remaining details in the listing input form subsections. For more detailed information about the listing input form subsections, refer to the Add a Listing With New Listing Maintenance help page.
Add any listing media in the Media section of the listing input form. For more information on how to add listing media, refer to the Add or Change Listing Media help pages.
Note
Generally, you must first enter preliminary listing data before adding media for a listing.
You can save your listing by clicking Save on the bottom right. The Save button stores the listing data entered and saves your progress, but when you click Save, you do not exit the page automatically. If you do choose to exit this page, the saved listing data can be accessed from the My Incomplete page. Refer to the Incomplete Listings for New Listing Maintenance Users help page for information on how to access and edit incomplete listings.
After you have finished entering all your listing information and adding media, and you are ready to publish your listing, you can click Publish Listing at the top right.
If your MLS allows closed listings to be edited, you can refer to the Change a Listing with New Listing Maintenance help page for information on how to edit your Comp listing after it has been published.