Add Listing Information to a Custom Report
To insert listing information fields, click Data Fields in the tag selection panel of the Custom Report Editor. Select the type of fields to insert (main, details, tax, etc.). The field selection page will be displayed. For example, if you select Main Fields, the main fields selection page will be displayed.
Note
Field selection pages vary slightly according to your MLS and the field type (main, detail, etc.). For context-specific help on any field selection page, click Help > Help with this page. Help is available throughout the Custom Report Editor.
Layout Settings
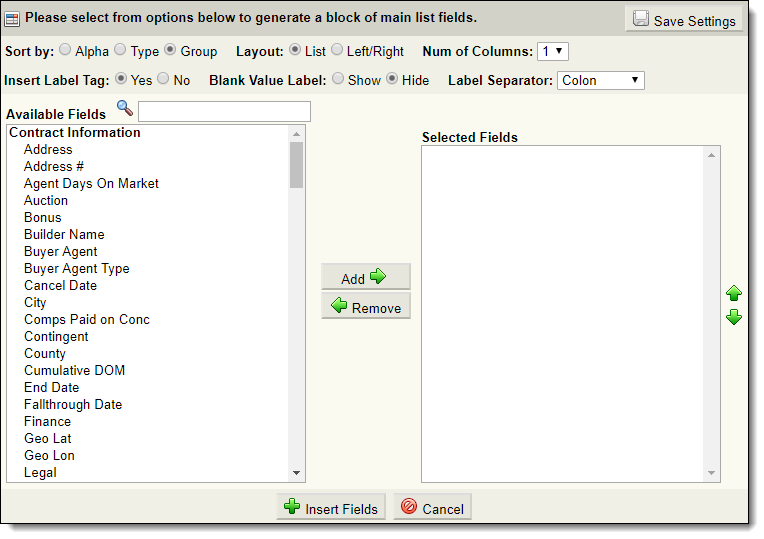
At the top of the field selection page, you can choose layout options for the fields. The following options may be included, depending on the type of field that you are adding:
Sort by – Select whether to sort the available fields list alphabetically, by type (datatype in the database, such as date, numeric, or text), or by group (field groups on the Add Listing page).
Layout – Choose whether the fields will be displayed in list format or left/right format on the report. List format displays the label and field value separated by a space; left/right format aligns the field values, as in a table.
Number of Columns – Select the number of columns to display the fields in on the report.
Number of Details – For detail fields with multiple selections, choose the number of details to include on the report. Details will appear in the order that they appear in the list.
Delimiter – For detail fields with multiple selections, select the delimiter to use between selections: semicolon, line break, space, or comma.
Insert Label Tag - Choose whether to include the label tag. For example, for the field List Price, if this option is set to Yes, the report entry will be displayed as "List Price: $325,000." If this option is set to No, the report will show "$325,000" without the List Price label.
Blank Value Label - Choose whether labels appear when the field value is blank. For example, assume you have included the field Fireplace. If you select Hide, and a listing has a blank entry for that field, the Fireplace label will be hidden from the report. If you select Show, the Fireplace label will be shown on the report regardless of whether there is data in the field.
Label Separator – Select the character to use to separate field labels from field values. The default separator is a colon. You can also use a line break or no separator.
Save Settings – Save layout settings for future use.
Select Fields
Select fields from the left-hand column and click Add to include the fields in the report. Fields will appear on the report in the order shown in the right-hand column. To change the order of the fields, select a field and use the up and down arrows to move the field in the list. To remove a field from the Selected Fields list, select the field and click Remove.
When you are satisfied with the fields and their order, click Insert Fields to add the information to the report. To return to the report without inserting any fields, click Cancel.
If you are adding Rooms by Level fields, you can create room groups. Select more than one room and click Add to create a group. You will be prompted to enter a label for the group. For example, you might create a group called "Bedrooms" that includes the fields "Master Bedroom," "Bedroom 2," and "Bedroom 3."