Custom Report Editor
Use the Custom Report Editor page to customize the look and content of your reports. To open a report in the report editor, click My Reports under Preferences on the menu. Then select an existing report and click Edit, or click the New button and select Report.
When you start a document, the main editing pane will be blank. To begin adding information, click in the editing pane to indicate where to place the first item. Next, choose the type of item to add to the report. Typically, you will begin by adding a template or a table, because templates and tables provide a framework for arranging listing information. If you begin by adding a template, the editing pane will resemble the following image:
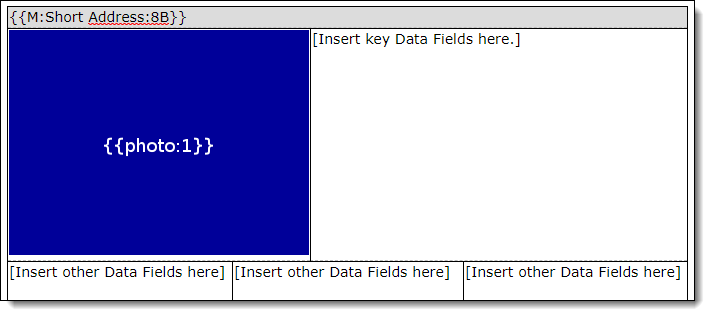
Some information appears inside double sets of curly brackets. That information, called a "tag," is a placeholder for listing information. The predefined templates contain tags for data that is common to all property types, such as photos or address information. You can insert the data fields of your choice into the blank areas of the template.
Note
As you are making changes to your report, be sure to click the Save button before you close the browser or navigate to another page in Flexmls. The system will prompt you to save the report if you attempt to navigate to another page when changes are unsaved.
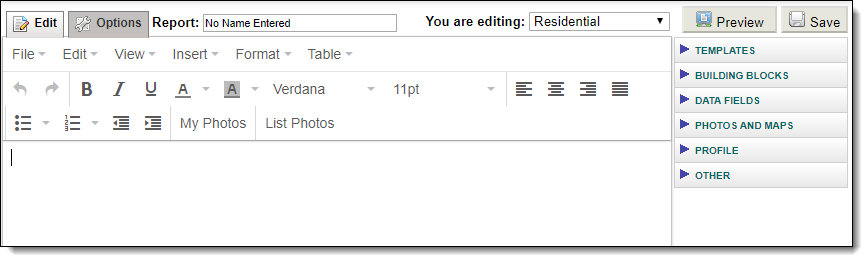
The Custom Report Editor is divided into two tabs: Edit and Options.
Use the Edit tab to design the layout of the report. You can include a wide range of data in a variety of formats. Use the built-in light word processor to customize the formatting of report text.
The drop-down list at the top of the page shows the property type that the report is for. You can set up a different layout for each property type in one report.
Preview Button
Generate a report populated with sample data from either a random listing or an MLS number that you select. The preview will open in a separate page. If you select a refresh time, changes that you make to the fields and layout will be updated automatically in the preview as you edit the report. You can also choose to view either the private or public version of the report.
Save Button
After you have entered a report name, you can save the report at any time. The Save button includes multiple options.
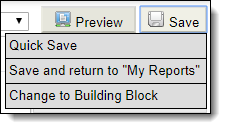
Click Quick Save to save the report in its current form without leaving the report editor. Click Save and Return to My Reports to save the report and return to the list of available reports. Click Change to Building Block to save the current report as a building block and remove it from the report list. If you click the Save button without choosing an option, the report will automatically Quick Save.
The right pane, or tag selection panel, contains a list of available information fields that you can insert into your report. As you select fields from the right-hand column, coded placeholders (or tags) are inserted in the editing pane.
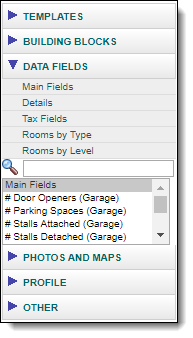
The following options are available:
Templates – Select from a list of available templates.
Building Blocks – Select from a list of saved building blocks or business cards.
Data Fields – Select from the available field types for the current report. For example, when working with a report for commercial listings, the options differ from those available when working with residential listings. Click on a field type, such as Main Fields, to open a page where you can customize the appearance and content of a block of fields. For more information about adding field blocks, see Add Listing Information to a Custom Report.
To find a single data field, scroll through the list or click in the text box next to the magnifying glass and start typing the name. Double-click on a field name to add it to the report. Specify whether to include the Label, Data, or Label & Data on the report; whether to show or hide the label when the field is blank; and whether to use a separator between the label and data. To override the field label, click the checkbox and enter the text that you want to display instead. For example, if you want "List Price: 340,000" to display as "$340,000," you could override the field label "List Price" with the text "$".
Photos and Maps – Select from the available photo and map fields. For consistently sized photos and maps, after inserting an image placeholder, click on the lower right corner of the placeholder and resize it to the desired image size. If your report contains multiple listings horizontally, this will ensure that the photos and information line up neatly.
Profile – Select from available member profile information, such as names, phone numbers, and images. Click on a heading to display the available fields.
Other – Select additional information, such as supplements, open houses, and listing counters. For example, you can use text in conjunction with the Listing Counter and Listing Total fields to create a counter such as "Listing 1 of 10" to organize multiple listings in a report. You can also add content that appears only under certain circumstances. For example, click Private Report Only Section to create a section where the text and fields you enter between the tags will display only on private reports.
Use the word processing toolbar to customize the formatting of report text. Hover the mouse over any icon to see a description of its function.

The following functions and options are available:
File – Create a new document, preview, or print.
Edit – Undo, redo, cut, copy, paste, paste as text, select all, or find and replace.
View – Source code, visual aids, building blocks, or the report preview.
Insert – Image, link, table, special character, or horizontal line.
Format – Options for formatting and aligning text.
Table – Table formatting options including the following:
Table – Opens a grid where you can define the size of a table
Table properties – Define the width and height of a table, adjust cell spacing, cell padding, alignment, and borders. Select Advanced to define style, select a border color, and/or a background color.
Delete table
Row – Insert, delete, set properties, cut, copy, or paste table rows.
Column – Insert or delete columns.
Cell – Set properties, merge, or split cells.
Undo – Reverses the most recent action.
Redo – Repeats the most recent action that was undone.
Bold, italics, and underline
Text color
Background color
Font family
Font size
Left, center, right, and full justification
Bullets
Numbering
Outdent – Decrease the indentation level of the selected text.
Indent – Increase the indentation level of the selected text.
My Photos – Select a photo from the My Logos and Photos section of your profile.
List Photos – Enter an MLS number and then select photos from that listing.
The Options tab contains general formatting options for the report. You can add comments and define the number of listings to display per page horizontally and vertically.
You can also indicate whether the report is inheritable, if applicable. If you make your report inheritable, all logins below your access level can use it. For example, the agency login can set up an inheritable report that all the agents in the office can use.
Click the checkboxes to automatically bold field labels or automatically put borders around images.