
Add or Change Listing Photos

To add or change the photos for a listing that has an MLS number, start on the Change Listing page. To go to the page, click Change Listing under Add/Change on the menu. Then enter the MLS number or click on the listing in the My Listings section of the page. To add photos to an incomplete listing, click My Incomplete under Add/Change on the menu, then select the listing and click Edit.

In the Media section of the Change Listing page, click the Photos link to open the photo library for the listing. You can add or remove photos, rearrange the order, add titles and captions, change the primary photo, rotate photos, and change photo privacy. Updates to photos are saved automatically. When you are finished adding and editing photos, click the Return to edit your listing link in the upper left corner of the page.

Tip

The following Guided Help tours are available for this function in Flexmls. When you click on a link, an instance of Flexmls will open in a new browser tab and instruction bubbles will guide you through the process.

Add Photos

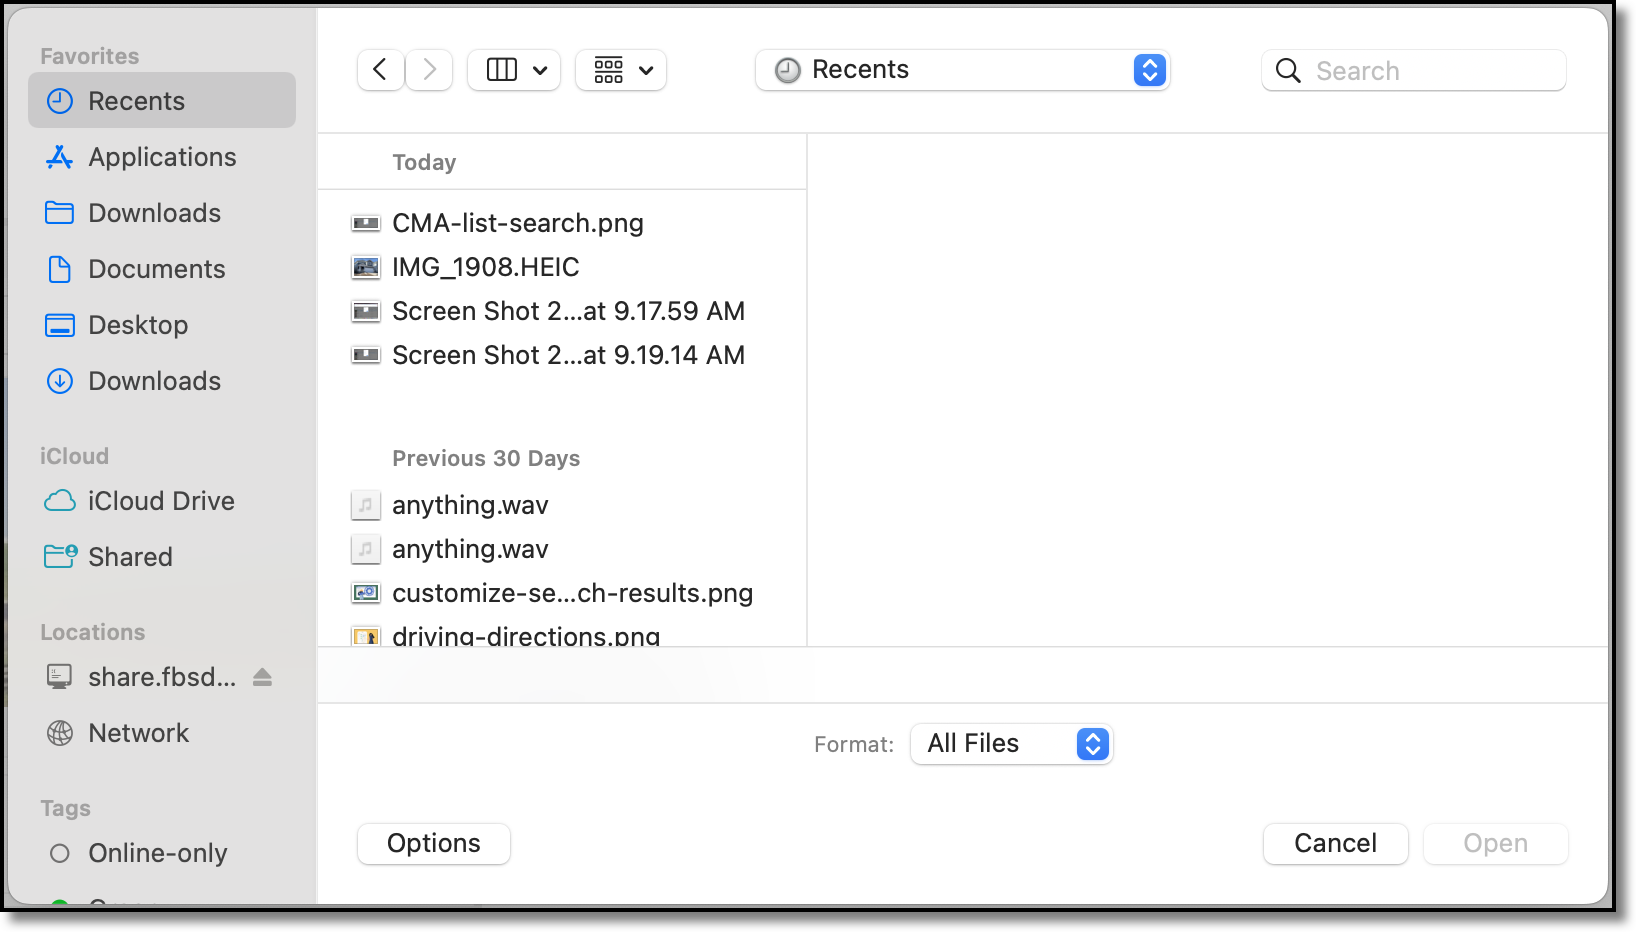
Add photos by clicking the Add Photos button. Select the folder where the photo is located on your computer. To select multiple photos, hold down the Control key (Command key on a Mac) and click on the photos you want to add. Click Open to add the photos to the listing.

The maximum file size per photo is 15 MB or 3000 x 2000 pixels. Flexmls supports .jpg, .jpeg, .gif, .tif, .tiff, .bmp, .png, .pgm, .pbm, .ppm, and HEIC photo formats. Note that large files take longer to upload than smaller files. The maximum number of photos per listing is set by your MLS.

add-photos.png

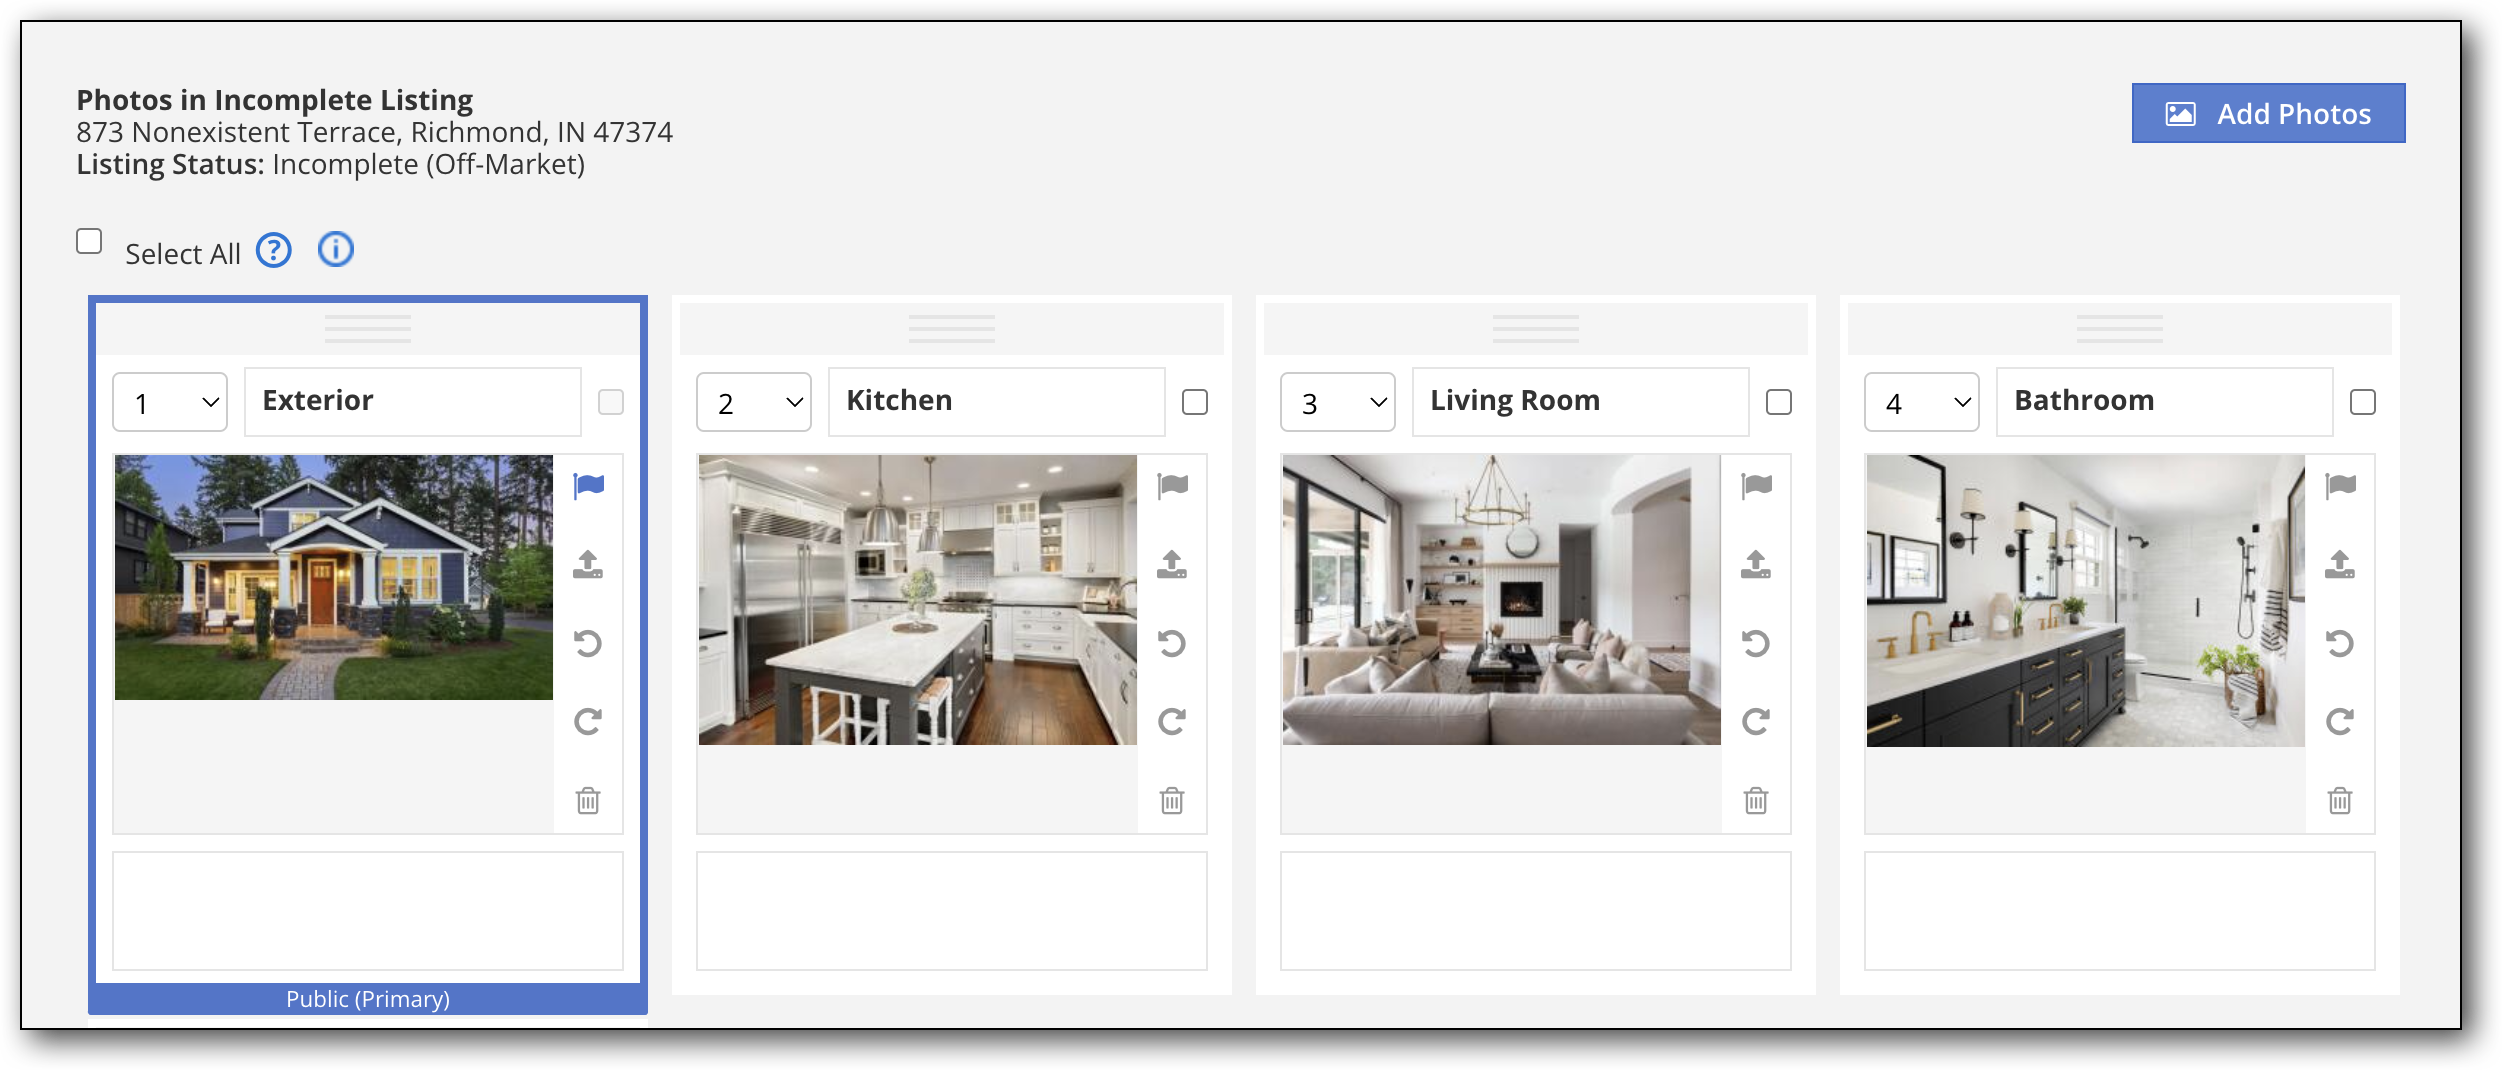
Once uploaded, all the photos appear on the page, with a description at the top of each photo.

The number in the upper left corner of each photo indicates the order in which it appears on the listing. To rearrange photos, click on a photo and drag it to a new position.

rearrange-photos.png

Alternatively, you can click the drop-down arrow next to the number in the upper left corner of a photo, then choose a position number.

rearrange-photos-2.png

To add or change the title of a photo, hover over the title bar at the top and click the Edit title (pencil) icon. Click the Save changes (check mark) icon to save your changes.

add-title.png

To add or change the caption for a photo, hover over the caption bar at the bottom and click the Edit caption (pencil) icon. Click the Save changes (check mark) icon to save your changes.

add-caption.png

The primary image for a listing is outlined in blue, with the flag icon selected and the label "Primary Image". To change the primary photo, click the flag icon on the desired photo.

primary-photo.png

Photo privacy options allow you to remove photos from public view without removing them permanently from a listing. Private photos cannot be viewed via the consumer portal, subscription emails, shared links, or public versions of reports. Private photos are available only to MLS members who are viewing listings in Flexmls. For users who can view them, private photos are indicated with a red Private tag.

Note

The primary photo for a listing cannot be made private.

You can specify that a photo is always private, or you can set photo privacy to change automatically based on listing status.

  • To make a photo always private, regardless of listing status, select the photo and click the Mark Private button. The photo will not be available to the public.

  • To change photo privacy automatically when the associated listing goes on or off the market, select the photo and click the Mark Private While Off-Market button. The photo will automatically be made private when the listing is in an off-market status. If the listing returns to an on-market status, the photo will automatically be made public again. Off-market statuses are specified by your MLS.

  • To remove privacy restrictions from a photo, click the checkbox in the upper right corner of the photo, then click the Mark Public button.

Photos that have been marked private are outlined in red, with the label Private. Photos that have been marked private while off-market will appear with a dark red outline and the label Private While Off-Market. Photos that do not have privacy restrictions are labeled Public.

private-photo.png

Note

Private photos can be copied, but they will not automatically be marked private on the destination listing.

Click the Upload Replacement Photo icon to replace a listing photo with another photo.

replace-photo.png

Click the Rotate icons to rotate your photos. Each click rotates the photo 90 degrees in the direction indicated by the icon.

rotate-photo.png

To remove a photo from a listing, click the Remove photo (trash can) icon. You will see a message saying that the image has been erased. To undo the removal of the photo, click the Undo link in the message.

remove-photo.png
remove-photo-2.png

To remove multiple photos at once, click the checkbox in the upper right corner of each photo, then click Delete Selected. Up to 50 photos can be selected and deleted at a time.

You can upload photos in HEIC format using the process described above if using a Safari browser.

If uploading photos in HEIC format in a Chrome browser, you will need to select All Files in the Format dropdown menu after selecting Add Photos in Flexmls.

HEIC-chrome.png