Complete the MCP Server Setup in ChatGPT
To complete the MCP server setup in ChatGPT, refer to the following steps:
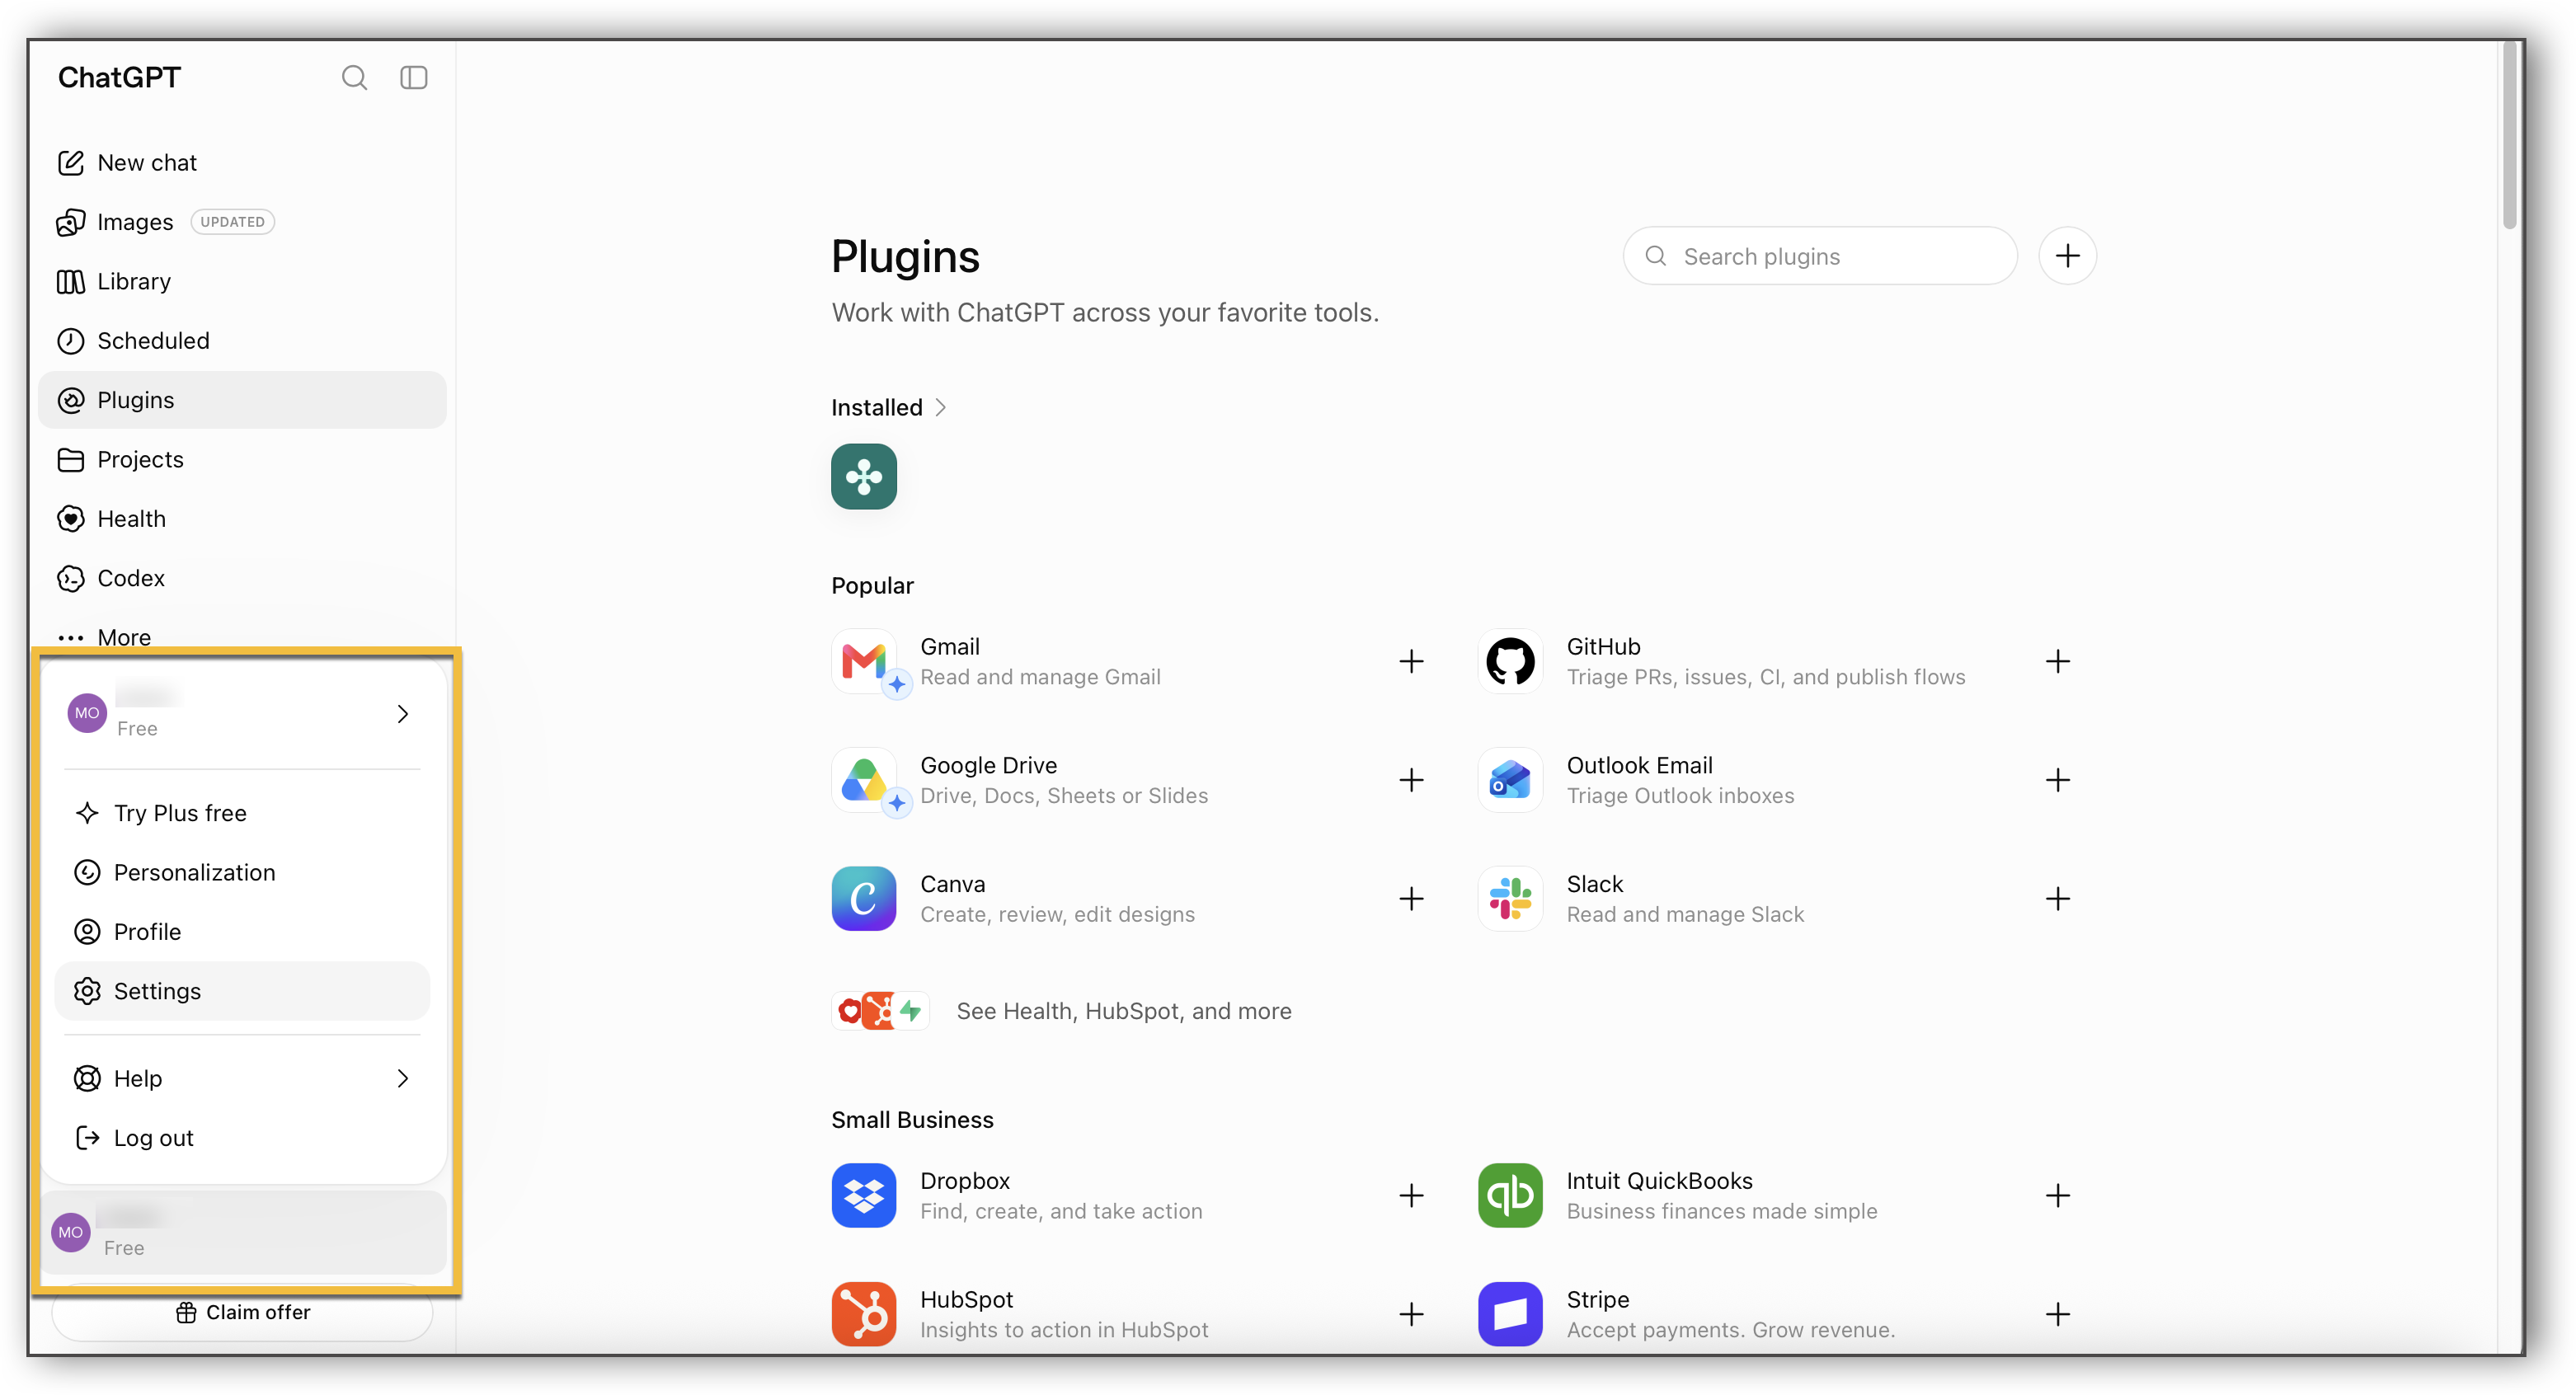
Click your username at the bottom left corner. Then, click Settings.
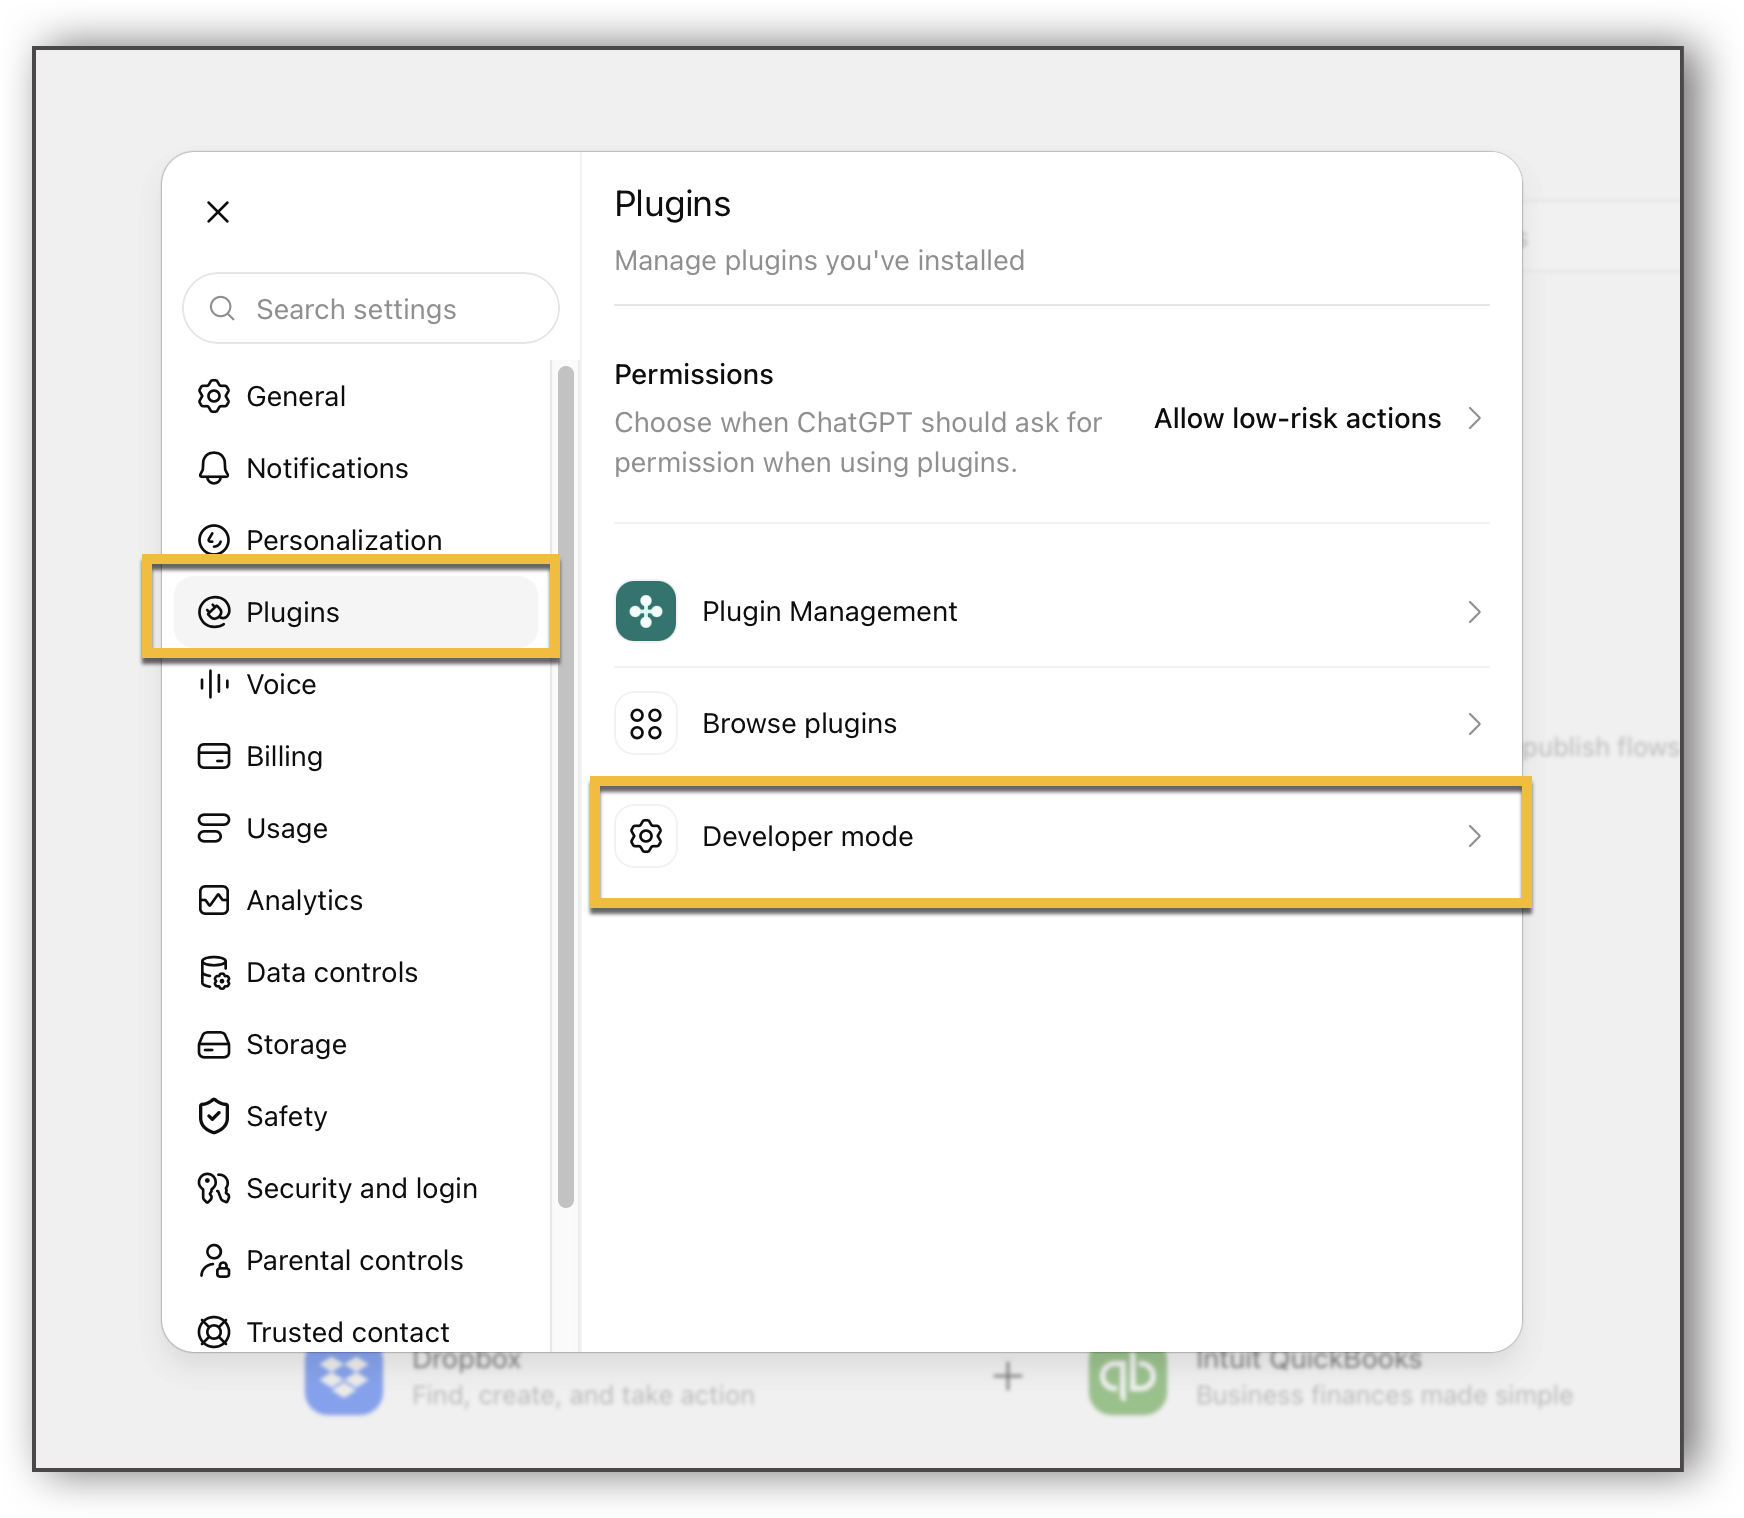
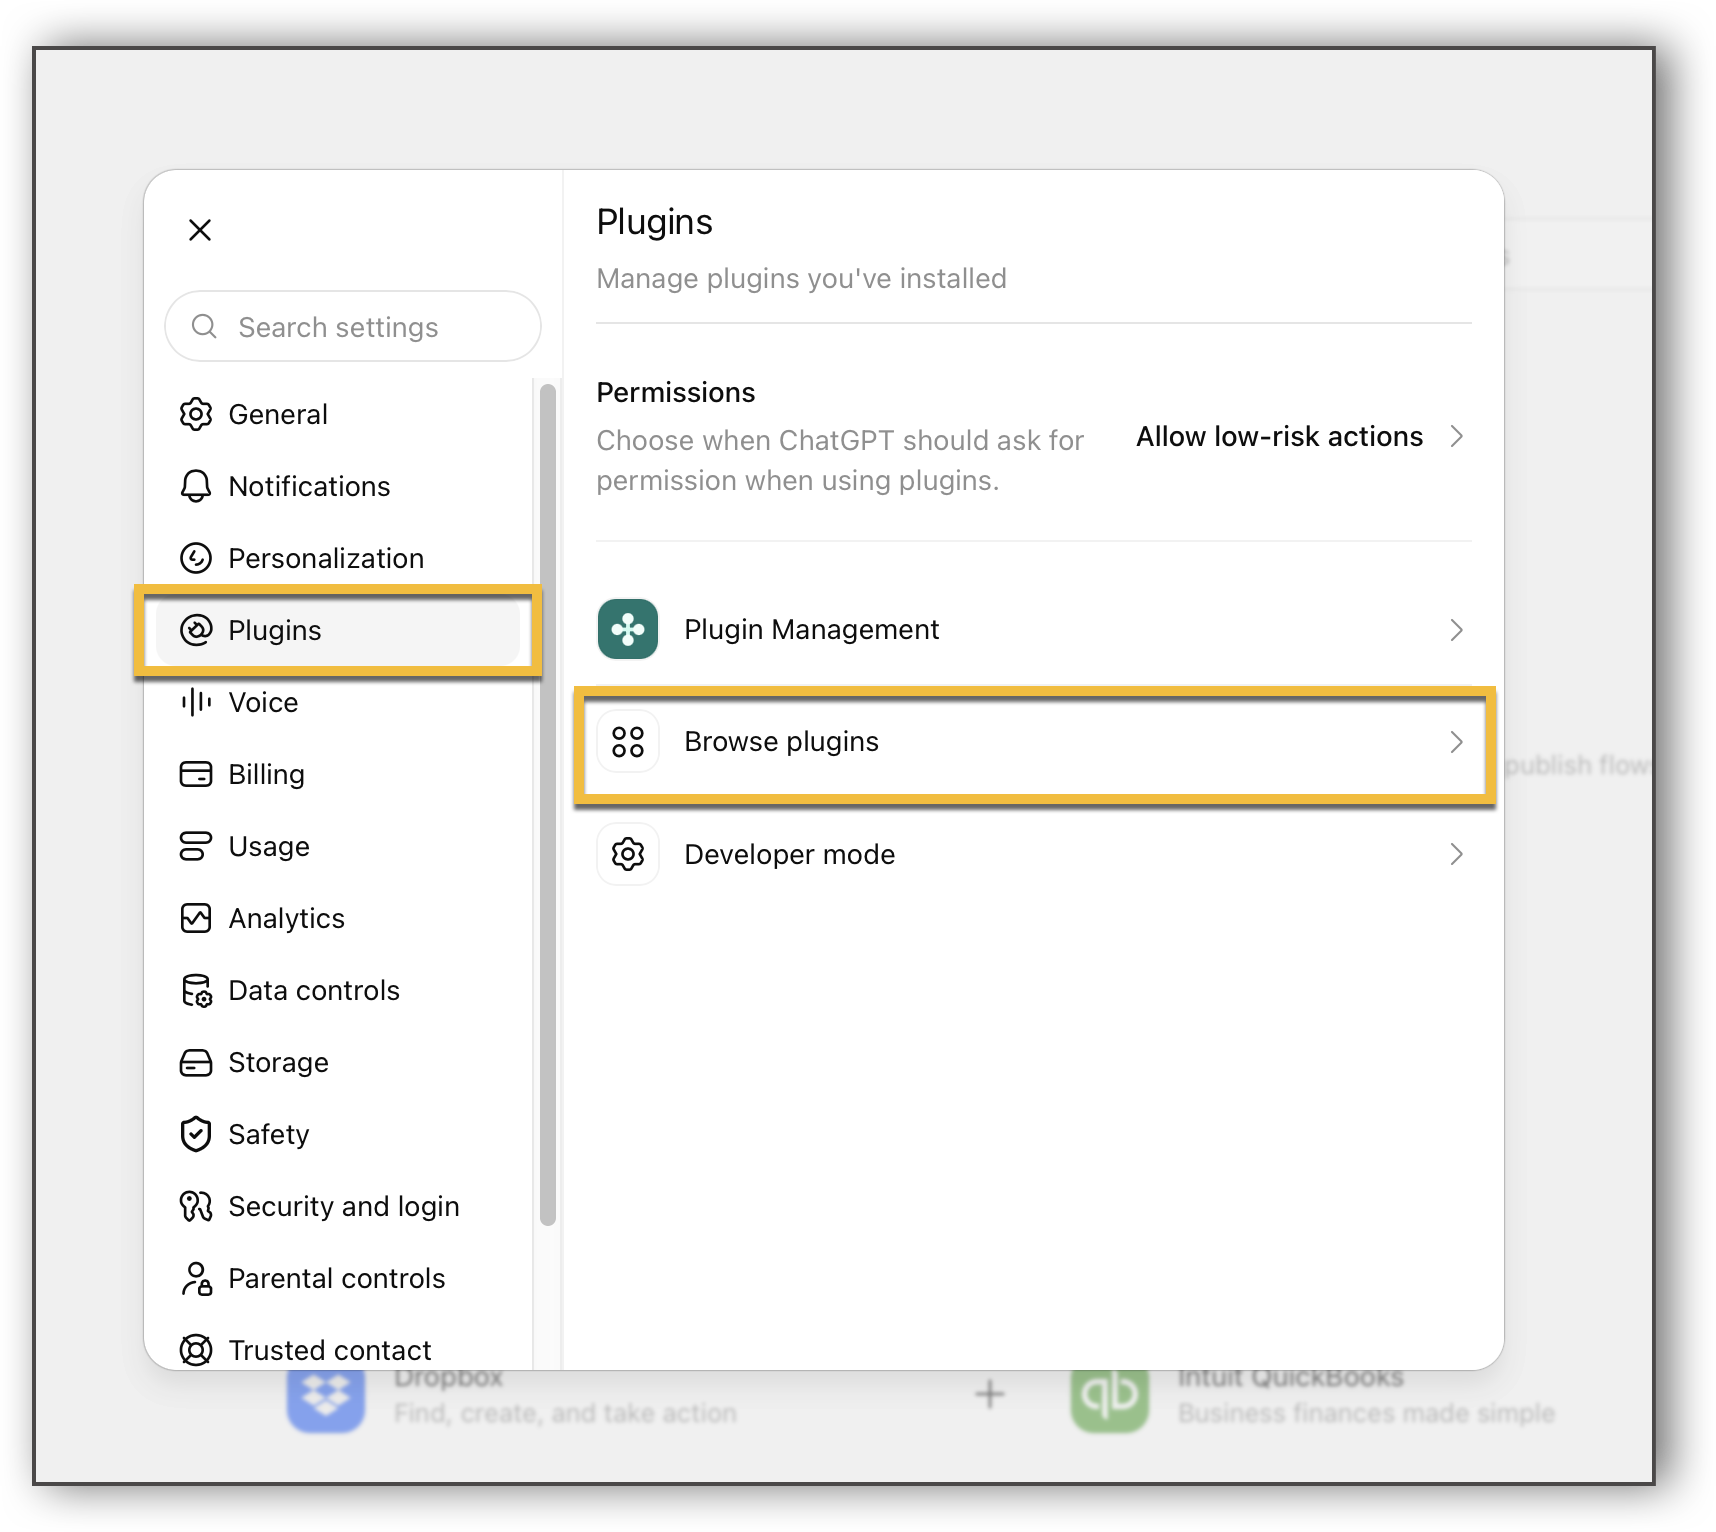
Click Plugins, and then click Developer Mode.
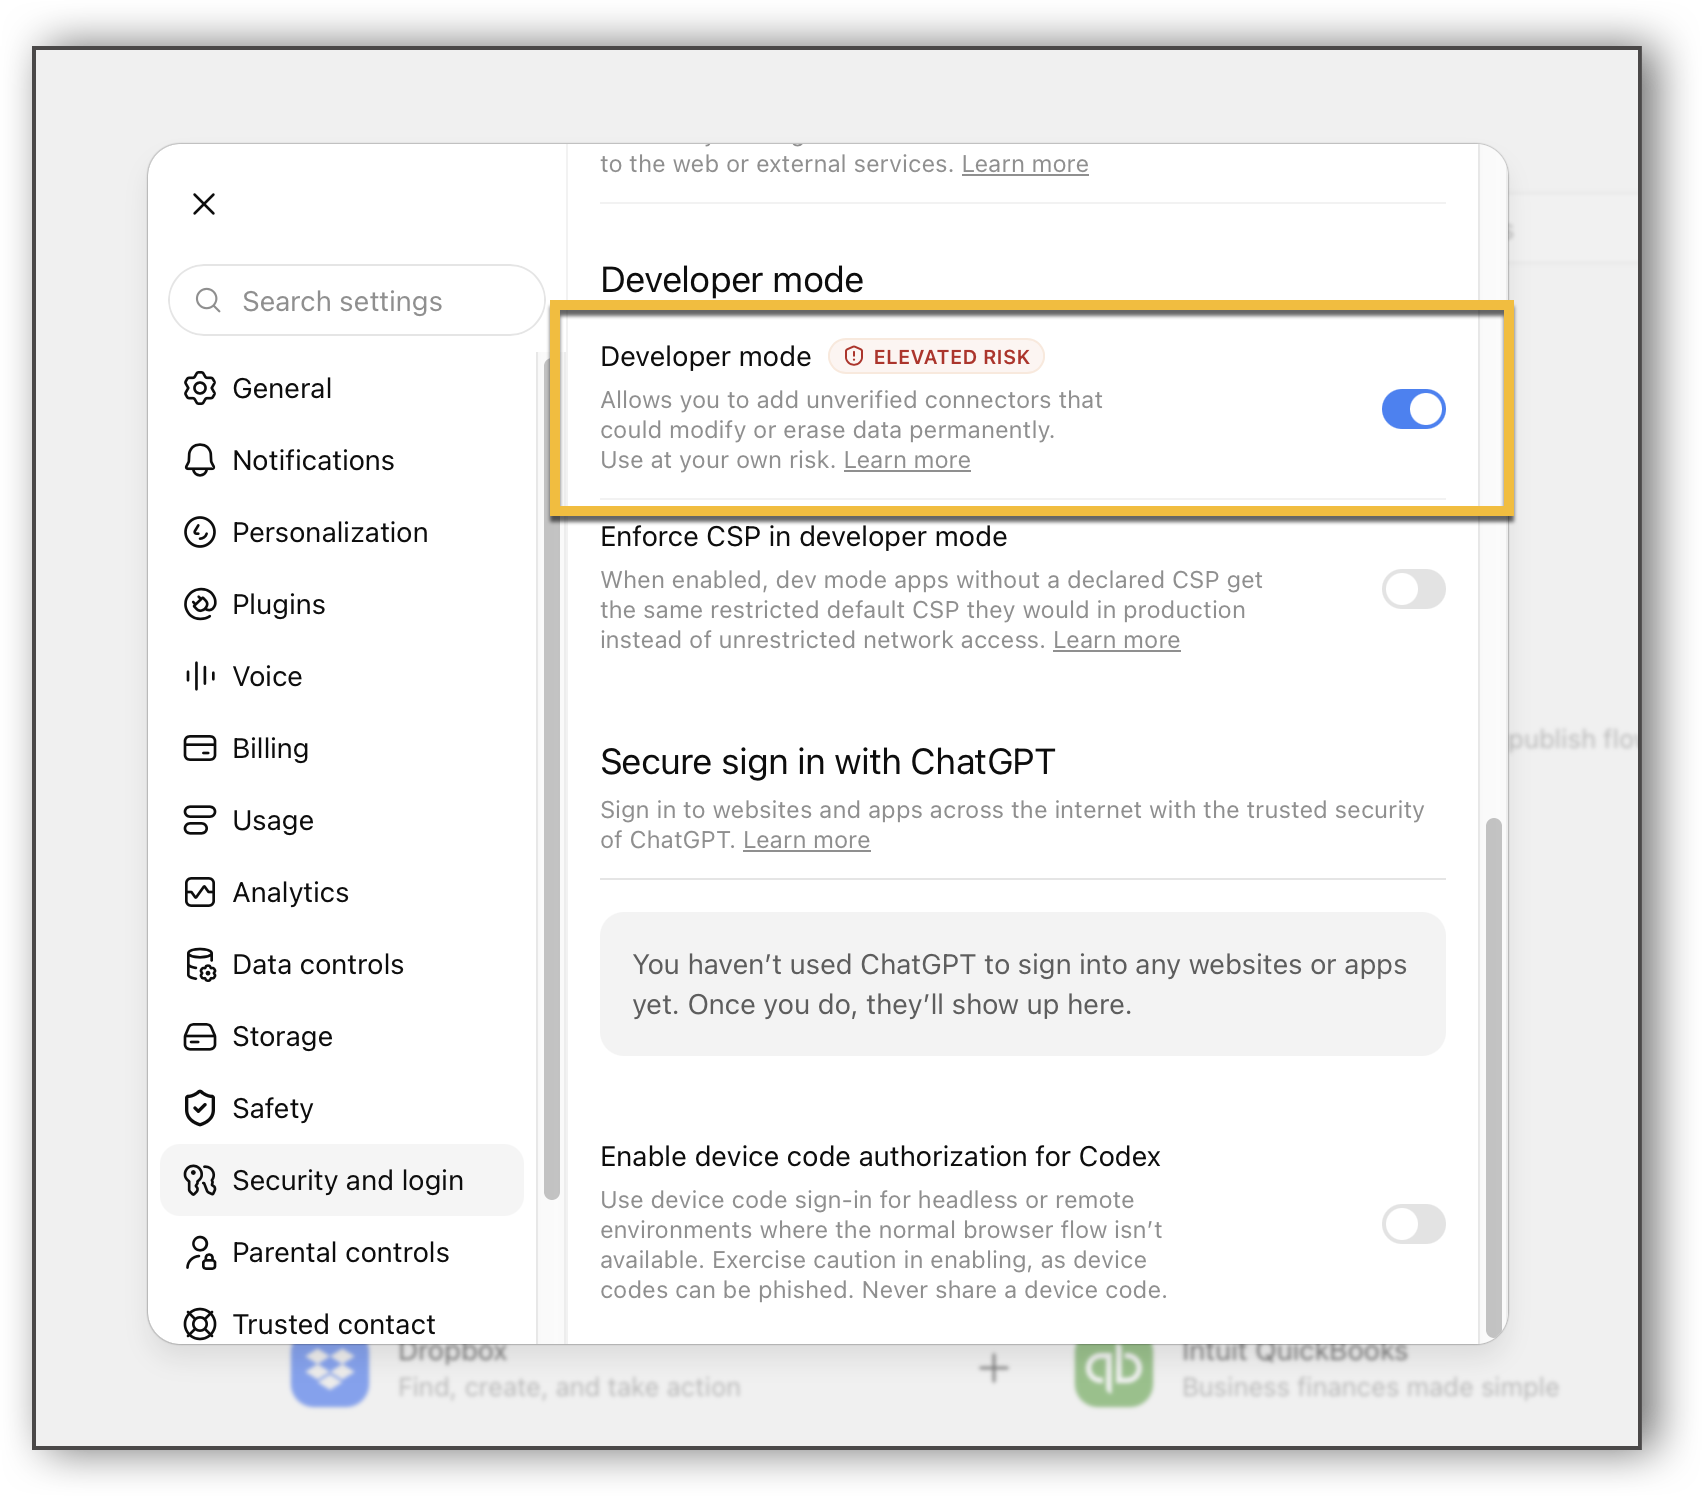
Use the toggle to enable developer mode.
Click Plugins again, and then click Browse Plugins.
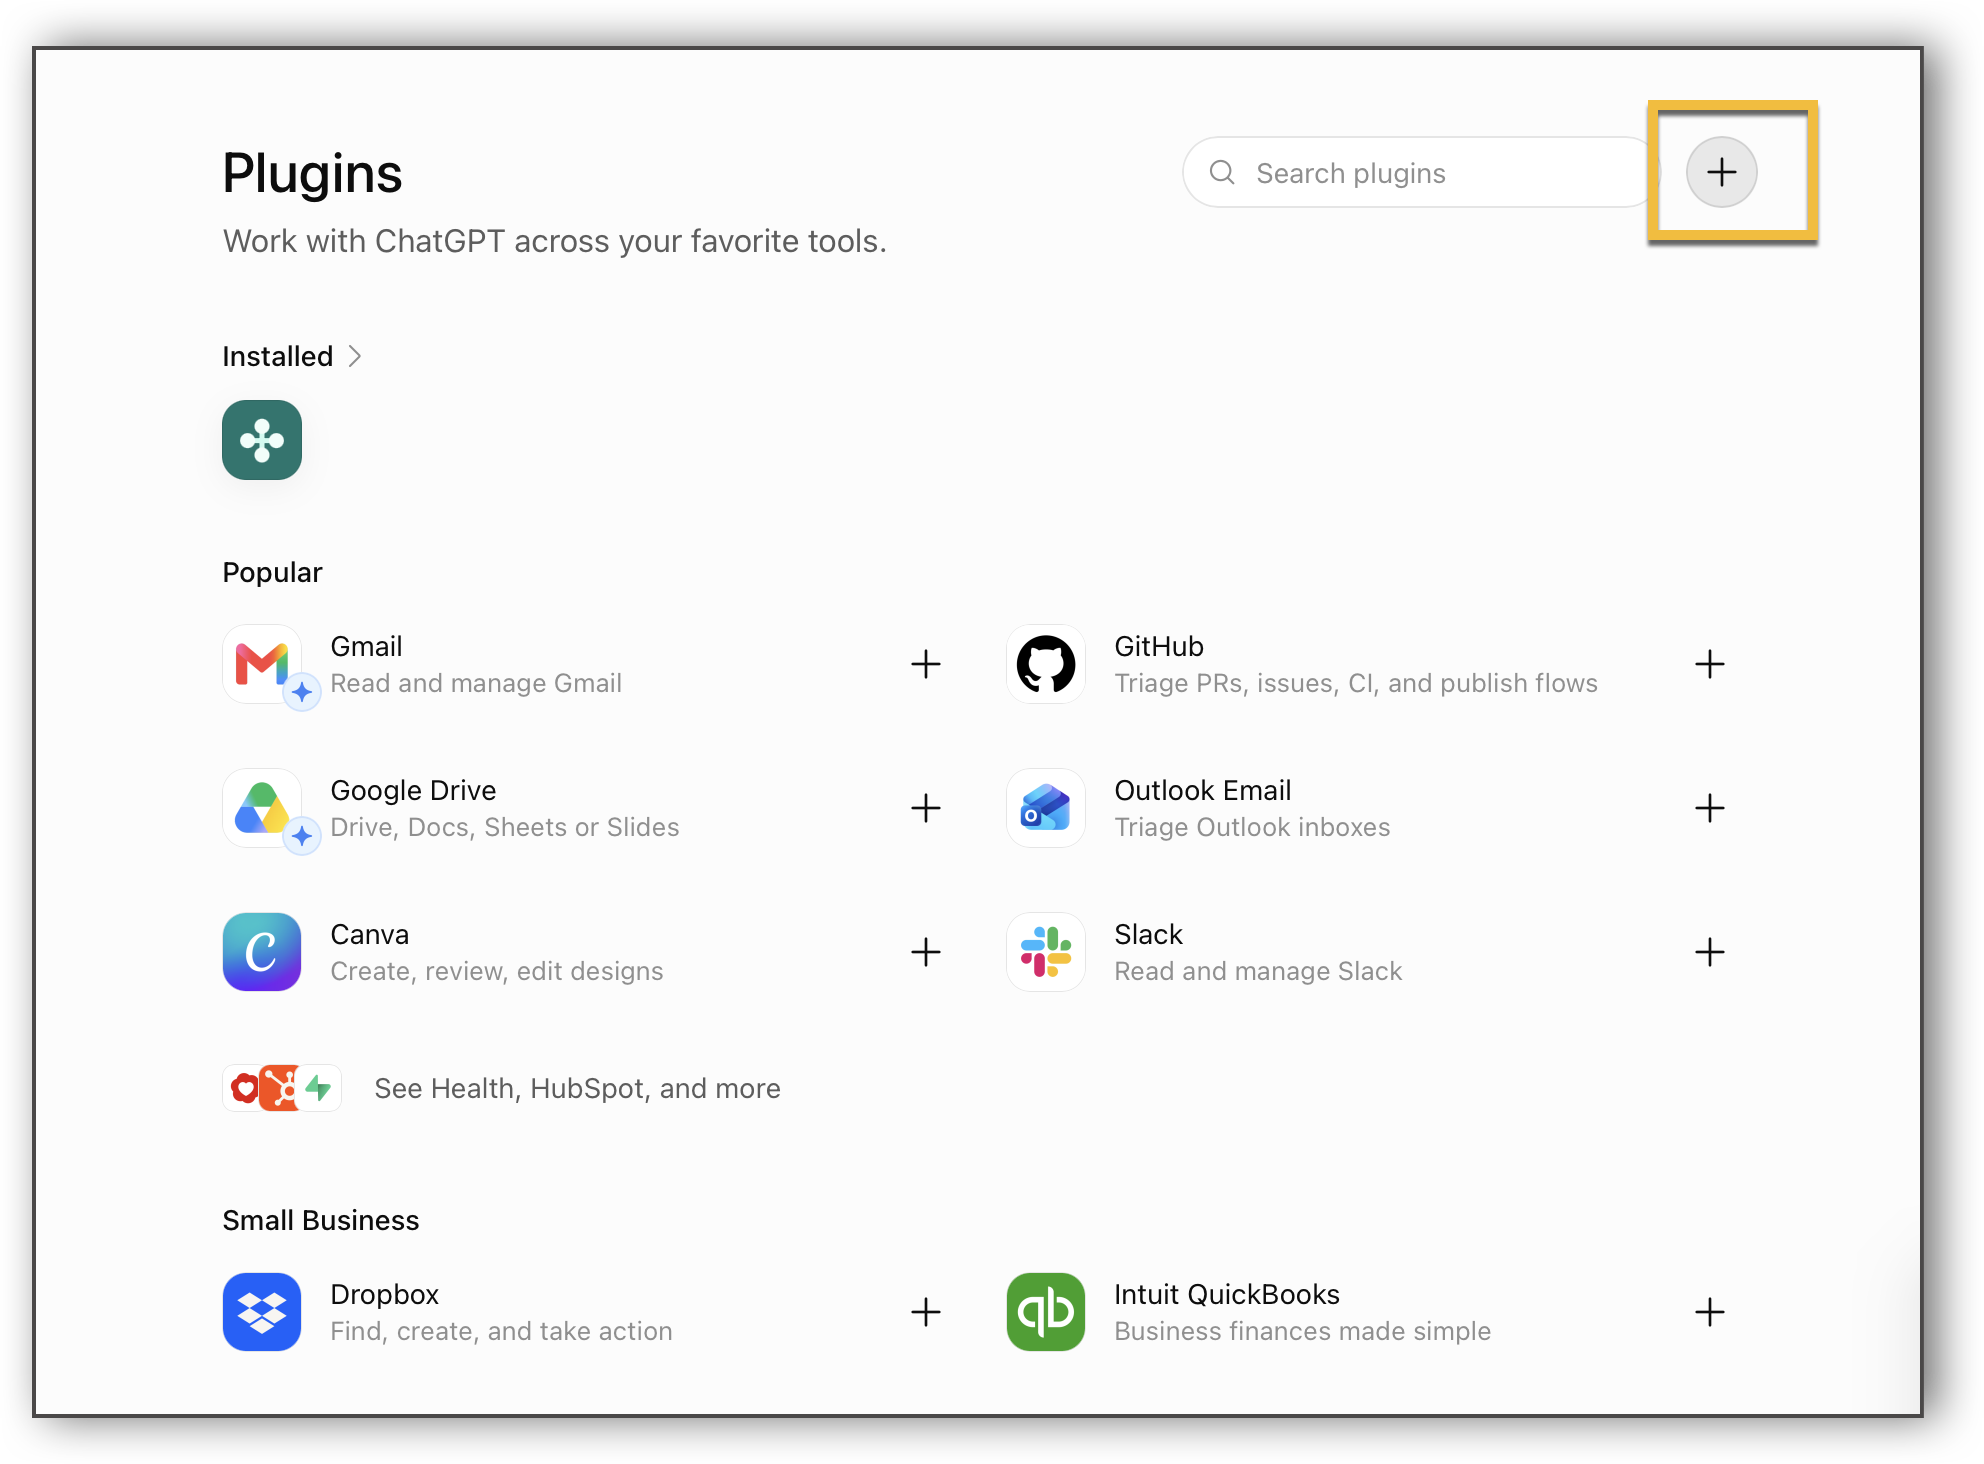
Click the plus (+) sign at the top right corner to add a new plugin.
Enter a name, optional description, and the Flexmls MCP server URL: https://mcp.fbsdata.com/mcp
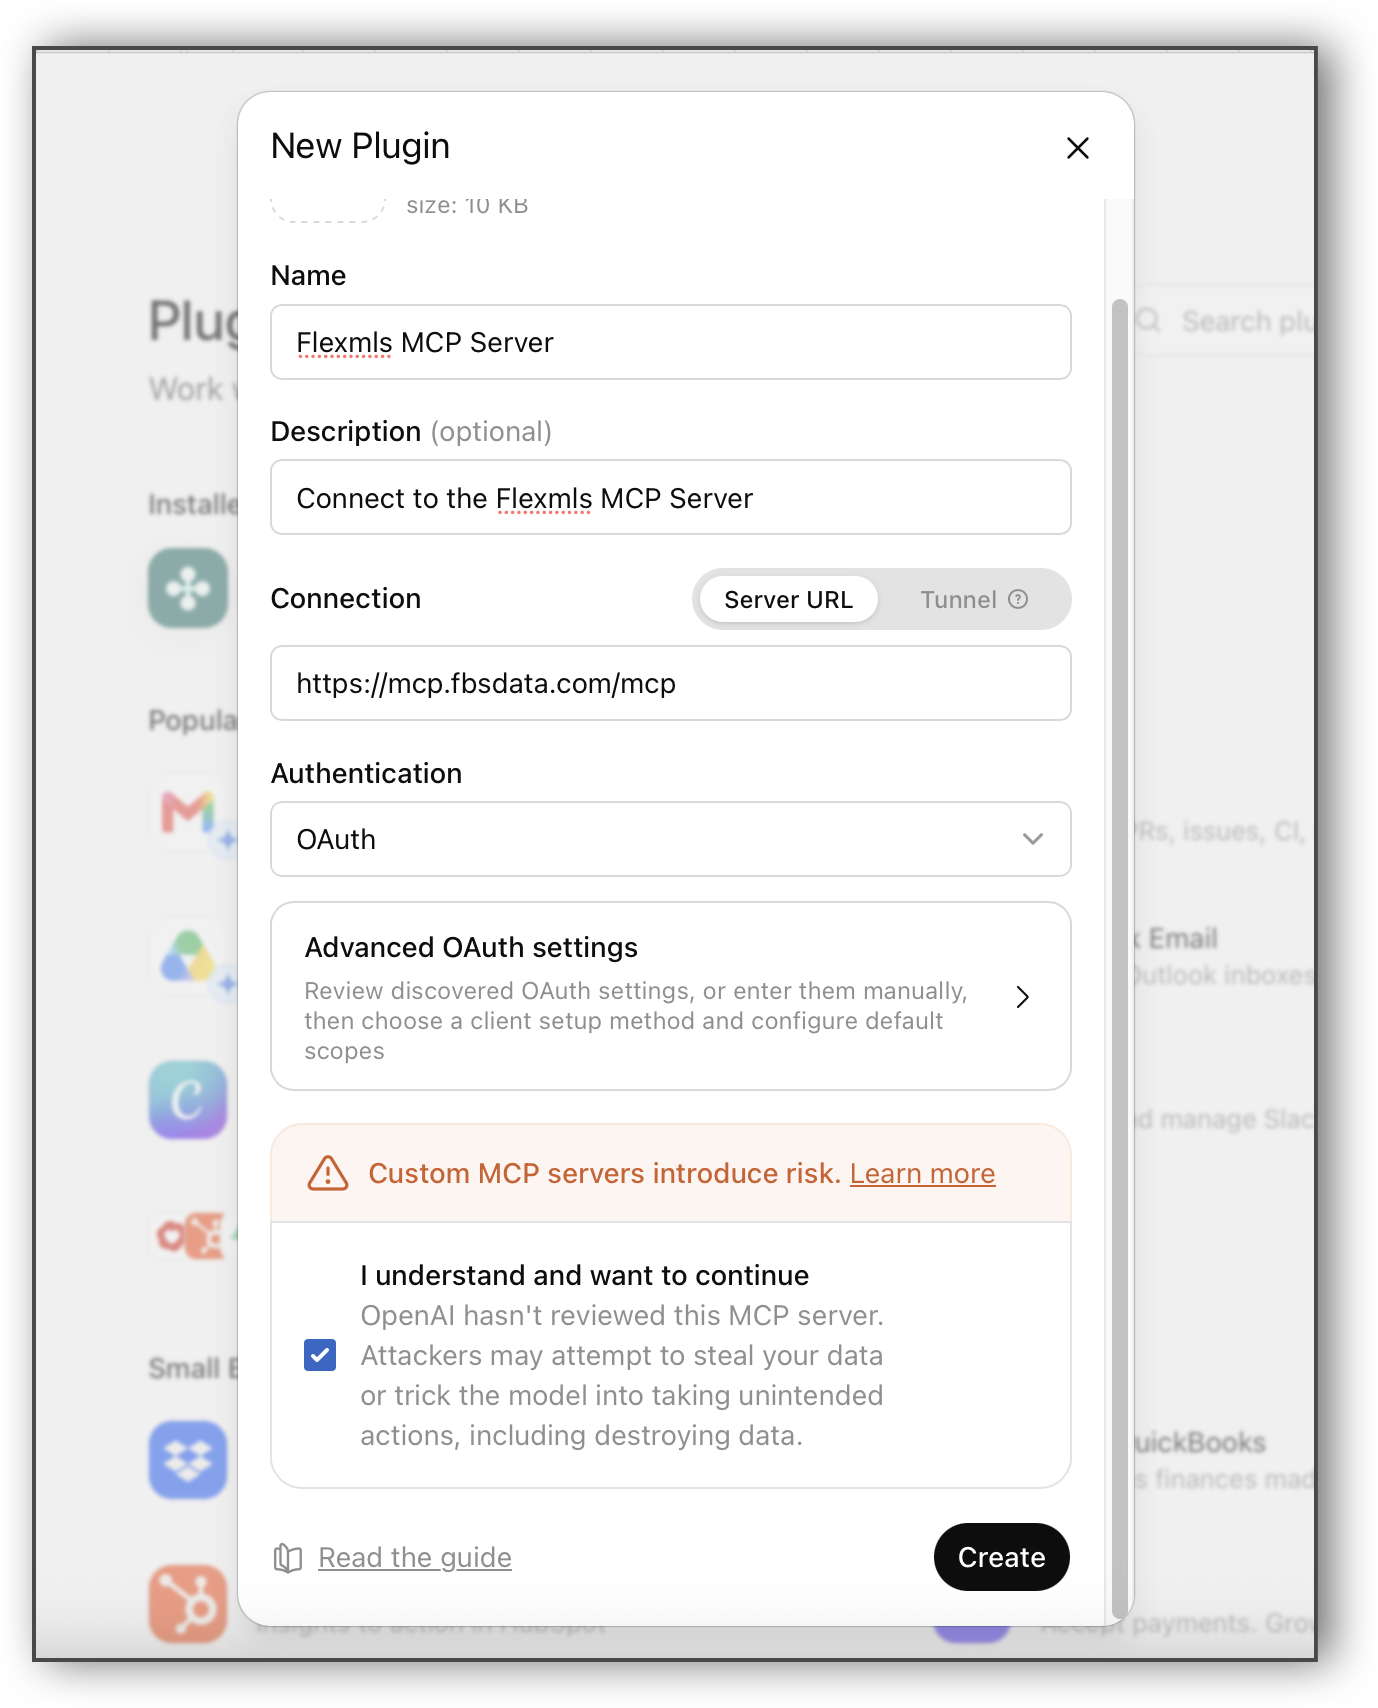
Select the checkbox acknowledging that you understand that you are connecting to an MCP server. Then, click Create.
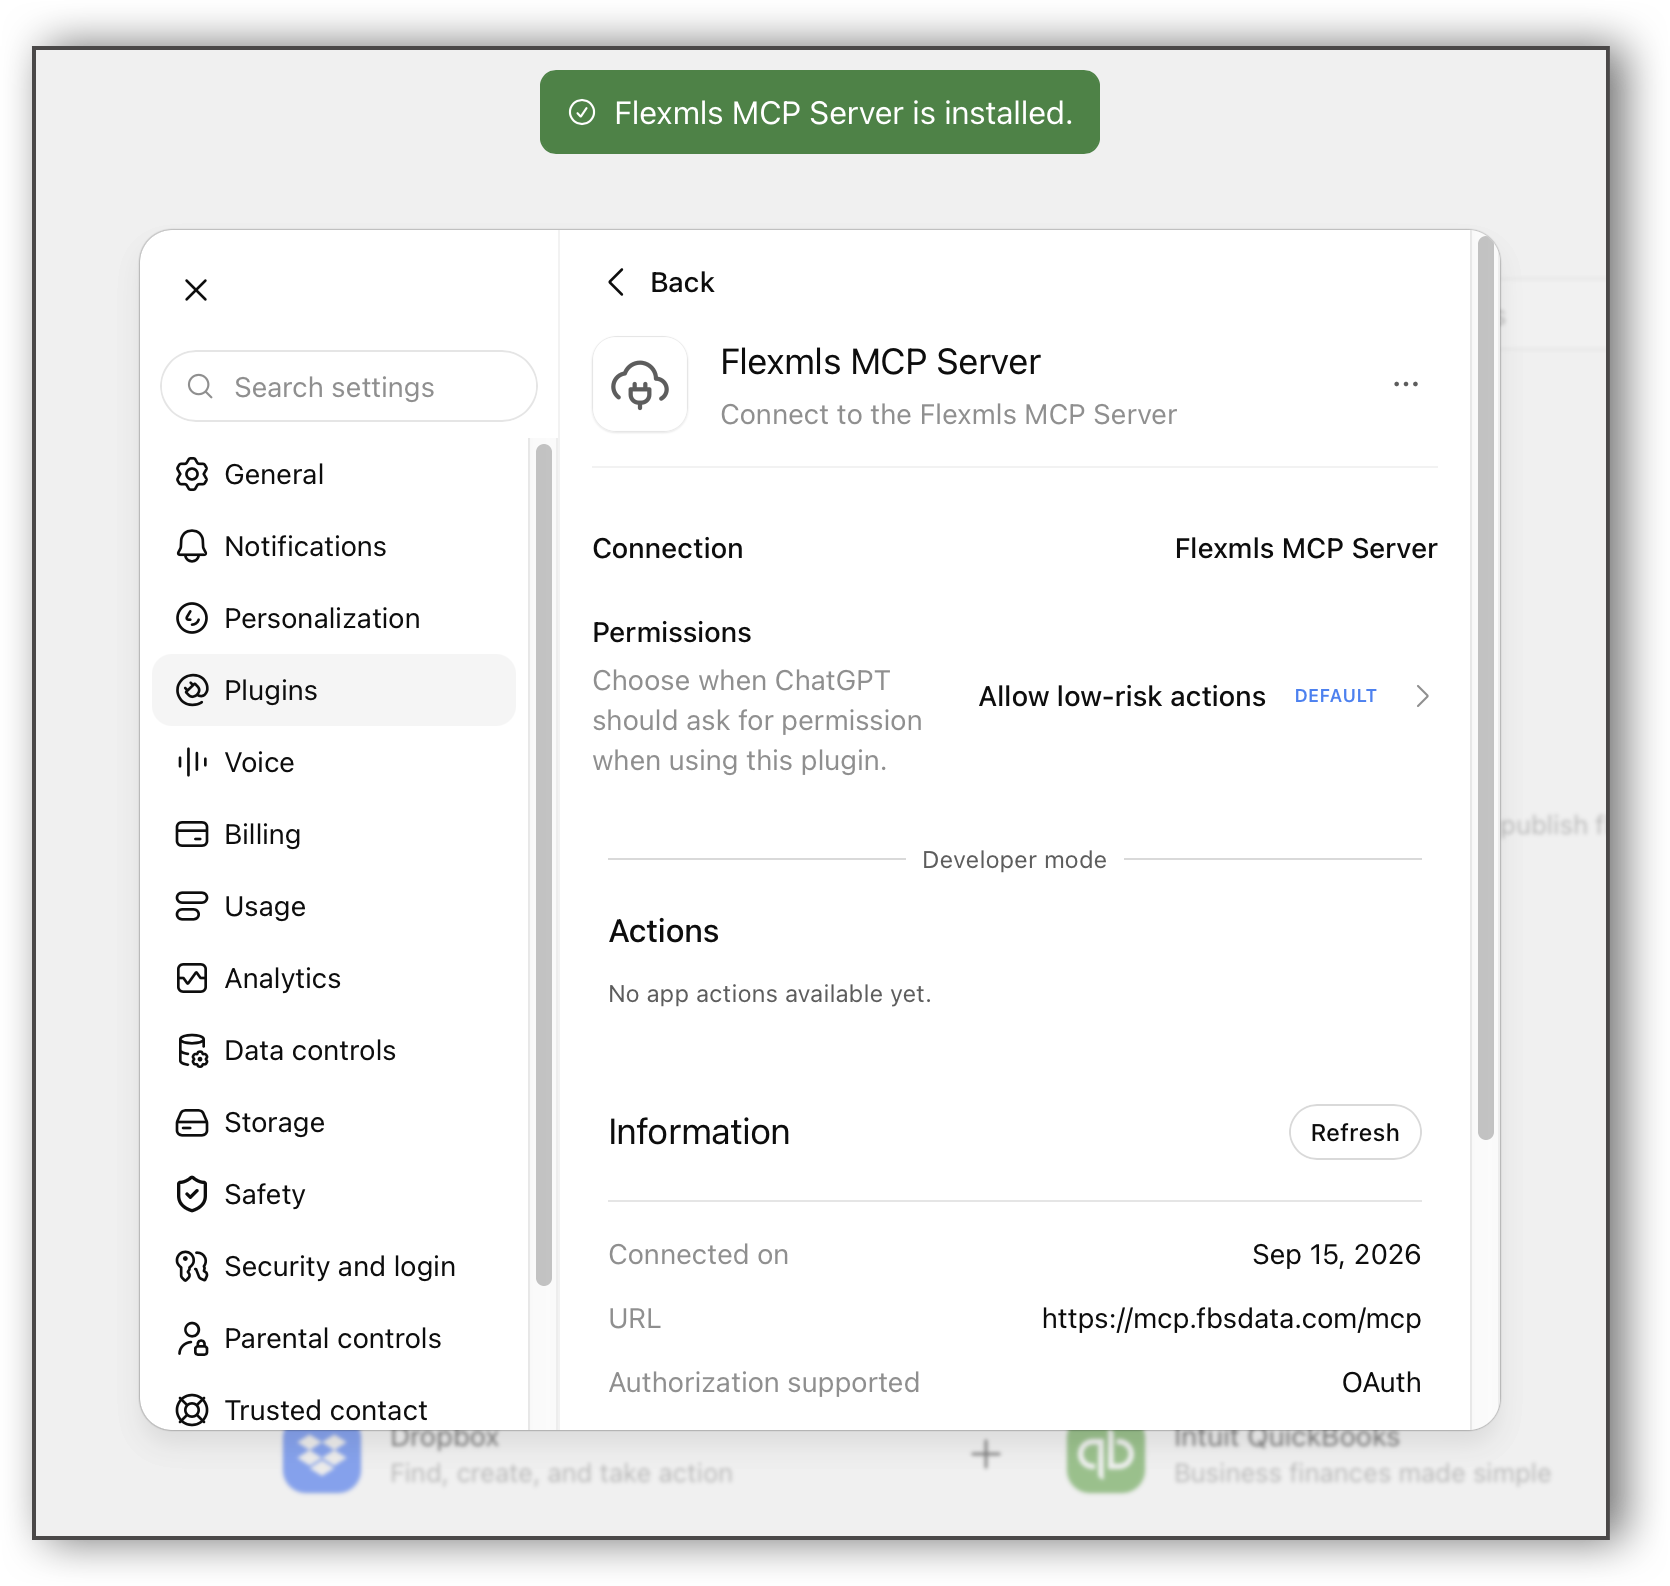
Once connected, a confirmation message will appear.
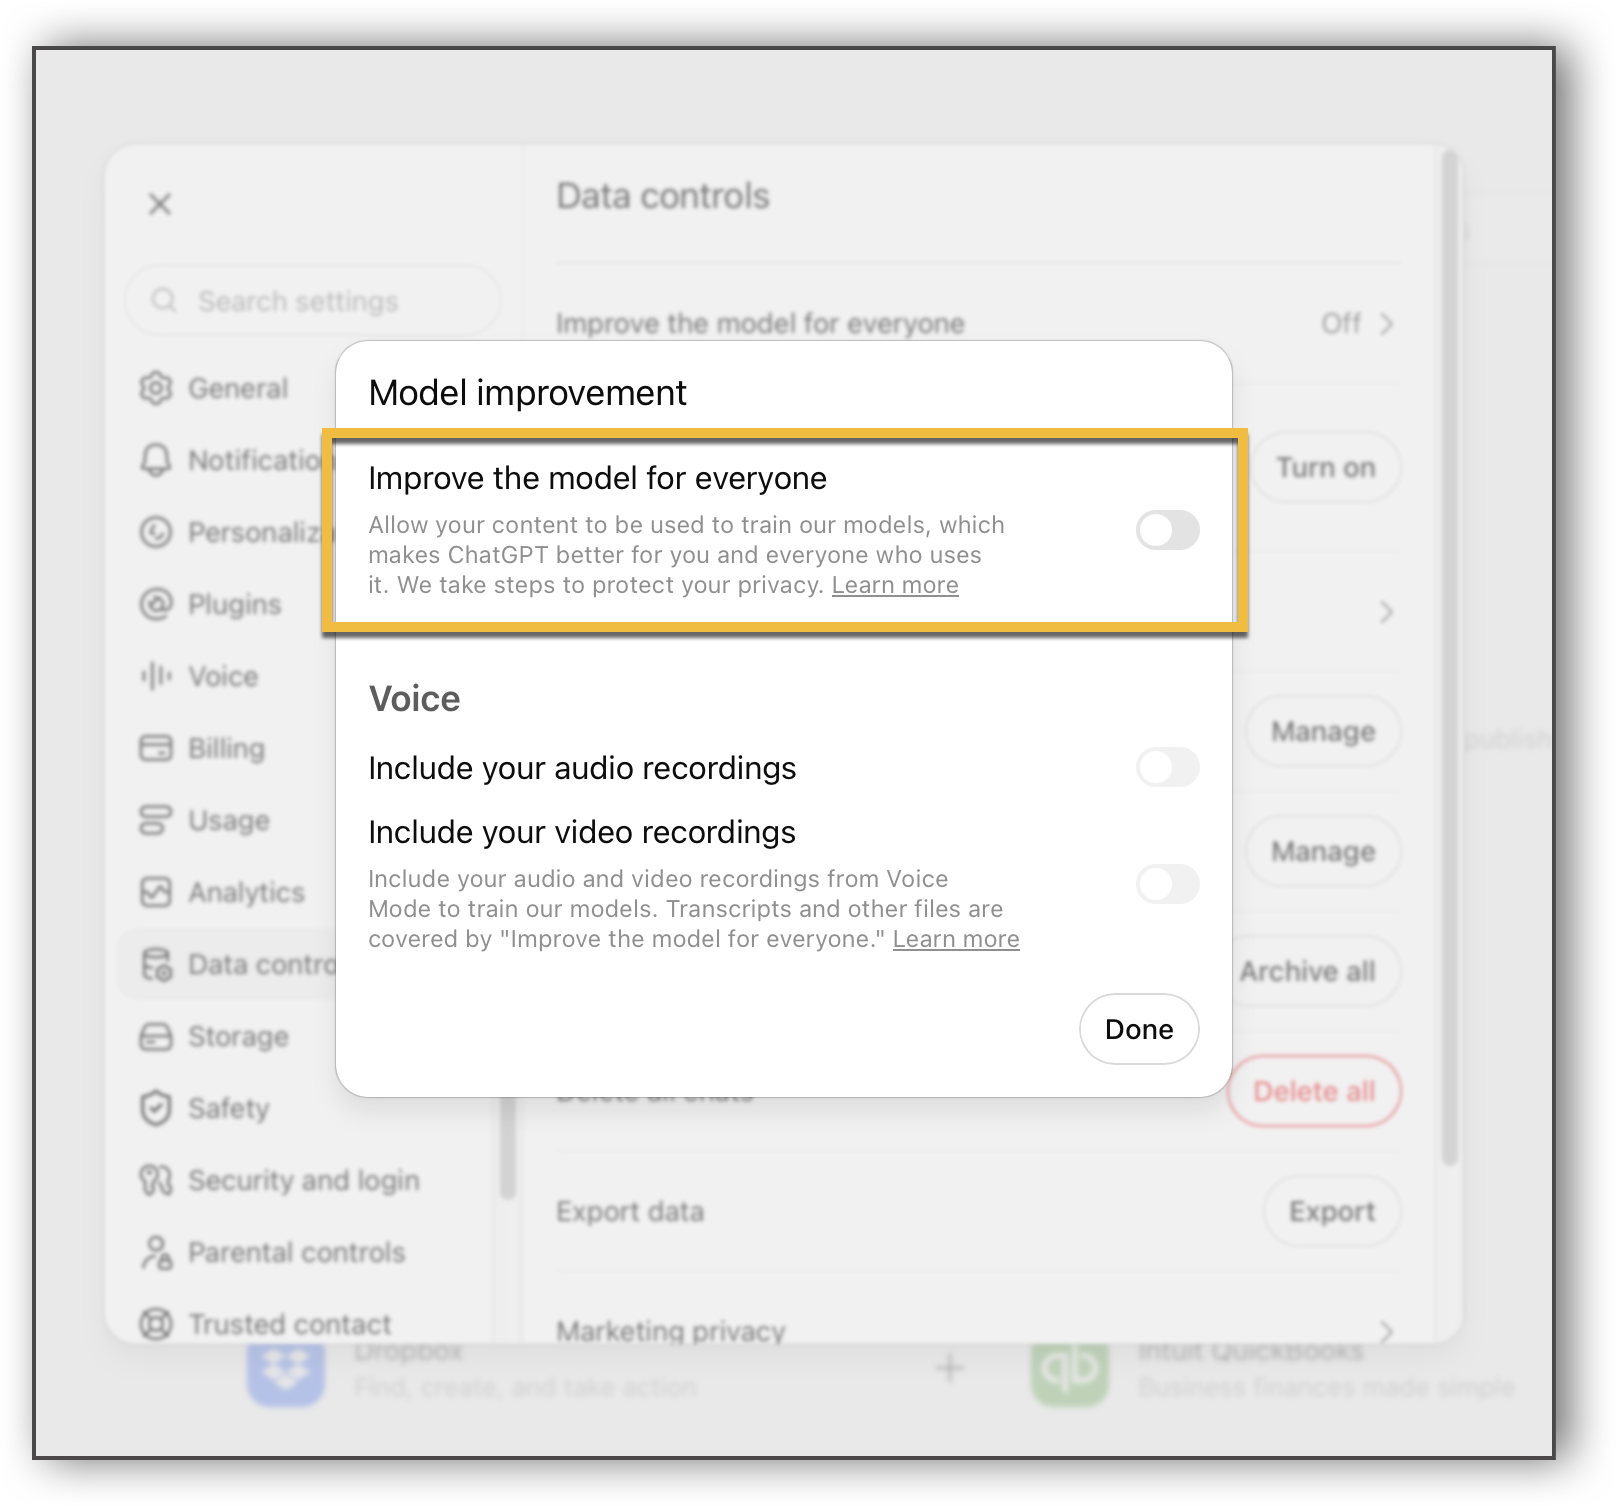
For data security purposes, we recommend disabling any settings that allow the AI client to store your data. To disable this setting in ChatGPT, complete the following steps:
Click your username at the bottom left corner. Then, click Settings.
Click Data Controls. Then, click Improve the model for everyone.
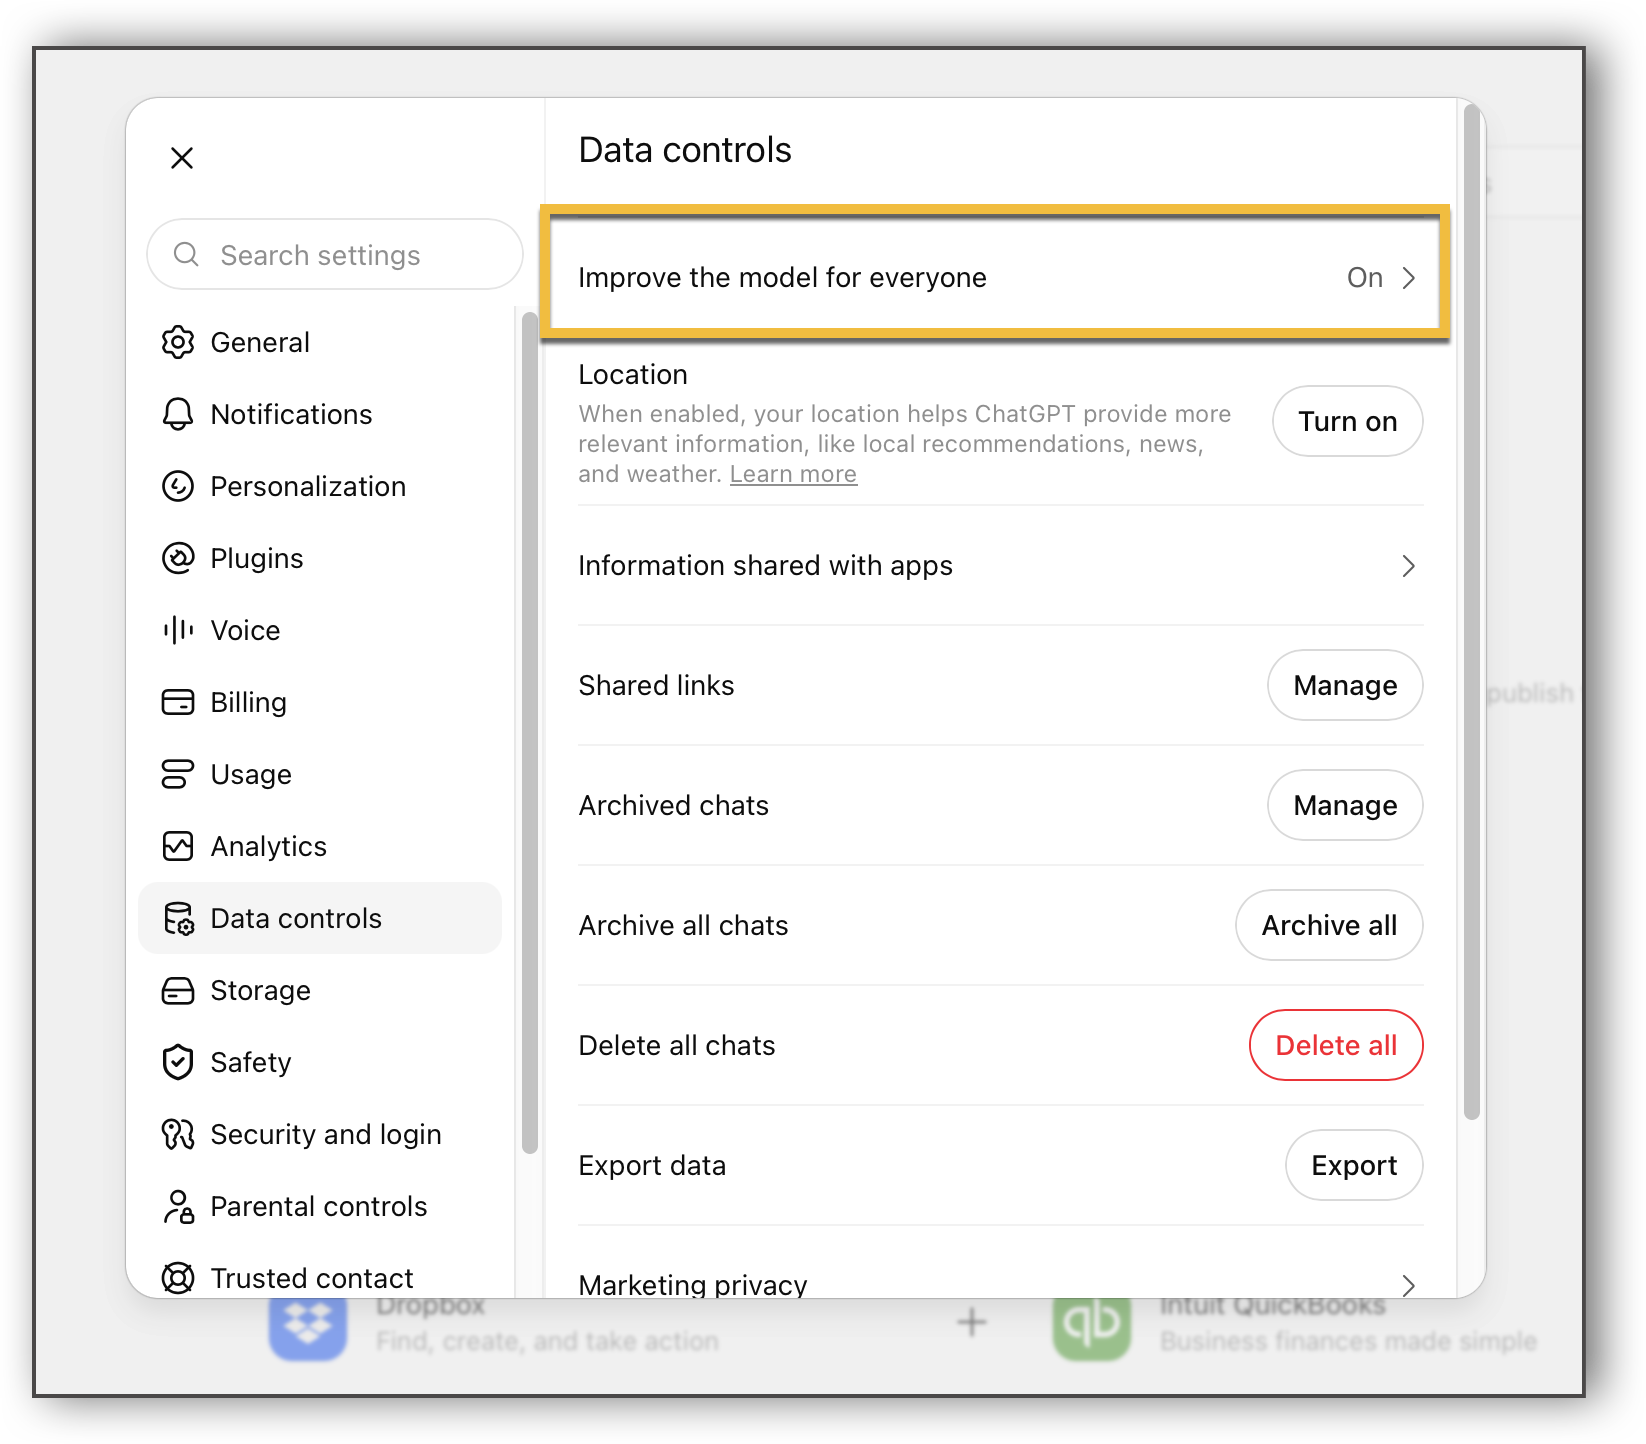
In the Model Improvement window, use the toggle to disable the "Improve the model for everyone" setting. Then, click Done.