My Exports
Click My Exports under Preferences to open the My Exports page, where you can view, create, or modify data export templates. Use data export templates to specify the fields to include when you export listings from a search results page. For more information about exporting listing data, see Export Search Results.
Tip
The following Guided Help tours are available for this function in Flexmls. When you click on a link, an instance of Flexmls will open in a new browser tab and instruction bubbles will guide you through the process.
Your current export templates are displayed in the Available Export Templates list. When you select a template from the list, the Description column displays information about the template. Click Edit or Remove to perform the corresponding actions on an existing template. Use the following procedure to create a new export template.
Create a Custom Export Template
To customize the columns of information included in a text export, set up a custom export template.
Click New. The New Export Template page is displayed.
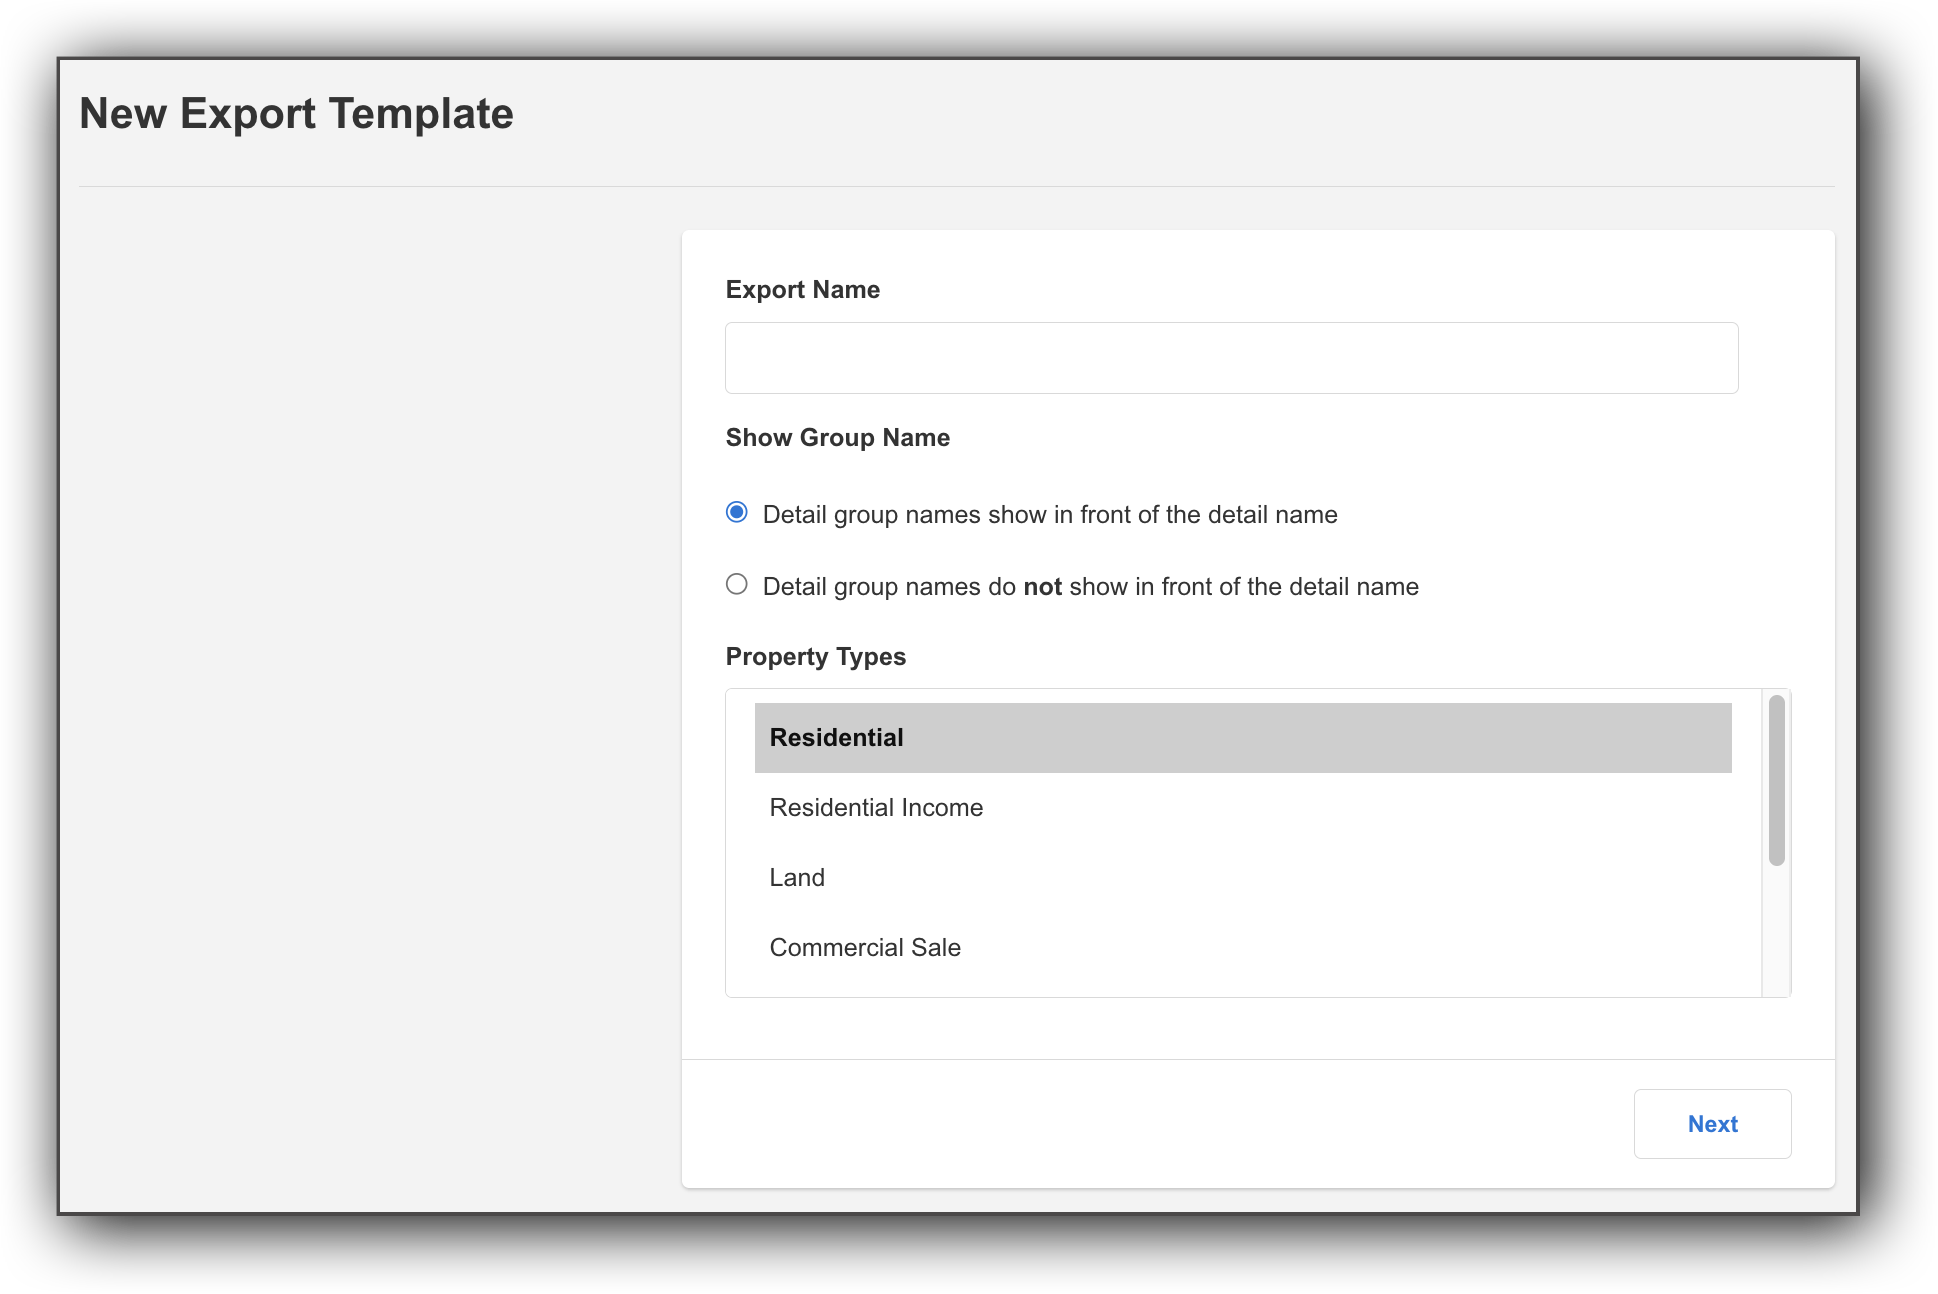
Enter a name for the export template so that you can easily identify it later. Choose whether to show the detail group name before the names of detail fields in search results.
Select the property types that the template applies to. Hold down the Control key to select multiple items in the list.
If applicable, you can make the template inheritable, which means that all logins below your access level can use it. For example, the office login can set up an inheritable template that all the agents in the office can use.
Click Next to continue.
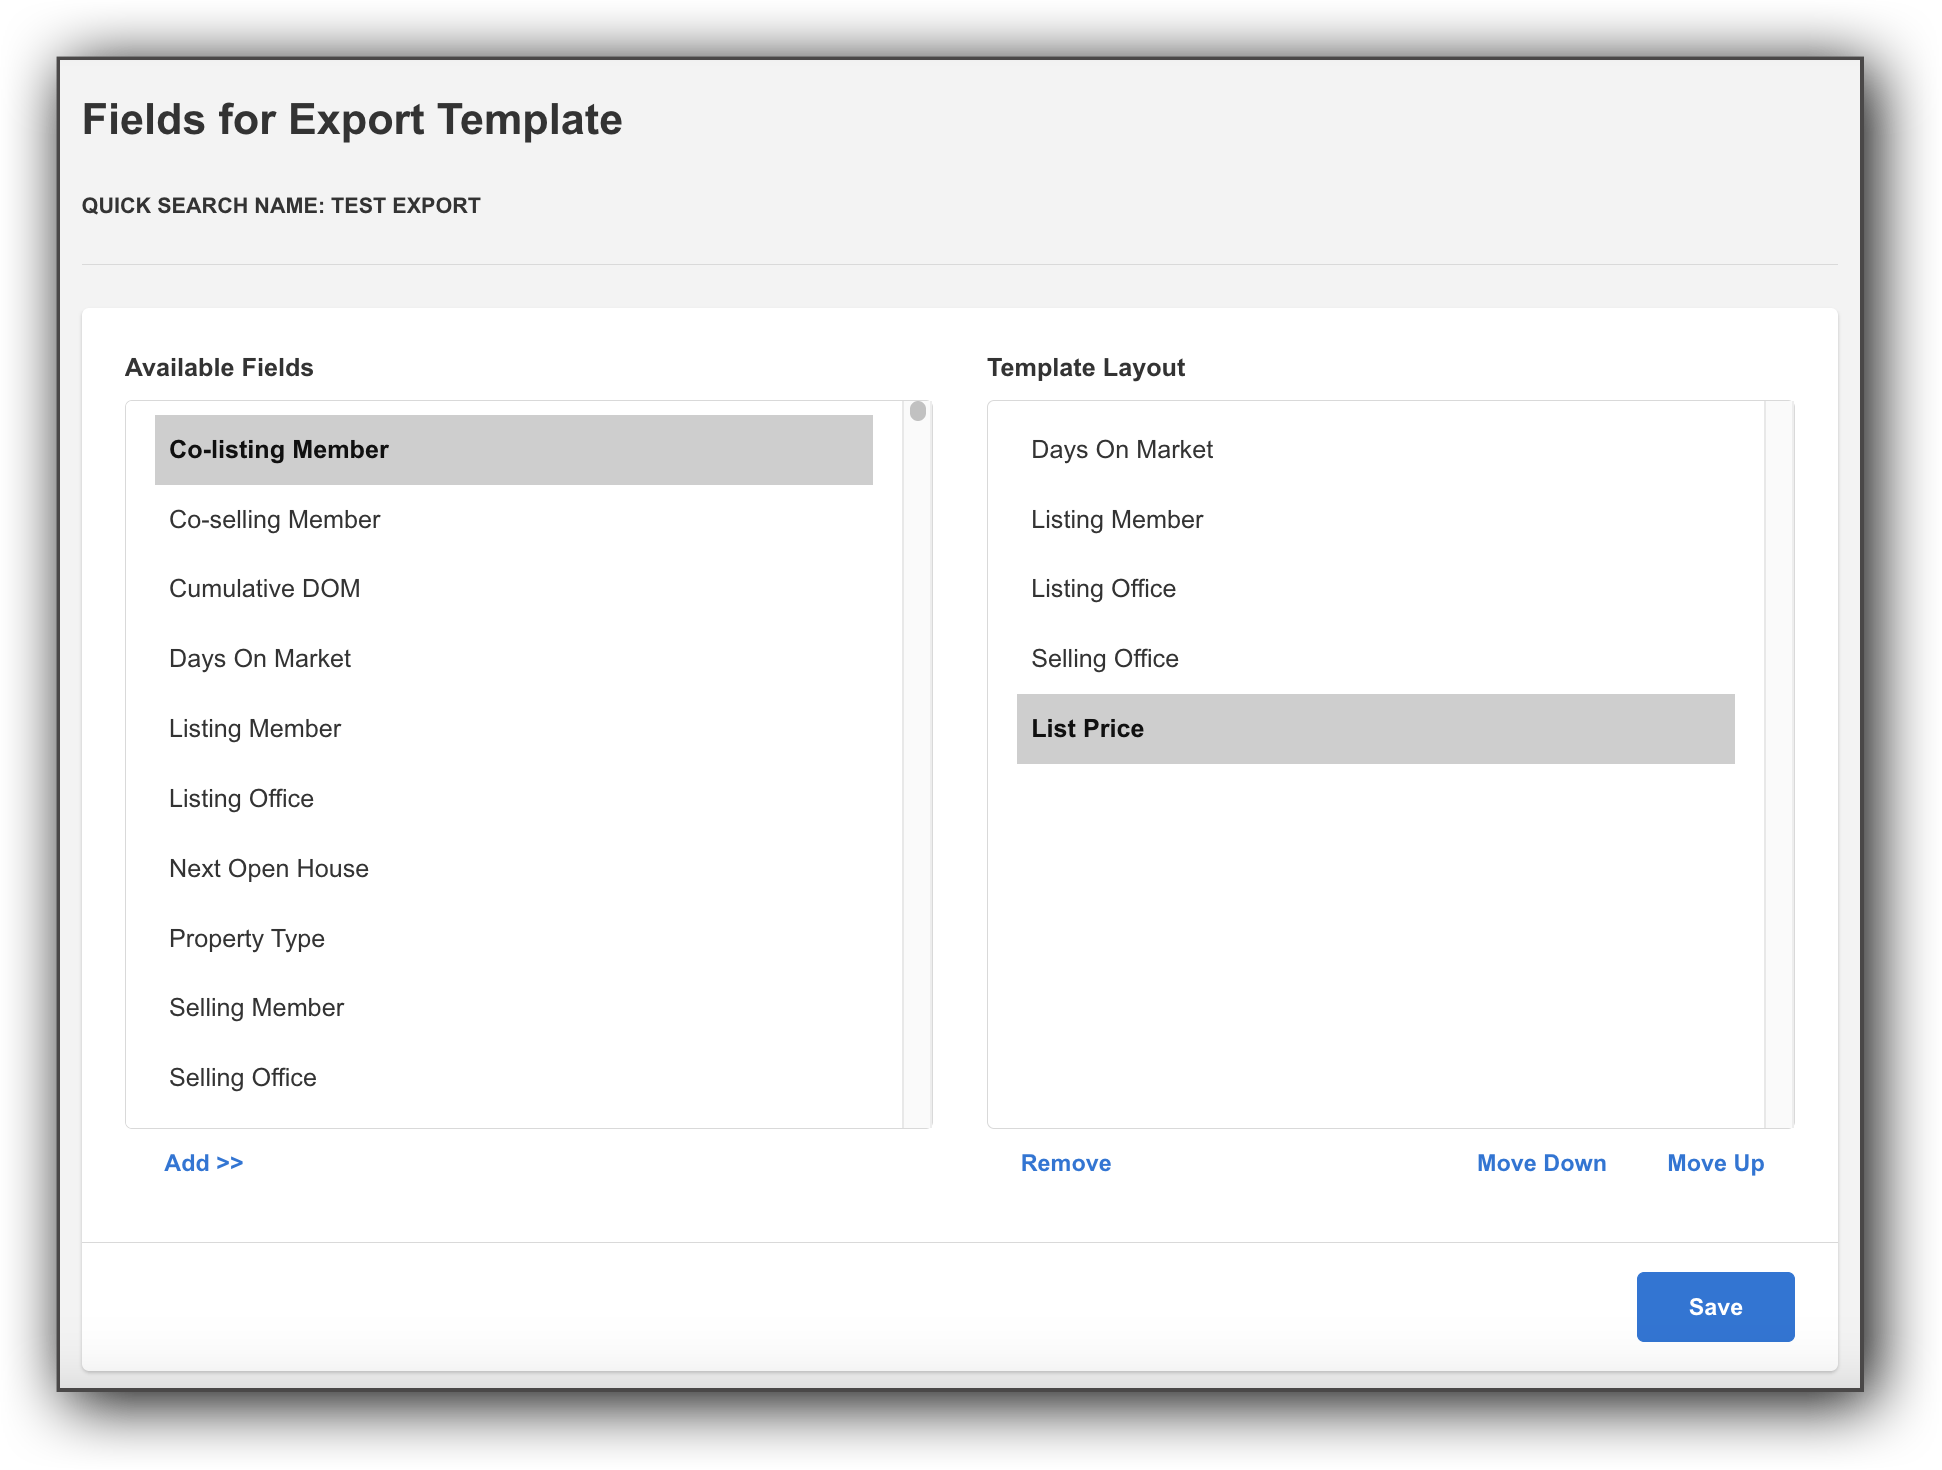
To add fields to the template, select them from the Available Fields list and click Add. Selected fields are listed in the right column. To reorder the fields, select a field and click Move Up or Move Down.
Note
The MLS number field is not available for selection because it is automatically included in exports.
Click Save to save the export template.
Share an Export Template
Click Give to someone to share an export template with other users. When you give a template to a member or office, it will appear in their list of available templates. To begin, select an office from the list of available offices. Then select one of the following options.
To share the template with the office-level login, click Give export to selected office.
To share the template with individual members in the office, click Give export to someone in the selected office. A list of members will be displayed. Select an individual member or hold down the Control key and click to select multiple members. Then click Give template to selected member.