Preview Mode for Subscriptions
Preview mode enables you to better control which listings your contacts receive in subscription emails. You can preview the listings that meet the search criteria for a subscription and select which ones to send to the contact. Only the listings you approve will be included in subscription emails and be shown in the contact's news feed.
Click Subscriptions under Contacts on the menu.
Click on the subscription that you want to modify.
On the Edit Subscription page, click the Enable Preview Mode check box.
Click Save at the bottom of the page.
Click Subscriptions under Contacts on the menu. In the Preview column, "On" is displayed for subscriptions that have preview mode enabled.
Click on the subscription that you want to modify.
On the Edit Subscription page, clear the Enable Preview Mode check box.
Click Save at the bottom of the page.
When preview mode is turned on for a subscription, you will receive emails when you have listings to approve.
Click the link in the email to begin the approval process. A search results page will open where you can work on behalf of the contact.
Click the Approve button for each listing that you want to send to your contact and add to their news feed.
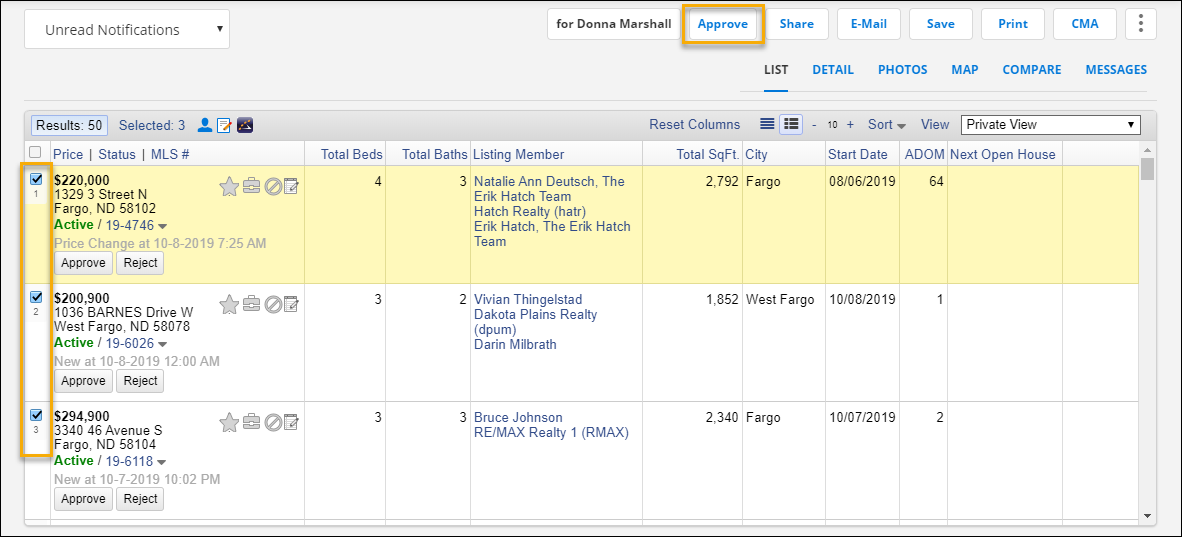
To approve multiple listings at once, select the checkboxes for the listings, then click Approve at the top of the page.
After you click Approve, a confirmation message will be displayed.
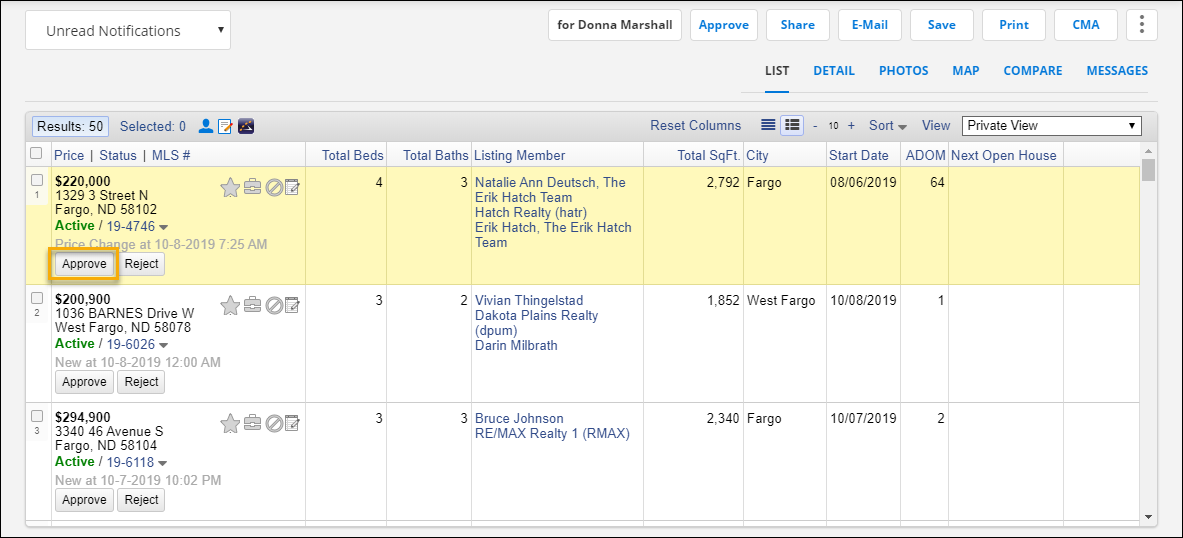
If you have decided that a listing will not interest your client, you can click the Reject button to hide the listing from future previews. The Hide Listing icon (red circle with a slash) will be selected, and the listing will move to the Hidden by Agent listing collection for the contact.
Approved listings will be sent to your contact via email and will appear in their news feed. Listings need to be approved only once. If changes are made to an approved listing, you will not need to approve it again.
You can use the Listings to Approve column on the Contact Management page to quickly see whether a contact has listings that need to be approved.
Click Contact Management under Contacts on the menu. If there are unapproved listings for a contact, the Listings to Approve column will show a number.
To view the unapproved listings, click on the contact to open their details.
In the lower right corner of the details page, click the number next to Listings to Approve. A search results page will open where you can work on behalf of the contact.
Click the Approve button for each listing that you want to send to your contact and add to their news feed.
To approve multiple listings at once, select the checkboxes for the listings, then click Approve at the top of the page.
After you click Approve, a confirmation message will be displayed.
If you have decided that a listing will not interest your client, you can click the Reject button to hide the listing from future previews. The Hide Listing icon (red circle with a slash) will be selected, and the listing will move to the Hidden by Agent listing collection for the contact.
Approved listings will be sent to your contact via email and will appear in their news feed. Listings need to be approved only once. If changes are made to an approved listing, you will not need to approve it again.
If the Listings to Approve column is not displayed on the Contact Management page, you can add it using the following procedure.
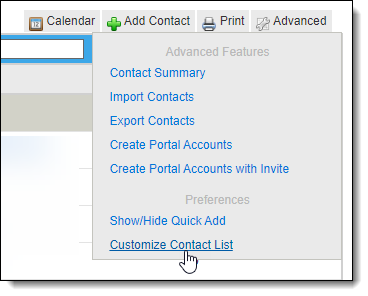
On the Contact Management page, click the Advanced button, then click Customize Contact List.
Click the Subscription Listings to Approve label to add the column to your view.
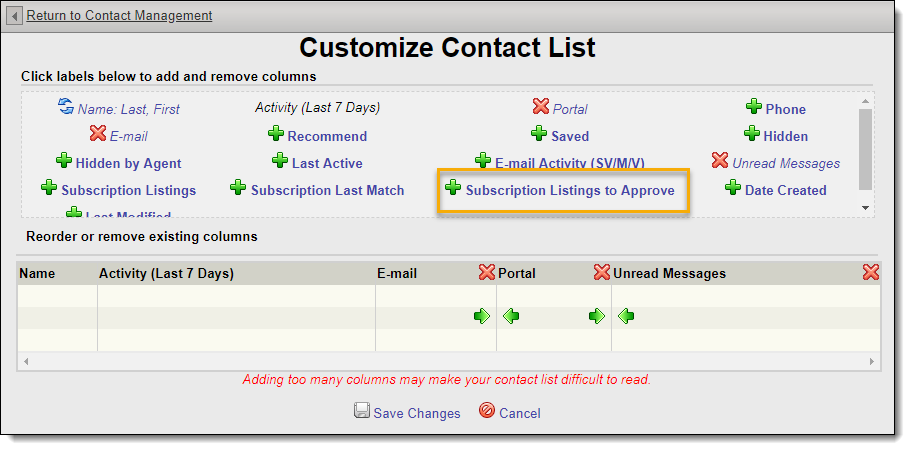
Click Save Changes at the bottom of the page.