Subscriptions
To manage subscription emails, click Subscriptions under Contacts on the menu. Subscriptions send emails to your contacts automatically when listings are added to Flexmls or when existing listings are changed. Subscriptions can be sent monthly, weekly, daily, or as soon as a listing is created.
Tip
The following Guided Help tours are available for this function in Flexmls. When you click on a link, an instance of Flexmls will open in a new browser tab and instruction bubbles will guide you through the process.
Use the following options on the Subscriptions page to change the display of information or view additional details:
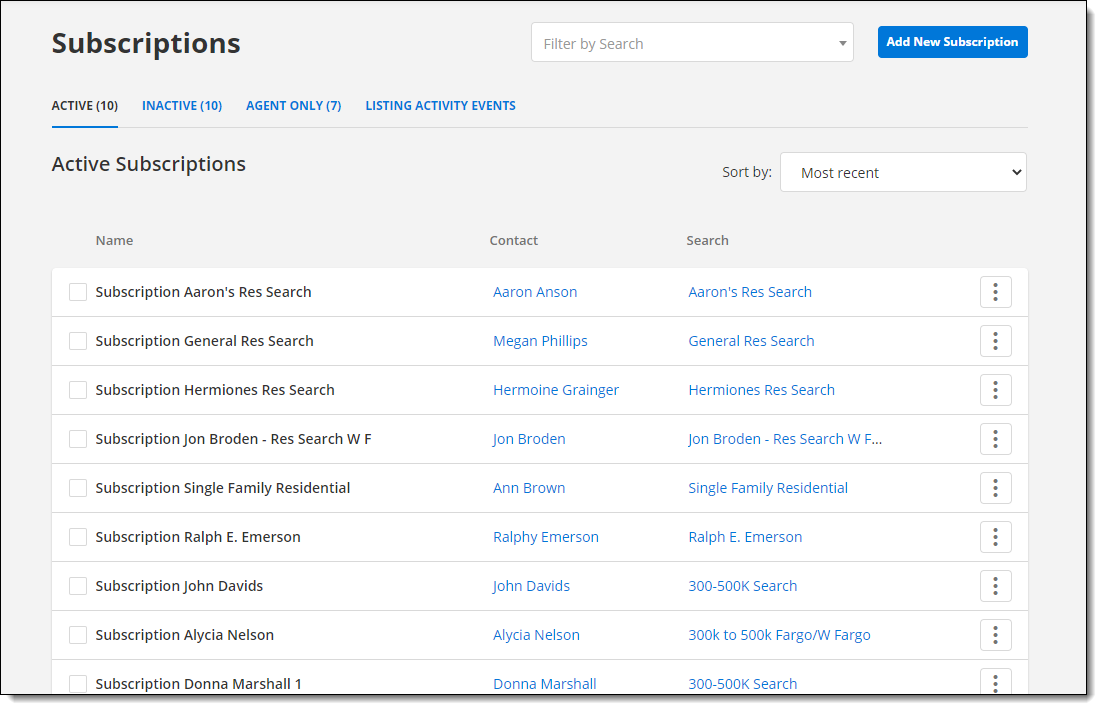
Tabs - By default, your currently active subscriptions are displayed on the Subscriptions page. To view Inactive or Agent Only subscriptions, or to view listing activity, click one of the tabs at the top of the page.
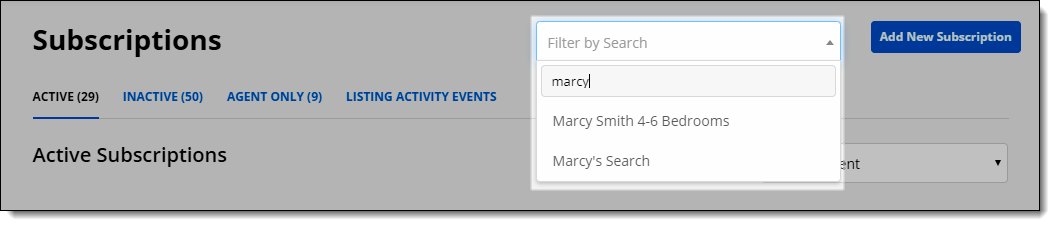
Filter by Search - Find all subscriptions on the currently selected tab that use a particular saved search. Start typing the name of the saved search in the text box, then click on the search name to view the associated subscriptions.
Sort by - Click the Sort by drop-down list in the upper right corner to change the sorting method. You can sort by most recent, least recent, or subscription name.
To tailor a subscription to the needs of a particular client, start with a search. You can use one of the following methods:
Perform a Quick Search to find listings that are relevant to the client. For more information, see Quick Search. When you have found the right listings, save the search. When you save a new search, you can associate it with a contact. For more information, see Save a search.
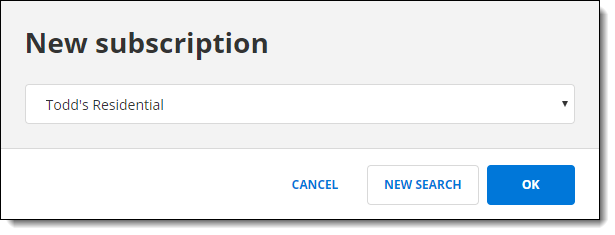
If you have already saved a search, go to the Subscriptions page and click Add New Subscription. Choose the saved search that you want to use to set up a subscription email and click OK.
After you select a search, the Edit Subscription page is displayed. First, enter a name for the subscription. We recommend using the name of the client, a description of the search, or both.
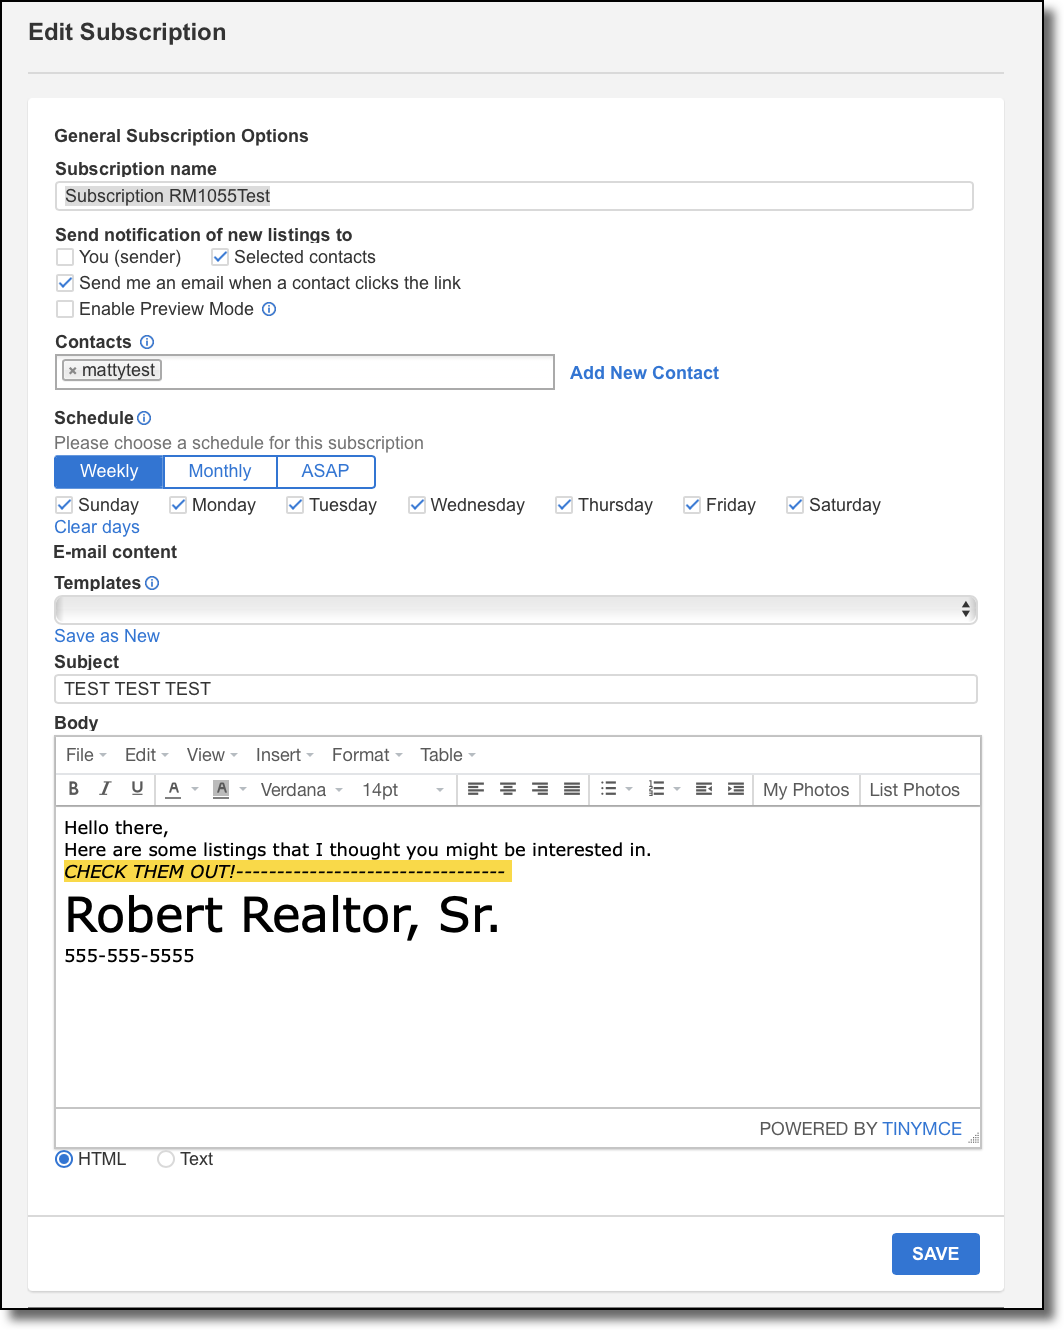
Select to send notifications to the selected contacts, yourself, or both. To receive an email notification when a recipient clicks a link in a subscription email, select Send me an email when a contact clicks the link. Your selections will be saved as the default for future subscriptions.
Click Enable Preview Mode if you want new listings sent to you first, so you can decide which ones to send to your contacts. When Preview Mode is off, all new listings that match the search criteria will be sent to the recipients you select with no preapproval process. For more information, see Preview Mode for Subscriptions.
Enter the names of the contacts that the email will be sent to. If needed, you can add a new contact’s name and email address from this page by clicking Add New Contact. If you select multiple contacts, they will automatically be treated as a blind copy, so recipients will not be able to see that the email is being sent to other contacts.
Note
To keep the subscription email feature running as smoothly and efficiently as possible, there is a limit of 200 recipients.
Specify a schedule for the subscription email event. Select the days of the week or month the email will be sent. You can also choose ASAP, which will send notifications within minutes of when listings are added or changed.
If you use the classic version of the portal, you can choose which interactive view of the search results that you want the client to see. A view is a set of columns that you can customize. The columns for the selected view are listed in the View to send section of the page. For more information about views, see My Views.
Enter the content of the email message that contacts will receive. Because this message will be included each time the subscription email is sent, we recommend that you make it generic.
The message you enter can be saved as a template for later use. You can set a default message template, replace or rename an existing template, or delete a template by clicking the appropriate button under the Templates field.
Click Save to save the subscription.
If a contact's email address is not opted-ed yet, an opt-in email is immediately sent to the address. If the Contact's email address is already opted-in, no additional opt-in email is sent. The contact must click the link in the email to confirm that their email address is valid and that they want to receive listings via subscription. Until they opt in, they will not receive listing emails. For more information, see Opt-In Status Report.
Edit Subscription Details
To edit a subscription, click on a subscription name or click the More (three dots) button, then click Edit subscription. You can make changes to that subscription's options, recipients, scheduling, and content. For more information about subscription options, see Set up a Subscription.

Note
Your selections will be saved as the default for future subscriptions only when creating a new subscription. When editing an existing subscriptions, your selections will not be saved as the default.
To view the existing subscriptions for a contact, use the Searches/Subscriptions tab of the Contact Details page. For more information, see Searches/Subscriptions Tab.
Edit Search Details
To view current results for the search that is associated with a subscription, click on the search name to open the search results page. To make changes to search criteria, click the Edit Search tab. When you are finished making changes, click Save > Save Search. For more information about saving searches, see Save a Search.
To quickly remove agent notifications from subscriptions, click the checkboxes next to the subscriptions, then use the buttons at the top of the page. You can remove the following types of notifications:
Remove Agent Notification – Stop receiving an agent copy of each email that is sent via the subscription.
Remove Contact Click Notification – Stop receiving a notification email when the contact clicks a link in a subscription email.
Click a contact name to view options for working with the contact.

Click View contact details to open Contact Management with the contact selected. For more information about contacts, see Contact Details.
Click Remove from subscription to stop sending emails to this contact for the subscription.
Under Contact Management, you can deactivate a contact to suspend subscription emails. If you deactivate a contact, the subscription settings are preserved in case you want to reactivate the contact and subscription. For more information, see Deactivate or Remove a Contact.
To discontinue an individual subscription email event, click the More (three dots) button, then click Delete subscription. Click Yes, I'm Sure to confirm that you want to delete the subscription.
To delete multiple subscriptions at once, click the checkboxes next to the subscriptions that you want to delete, then click the Delete button at the top of the page. Click Yes, I'm sure to confirm that you want to delete the subscriptions, then click Delete Selected.