Create or Edit a View
When you perform a search in Flexmls, the search results are displayed on the List tab using a view. A view is a group of columns of information. Set up views to display just the information that is useful to you. For example, when looking at Closed listings, you may want to include columns for Sold Date, Sold Price, Days on Market, and Selling Agent. When looking at Active Listings, columns like List Price, Bedrooms, and Bathrooms may be more relevant.
The MLS can set up default views that are inherited by all members. Inherited views cannot be changed or removed. If needed, you can create your own view from scratch or you can save a modified version of an inherited view.
Tip
The following Guided Help tours are available for this function in Flexmls. When you click on a link, an instance of Flexmls will open in a new browser tab and instruction bubbles will guide you through the process.
Create a New View
You can begin this procedure from a search results page or from the My Views page.
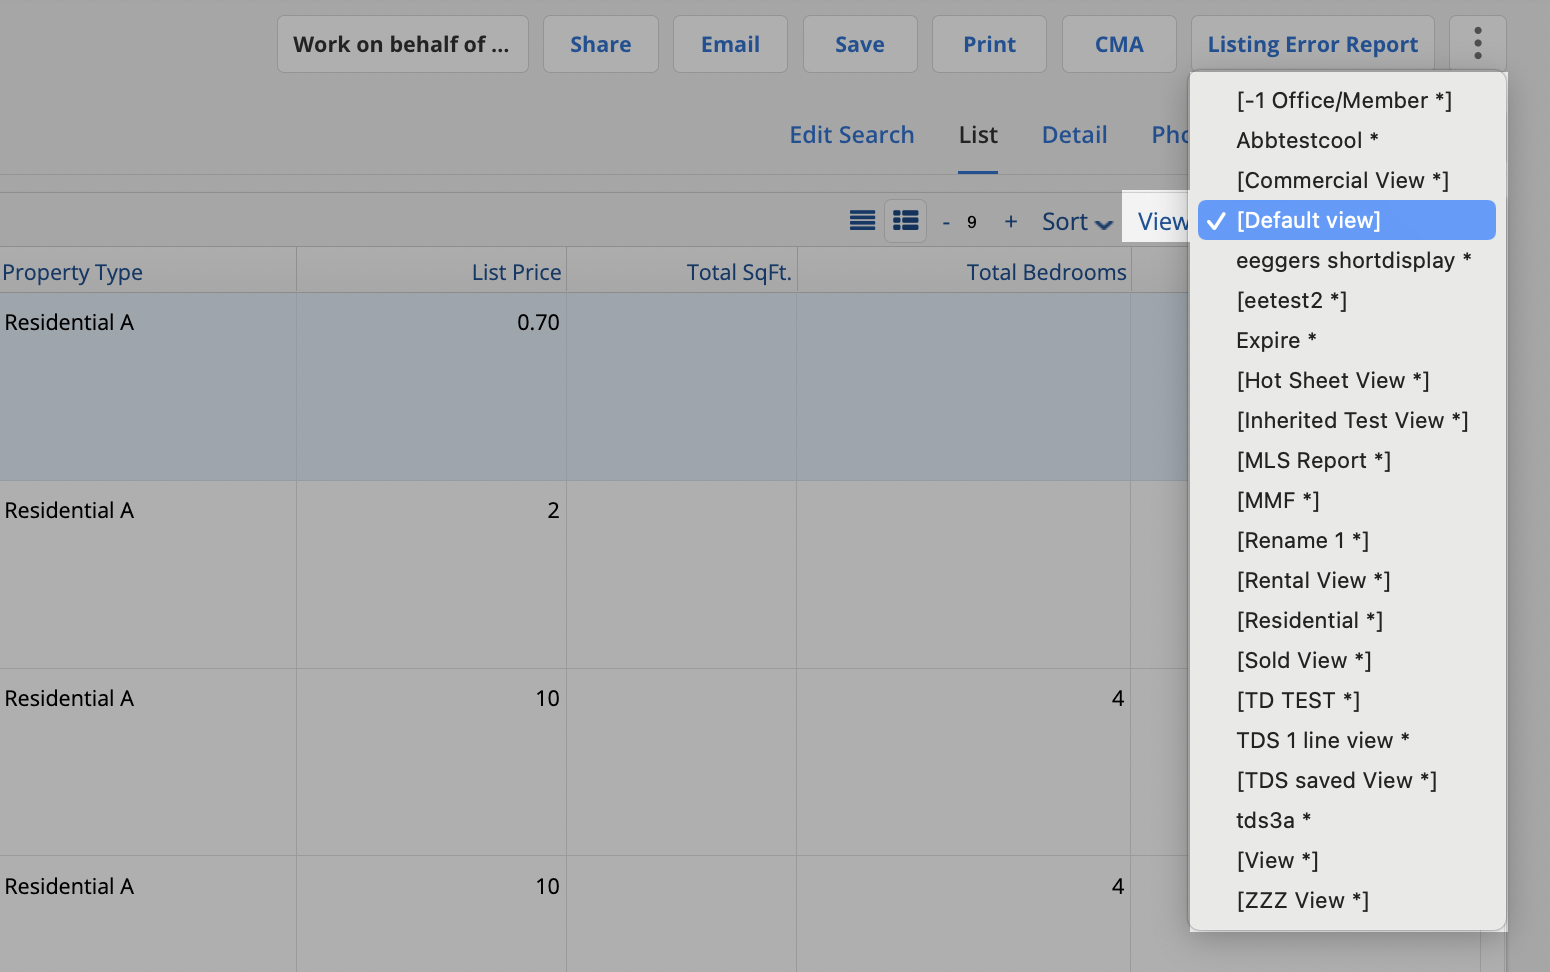
From the List tab of a search results page, click the View drop-down list and select the view that you want to modify. Then click the View link next to the view name. If you selected an inherited view, a personal copy will be created.
From the My Views page, click New to create a view. To change an existing view, select the view and click Edit.
Enter information on the General tab.
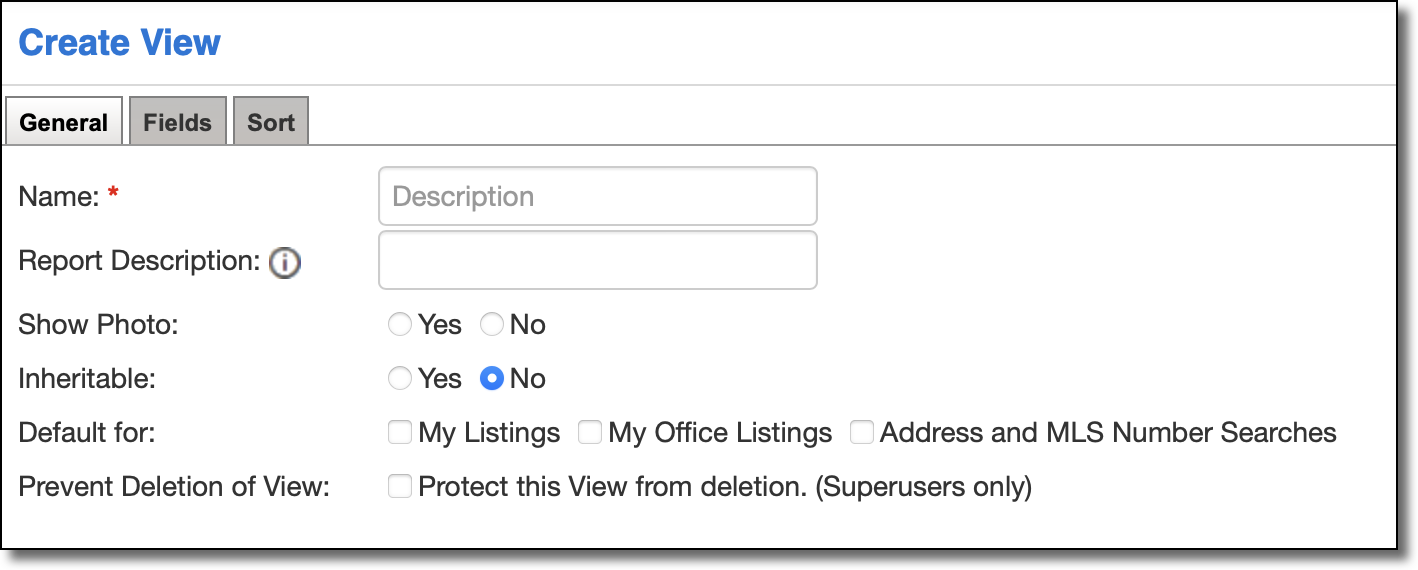
In the Name field, type a name for the view. We recommend choosing a name that will be easy to identify.
Use the Report Description field to enter a description for the view that will be displayed in the printer-friendly version of search results.
Click the Show Photo option to display a thumbnail photo for each of your listing results, when available.
Depending on your permission level, you may be able to make the view inheritable, which means that all logins below your access level can use it. For example, the office login can set up an inheritable view that all the agents in the office can use.
Check the boxes to indicate which listing searches will use the view by default. You can use the view for search results on the My Listings page, the My Office Listings page, the Address Search page, or the MLS # Search page.
On the Fields tab, select the information that will be shown in the view. Available fields are listed on the left and selected fields are listed on the right. Fields are listed based on the property type selected at the top of the tab. Hover over a field name in either the Available Fields list or the Selected Fields list to see how that field is used for all property types.
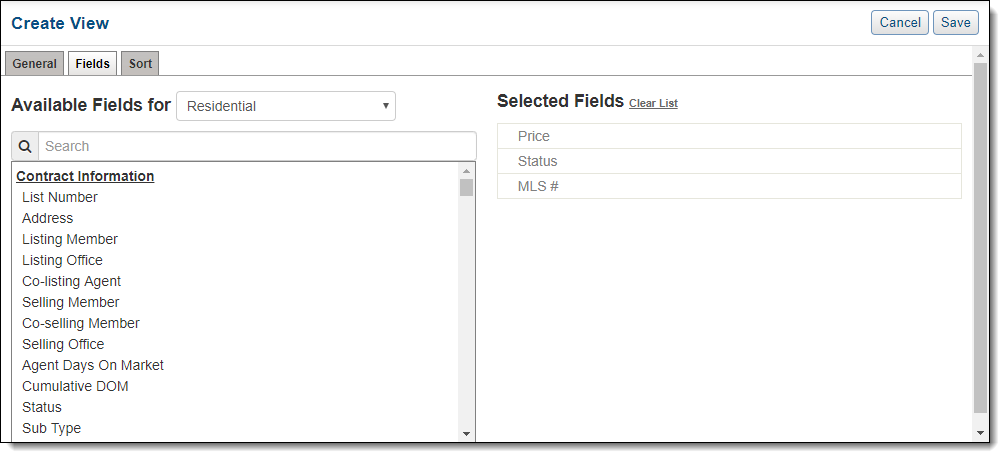
The Available Fields list contains main and detail fields that are available for the selected property type, arranged under Group headings. Select which columns of information to display in the view. You can begin typing in the Search box to narrow the list. Click on a field to move it to the Selected Fields list.
The Selected Fields list displays fields that will be included in the view. Price, Status, and MLS # are included automatically in all views and cannot be removed. Use the Selected Fields pane to organize the selected columns in the view. To reorder the fields, click on a field name to drag and drop it into position. To remove a field from a view, click the X to the right of the field name.
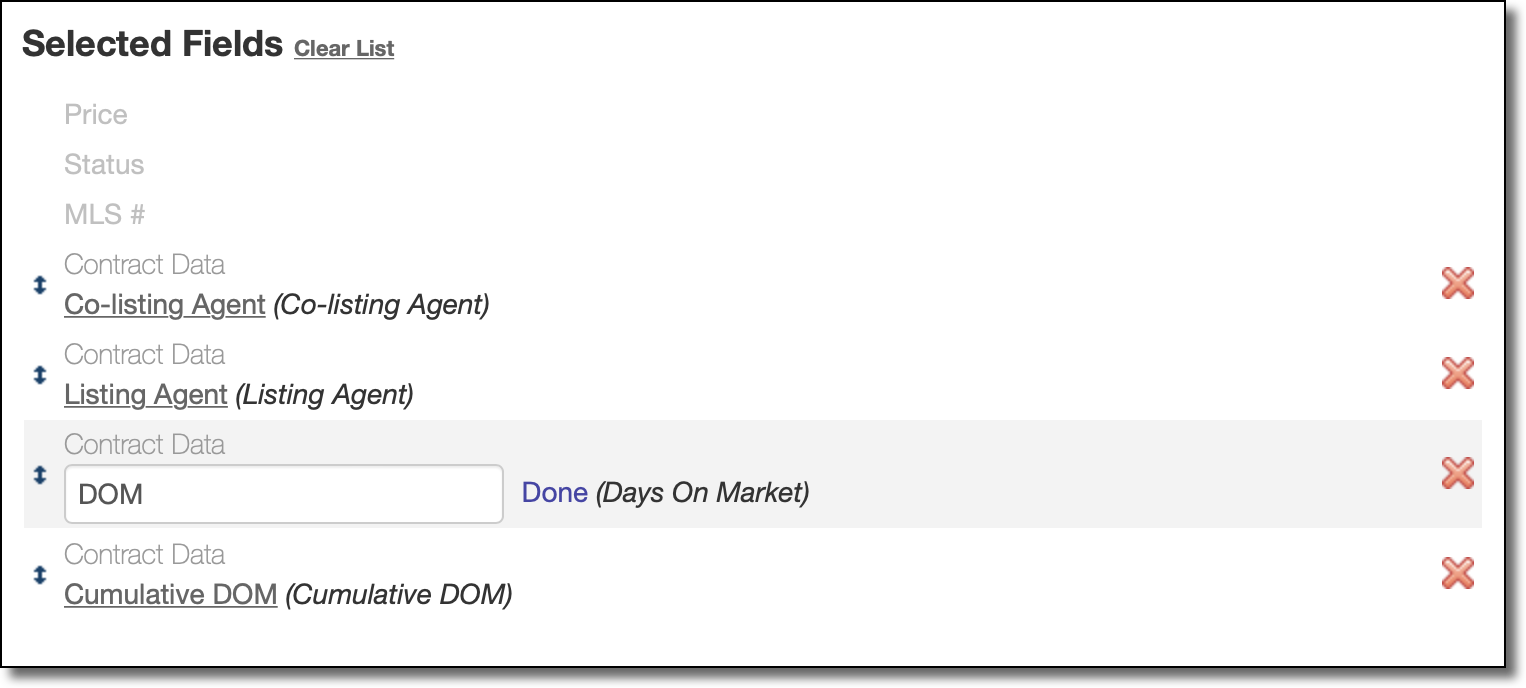
You can edit column names to conserve space. For example, “Days On Market” could be abbreviated to “DOM.” To edit a field name, click on it. A text box will open, where you can edit the name. Click Done to save the new name for the field. The full/original field name appears in parentheses for your reference.
On the Sort tab, specify how search results will be sorted. By default, Column Order is selected, which means that the information will sort according to the fields you have chosen, in the same order that they are displayed.
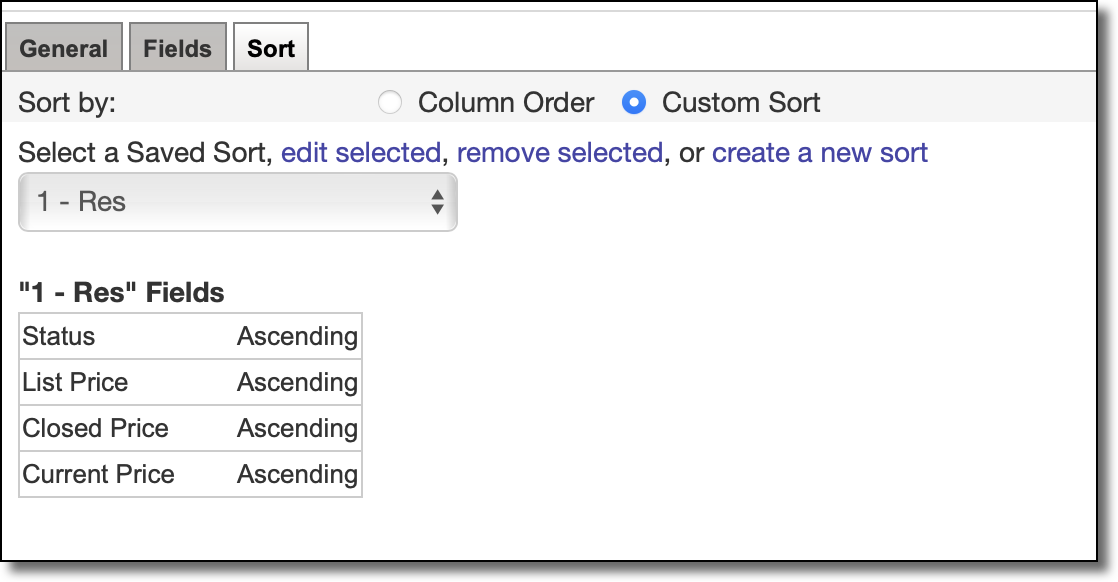
To sort in a different order or by fields that are not shown in the view, select Custom Sort . Select a saved sort or create a new saved sort. For more information, see Create or Edit a Saved Sort.
Click Save to save the view. The My Views page will be displayed, and the new view will be included in the list.
Apply a View to a Saved Search
When reviewing search results on the List tab, you can select a different view by clicking the View drop-down list. Changing views will refresh the page and display the results using the columns from the view.
To permanently use that view with the saved search, click Save.
Apply a View to a Quick Search Template
Each Quick Search template (for example, Residential) has a default view that controls which columns are displayed on the List tab of search results. To display a different set of columns, select a different view from the View menu. Quick Search will automatically remember the last view that you used with a template (either personal or inherited). The next time you begin a Quick Search with that template, your selected view is used.