My Quick Searches
Click My Quick Searches under Preferences to open the My Quick Searches Preferences page, where you can view and create Quick Search templates.
A Quick Search template contains a few fields of information with which to start a search. For example, a template to search for vacant land may include fields such as Status, List Price, Area, Lot Acres or Lot Size, and Zoning.
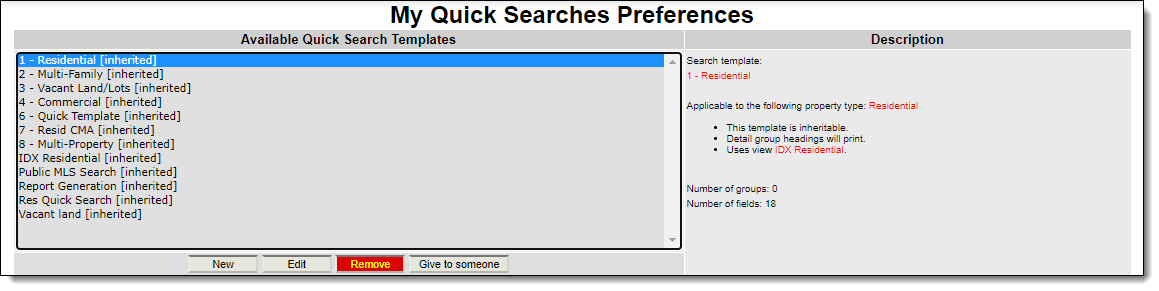
Your current templates (both inherited and customized) are displayed in the Available Quick Search Templates list. When you select a template from the list, the Description column displays information about the template.
Tip
The following Guided Help tours are available for this function in Flexmls. When you click on a link, an instance of Flexmls will open in a new browser tab and instruction bubbles will guide you through the process.
Use this procedure to create a new Quick Search template that is not based on an existing template.
Click New to open the New Quick Search Template page.
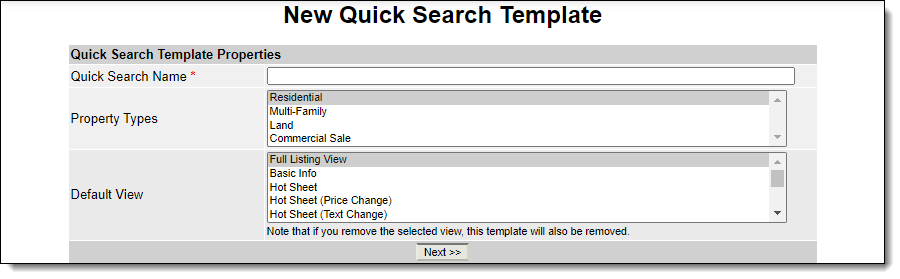
Enter a name for the template so that you can easily identify it later.
Select the property types that the template applies to. (Hold down the Ctrl/Cmd key to select multiple items in the list.)
Depending on your permission level, you may be able to make the template inheritable, which means that all logins below your access level can use it. For example, the office login can set up an inheritable template that all the agents in the office can use.
Select the default view to associate with this template. The view determines the columns of information that are displayed on search results pages. Click Next to continue.
To add fields to the template, select them from the Available Fields list and click Add. Selected fields are listed in the right column. To reorder the fields, select a field and click Move Up or Move Down.
Note
It is important to include the Status field in every Quick Search template. If you do not include the Status field, you will not be able to specify a status or a date range when using the template to conduct a search.
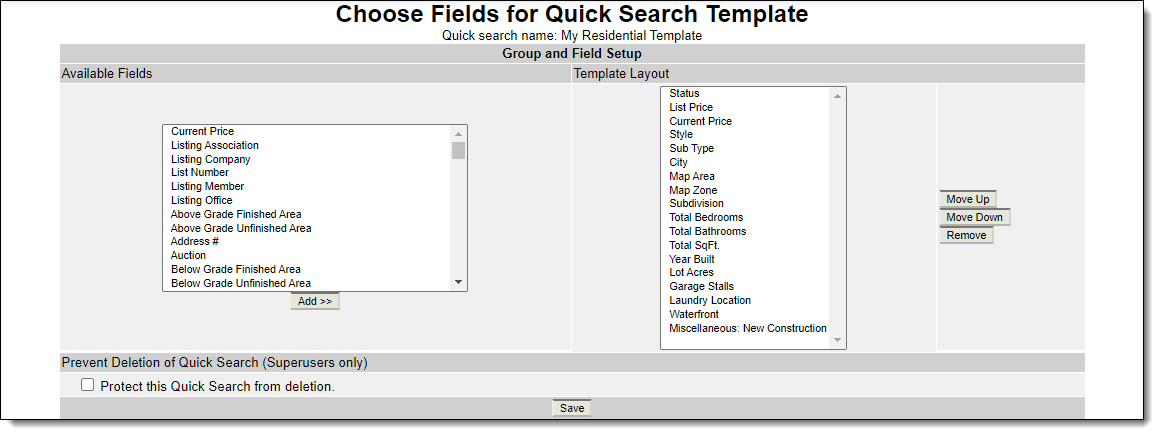
Click Save to save the Quick Search template. Once Quick Search templates have been set up, you can use them by clicking Quick Search on the menu or by typing the name of the template in the Quick Launch bar.
This procedure describes how to use the My Quick Searches page to customize an inherited Quick Search template. You can also modify a template while you are using Quick Search. For more information, see Customize an Inherited Quick Search Template.
Select an inherited template and click Edit to open the Create Template from 'Template' page. The inherited template's properties are selected by default.
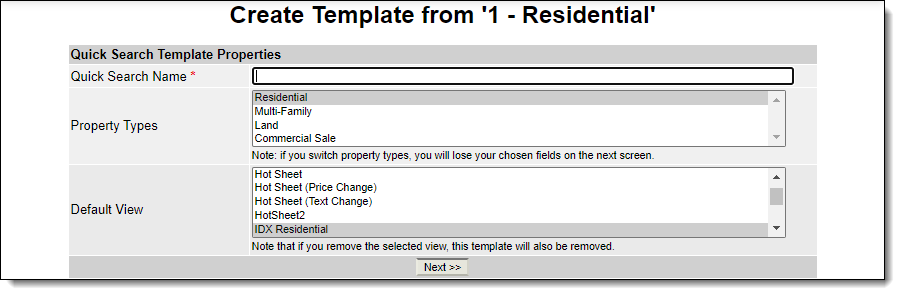
Enter a name for the template so that you can easily identify it later.
The property types from the inherited template are selected by default. Change the property type selections, if needed. (Hold down the Ctrl/Cmd key to select multiple items in the list.)
Depending on your permission level, you may be able to make the template inheritable, which means that all logins below your access level can use it. For example, the office login can set up an inheritable template that all the agents in the office can use.
Select the default view to associate with this template. The view determines the columns of information that are displayed on search results pages. Click Next to continue.
To add fields to the template, select them from the Available Fields list and click Add. Selected fields are listed in the right column. To reorder the fields, select a field and click Move Up or Move Down.
Note
It is important to include the Status field in every Quick Search template. If you do not include the Status field, you will not be able to specify a status or a date range when using the template to conduct a search.
Click Save to save the Quick Search template. Once Quick Search templates have been set up, you can use them by clicking Quick Search on the menu or by typing the name of the template in the Quick Launch bar.
Select a template and click Give to someone to share a Quick Search template with other users. When you give a Quick Search template to a member or office, it will appear in their list of available templates.
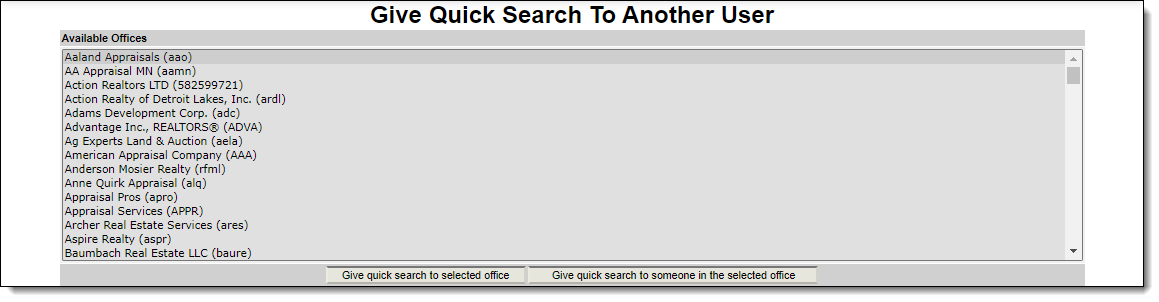
To begin, select an office from the list of available offices. Then select one of the following options.
To share the template with the office-level login, click Give quick search to selected office.
To share the template with individual members in the office, click Give quick search to someone in the selected office. A list of members will be displayed. Select an individual member or hold down the Control key and click to select multiple members. Then click Give quick search to selected member.
You can also use the My Quick Searches page to remove a Quick Search template. You can remove only the templates that you have created. You cannot remove the default MLS templates. You also cannot remove a template that is currently used in a saved search.
To delete a template, select it and click Remove. If the template is currently used in saved searches, an error message will be displayed, and you will not be able to delete the template. If the template is not currently used in saved searches, click Next to confirm removal of the Quick Search template.