Transfer a Listing
Use the transfer function, if allowed by your MLS, to transfer listings between agents and offices on the list side. If your MLS allows, you may be able to transfer listings on the buy side. You must sign in to Flexmls Web using the office login information to transfer listings.
Tip
The following Guided Help tours are available for this function in Flexmls. When you click on a link, an instance of Flexmls will open in a new browser tab and instruction bubbles will guide you through the process.
To transfer a listing, click Transfer under Add/Change on the menu.
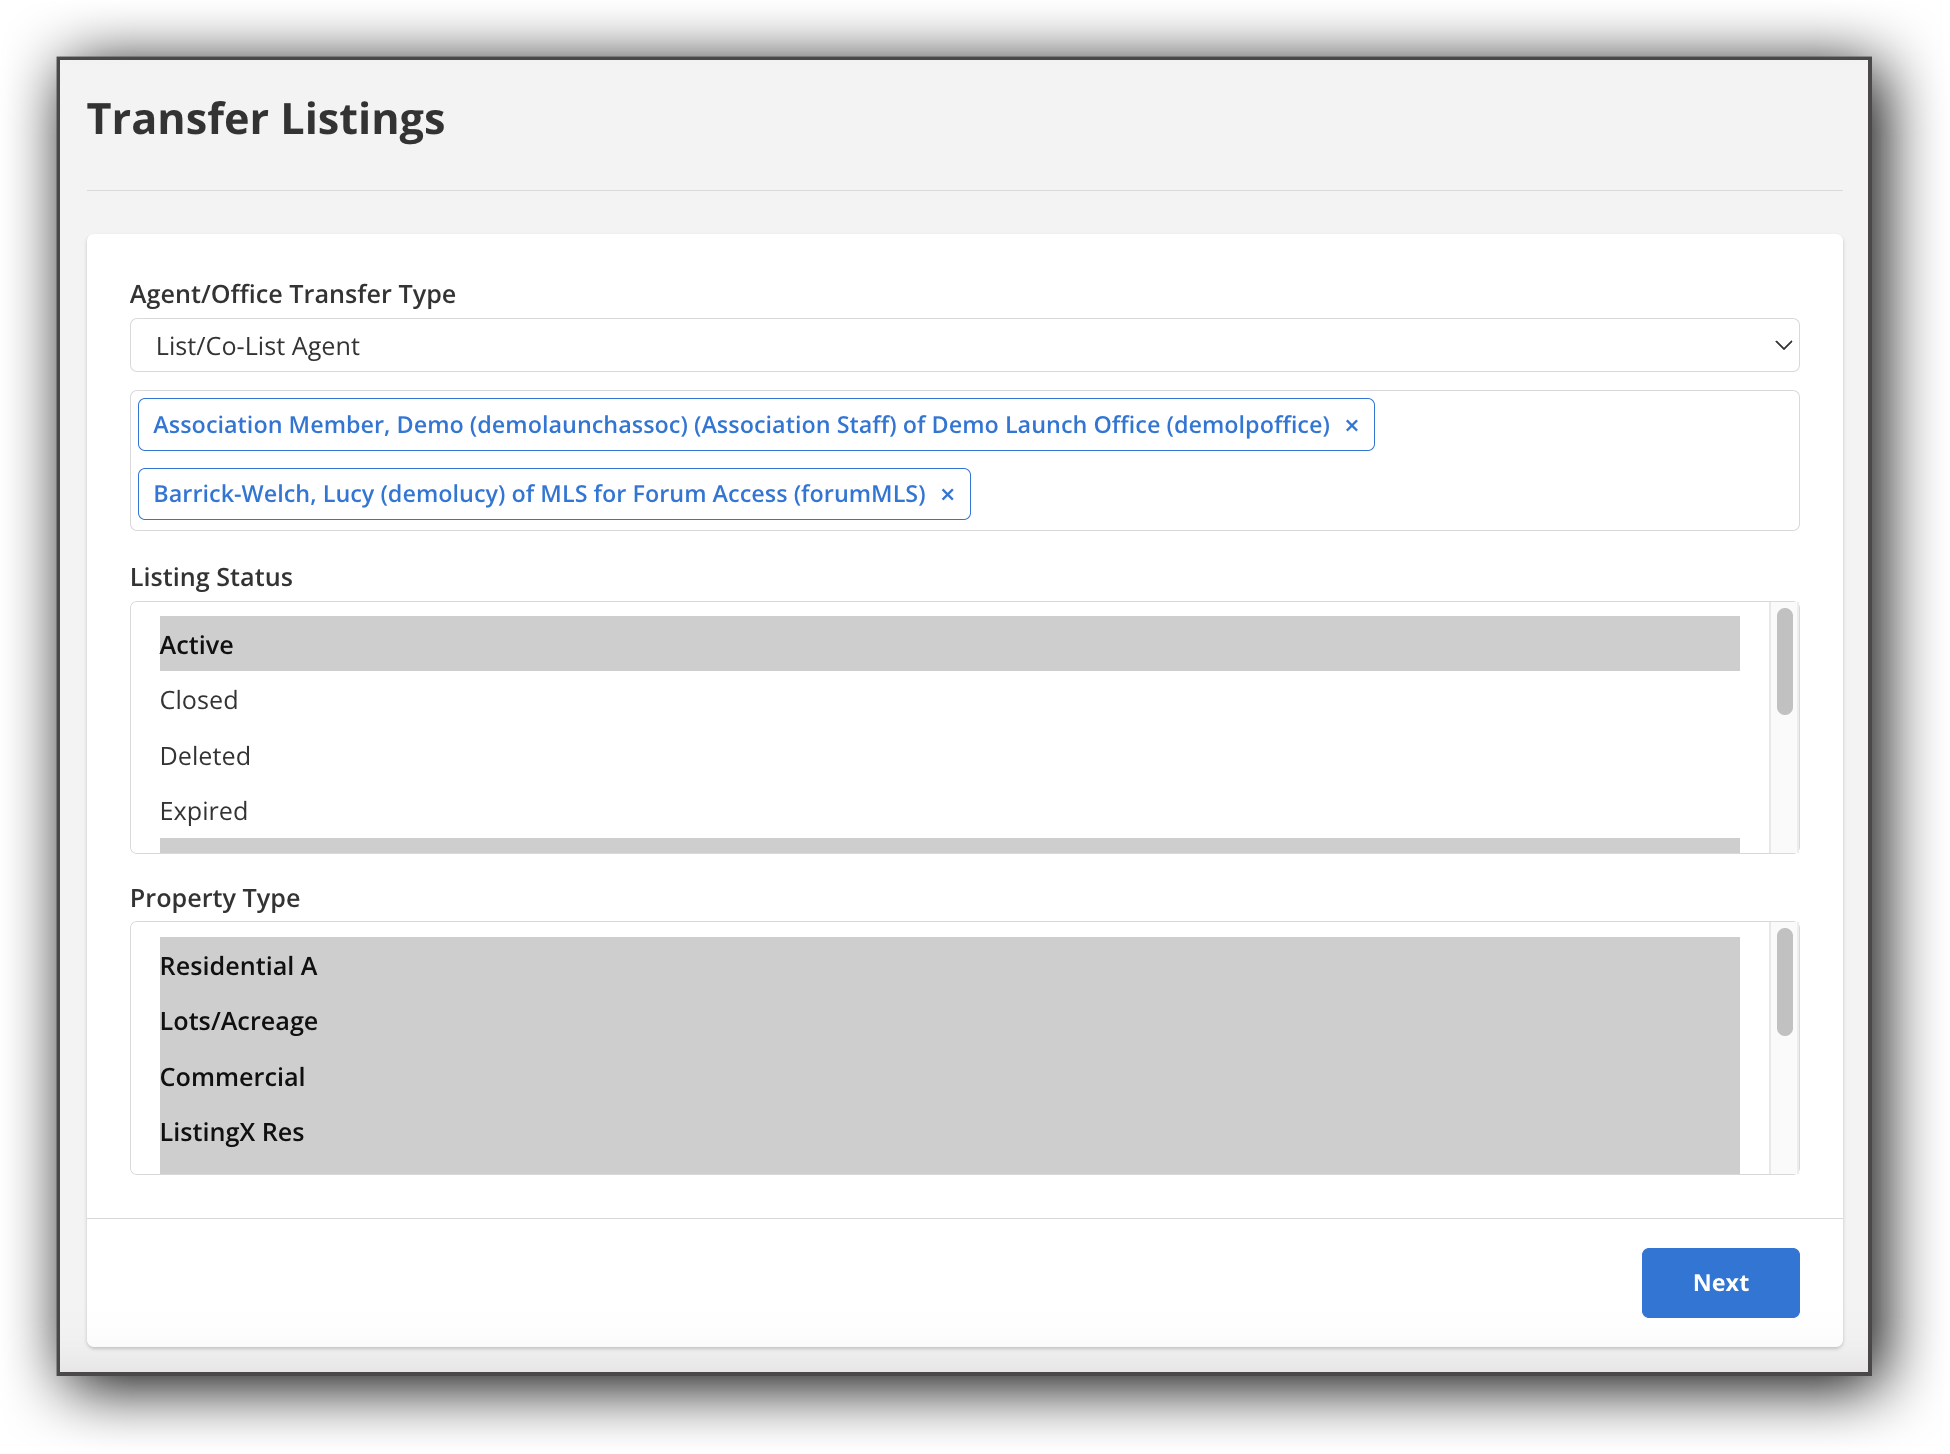
Select the transfer type in the dropdown menu of the Agent/Office Transfer Type field. Select List/Co-List Agent to transfer listings between members. Select the List/Co-List Office option to transfer listings within offices. Depending on your MLS and your account access, you may be able to view and select options to transfer listings on the buy side.
Once you have selected your transfer type, begin typing the name of the agent or office you want to transfer listings to. You can also enter the short ID. If you are transferring listings between agents, you can use the checkboxes to select an unlimited number of agents in the dropdown menu that appears. When you have finished selecting agent names, click Done.
In the Listing Status field, select the listing statuses of the listings you want to transfer. To select multiple listing statuses, hold down the Control key (Command for Mac) and click the statuses you want.
In the Property Type field, choose the property types for the listings you want to transfer. By default, all property types are selected. To deselect a property type, hold down the Control key (Command for Macs) and click on the option to remove highlight.
Click Next to open a search results page with the matching listings based on your selections.
Use the checkboxes on the left side to select the listings you want to transfer, and click the Transfer button at the top of the page.
The listings you selected in the previous page will be transferred to the agents listed in the "To" column. If multiple agents are listed in the "From" column, the destination agent in the "To" column will autofill with the active account for that agent. If you want to change the destination agent, click the dropdown to enter and select a new agent. Review each line and update the destination of the agent's listings, as appropriate. To delete a destination agent, click the X to clear the field and remove that agent's listings from the transfer. When you have finished making your selections and modifications, click Transfer.
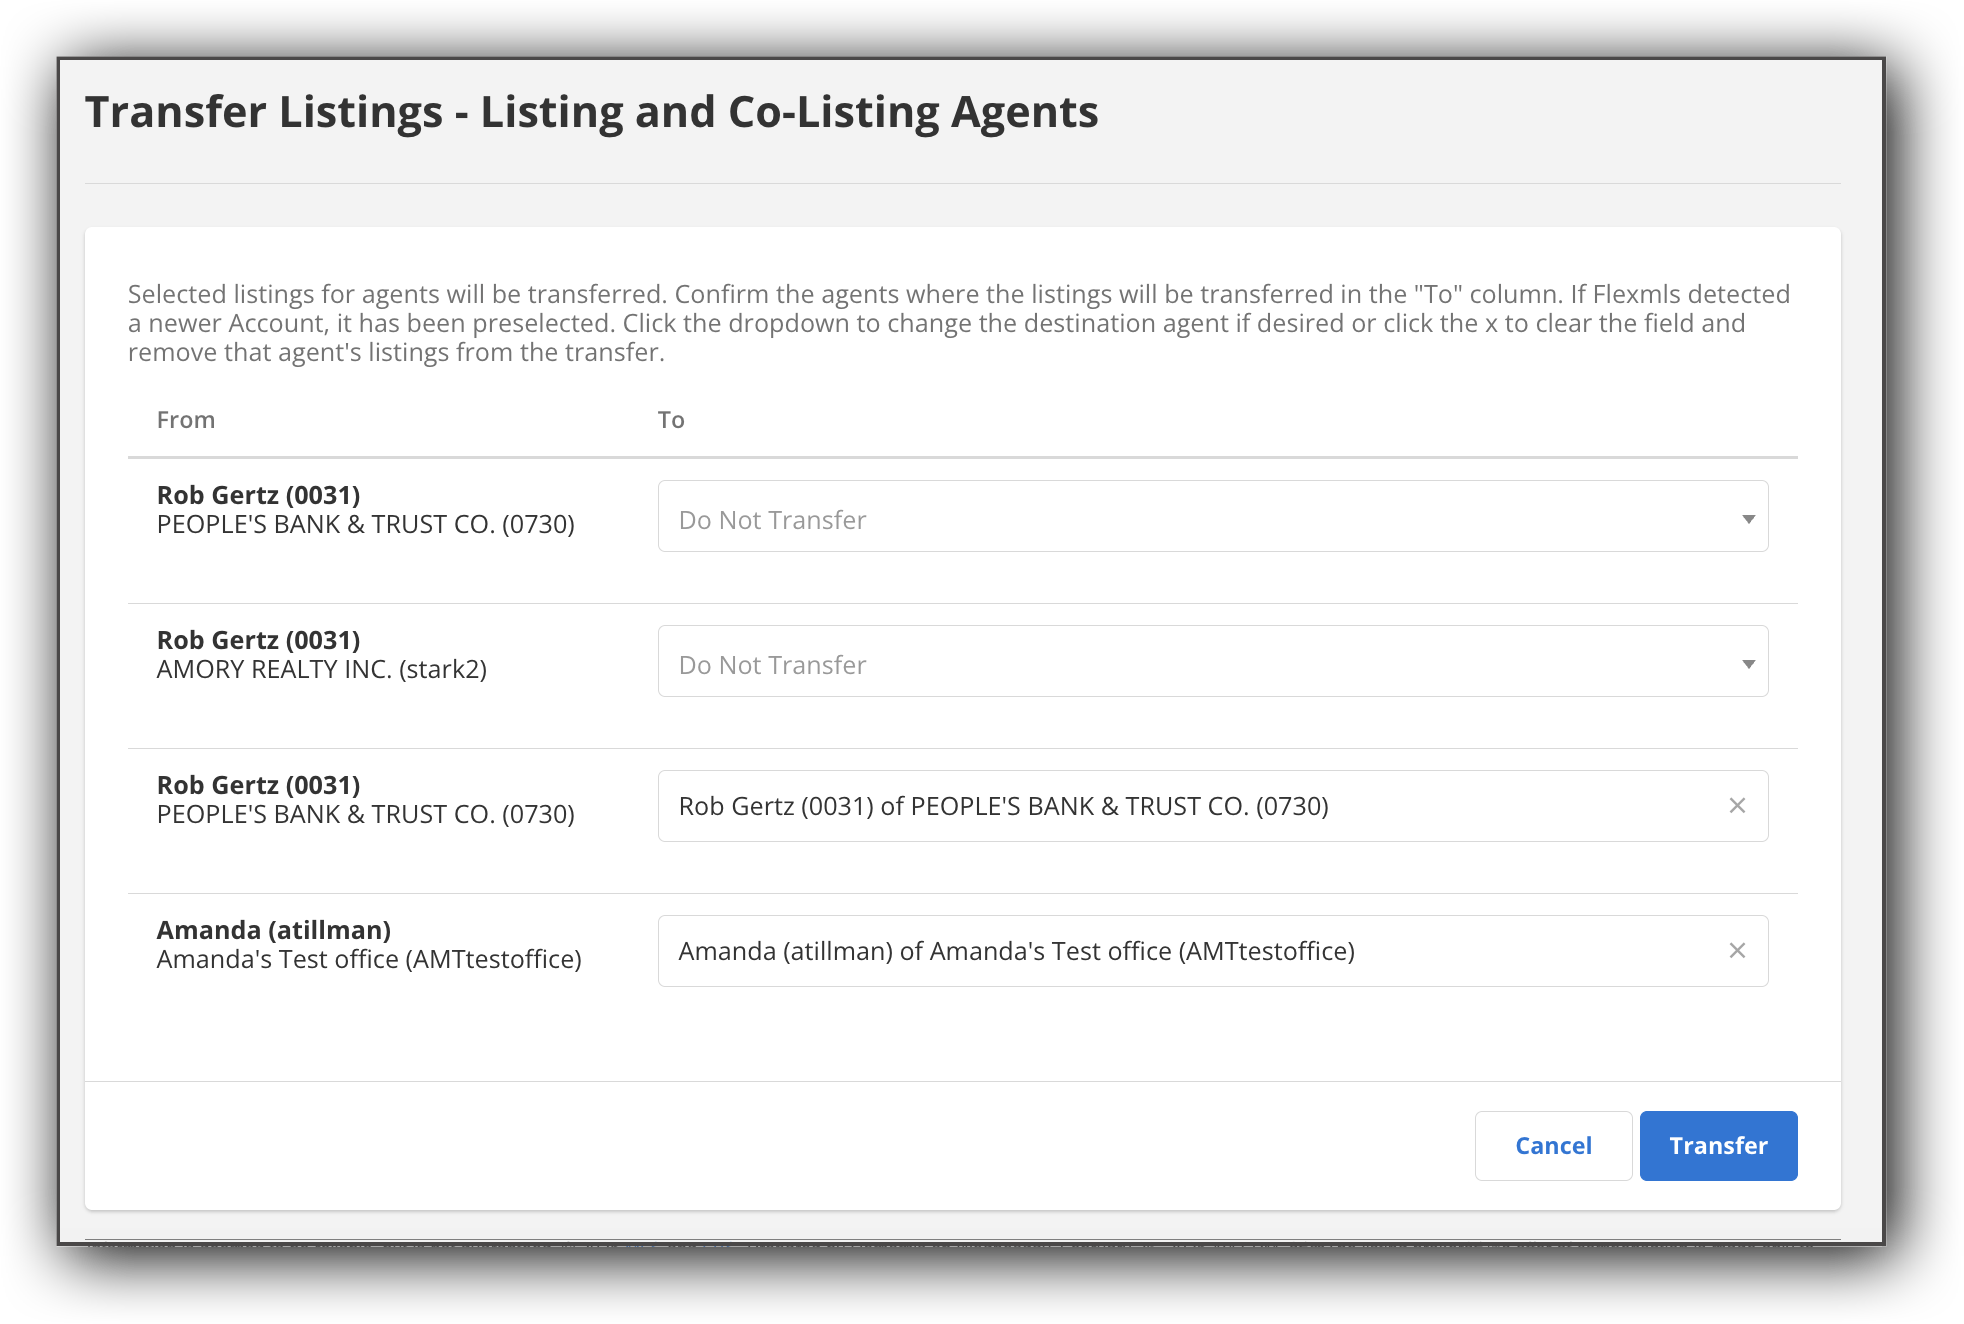
When the transfer is complete, a confirmation message will appear.
