Add or Remove List Items (Main Fields)
To add an item to a list for a main listing field, use the Fields - Main Listings page.
If you are adding items to a list that is related to another list (related scroll), make sure to add the appropriate relationships, as well. For more information, see Related Scroll Fields.
Note
List items can also be accessed through Custom Fields.
Caution
Caution: Depending on your MLS Settings, certain field settings may be read-only to MLS administrators. Changes to those field settings can only be made by FBS Staff. If your MLS has access to make certain field changes such as changing or removing fields, be aware of the potential consequences of changing or removing fields. See Field Changes for more information.
Click Fields - Main Listings under Main Listings on the Admin menu.
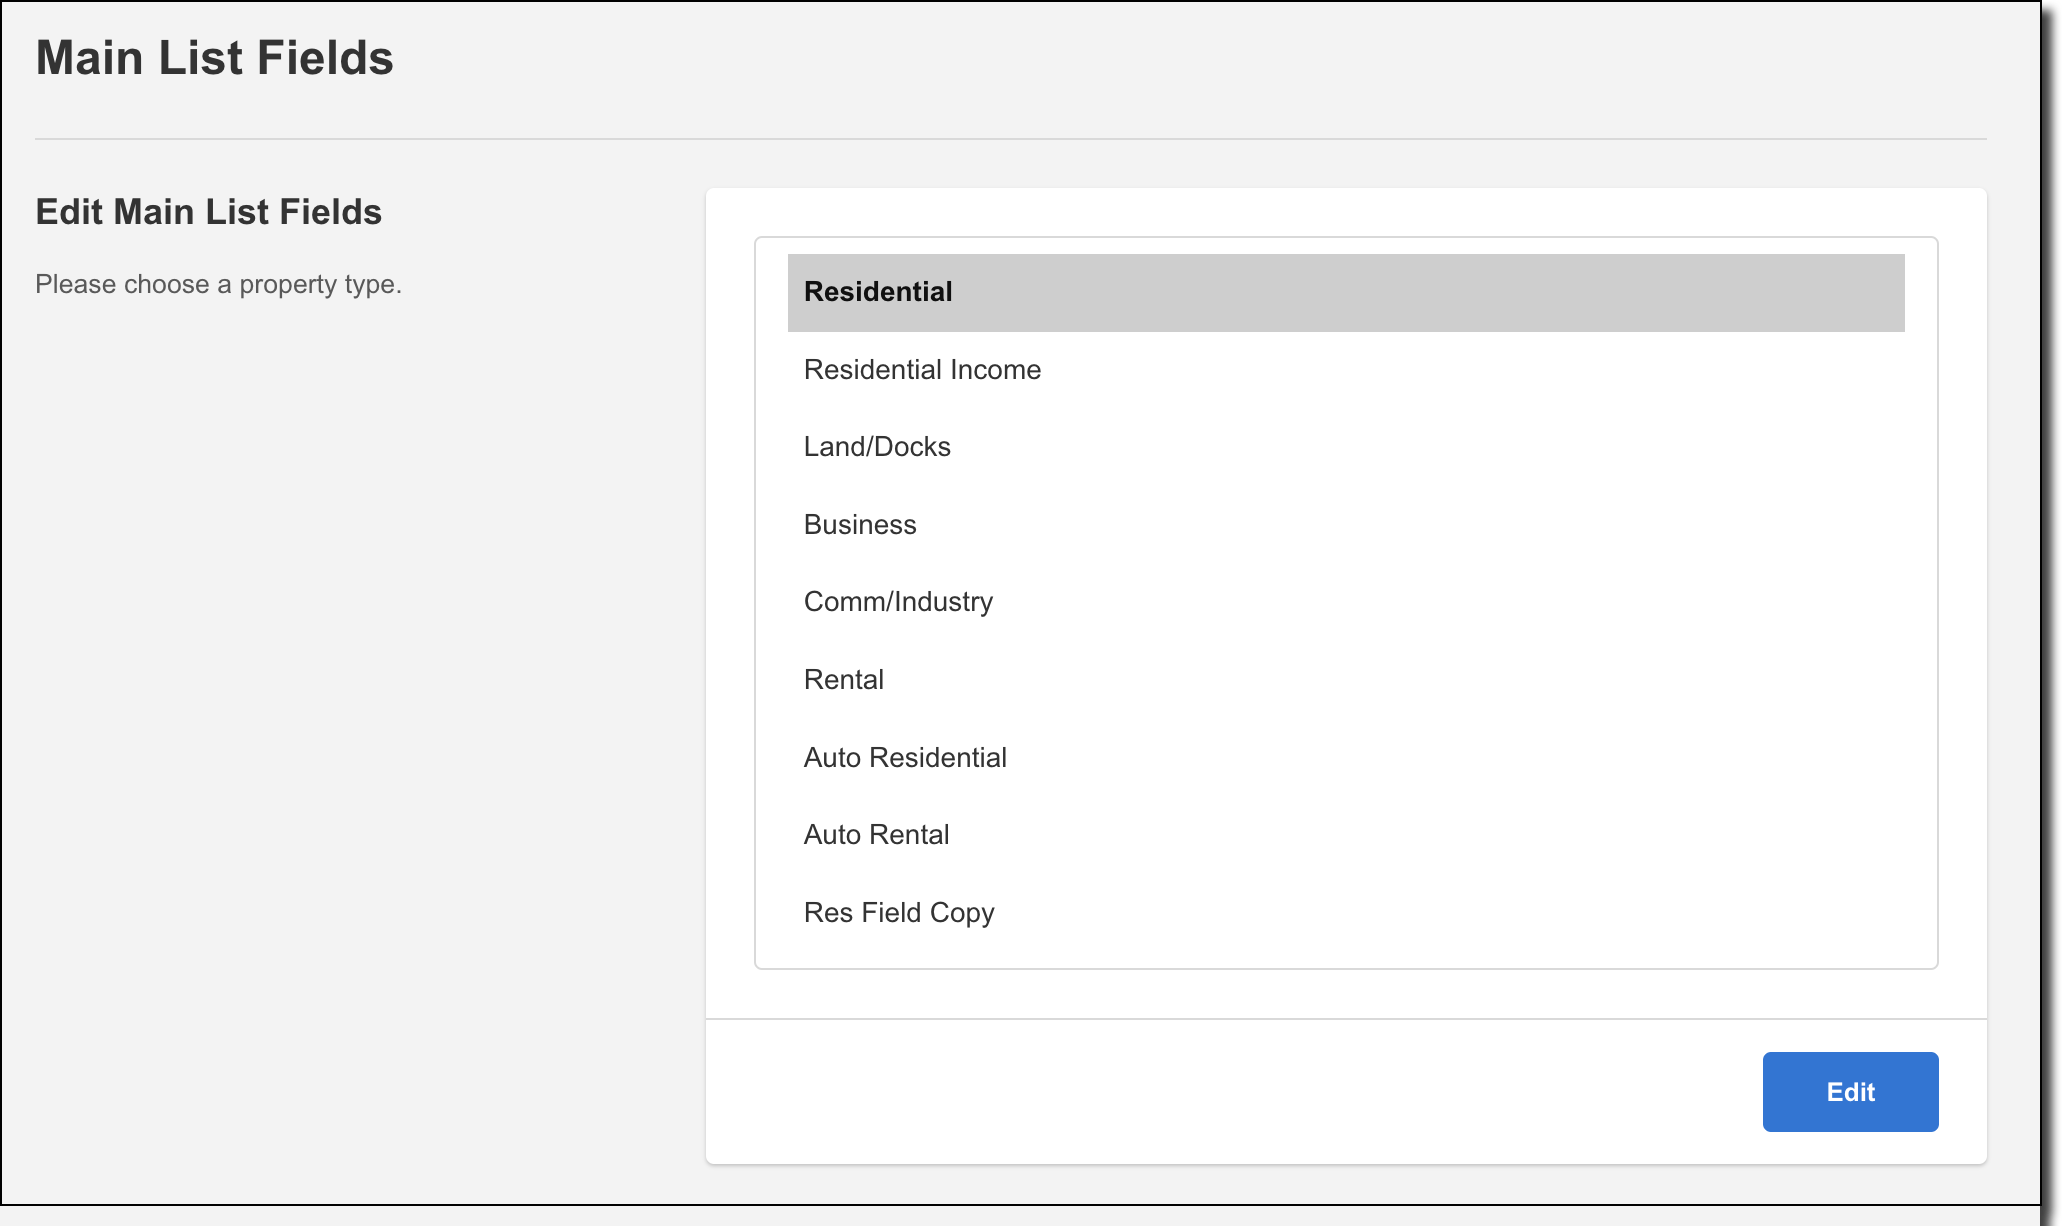
Select a property type and click Next.
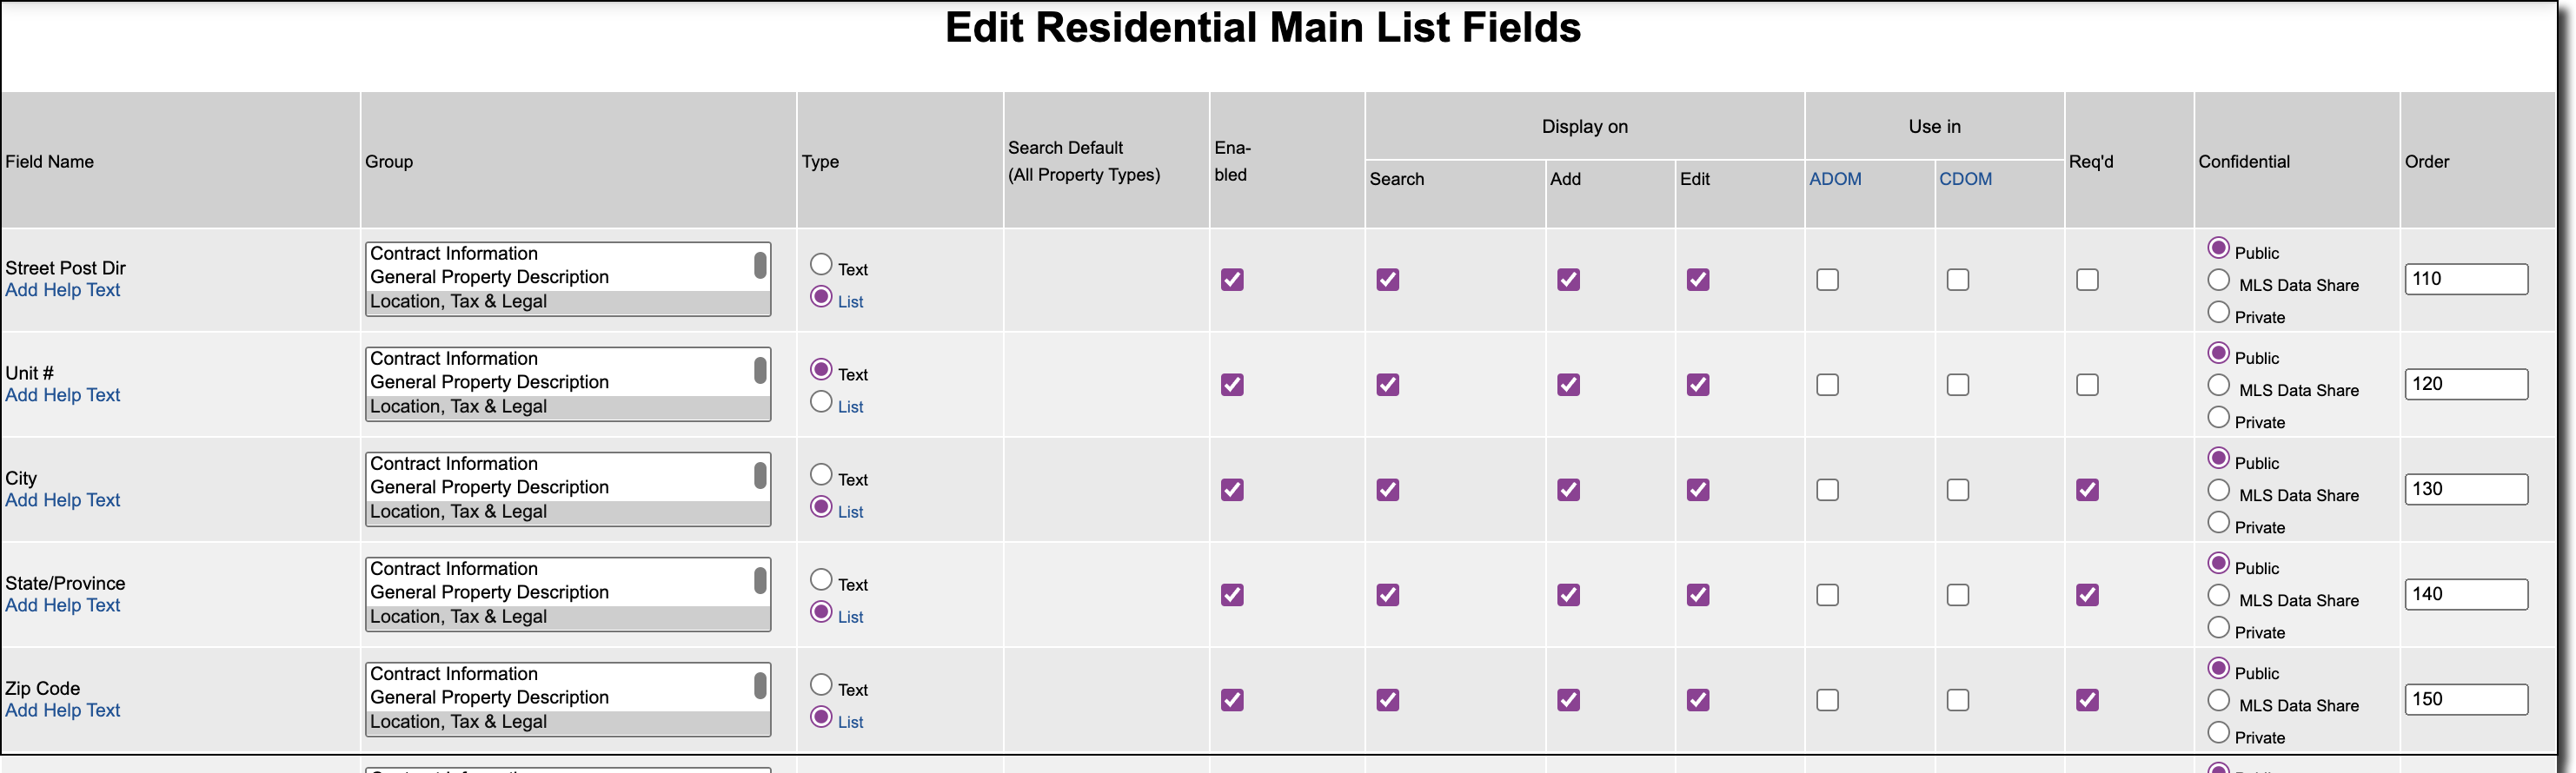
The Type column shows the data type that defines how each field is used. If the field's data type is List, you can click on the word List to edit the available items.
Note
Depending on your MLS settings, some field settings may be read-only and can only be changed by FBS. Contact Customer Success (cpr@flexmls.com) to make field changes to any read-only field settings.
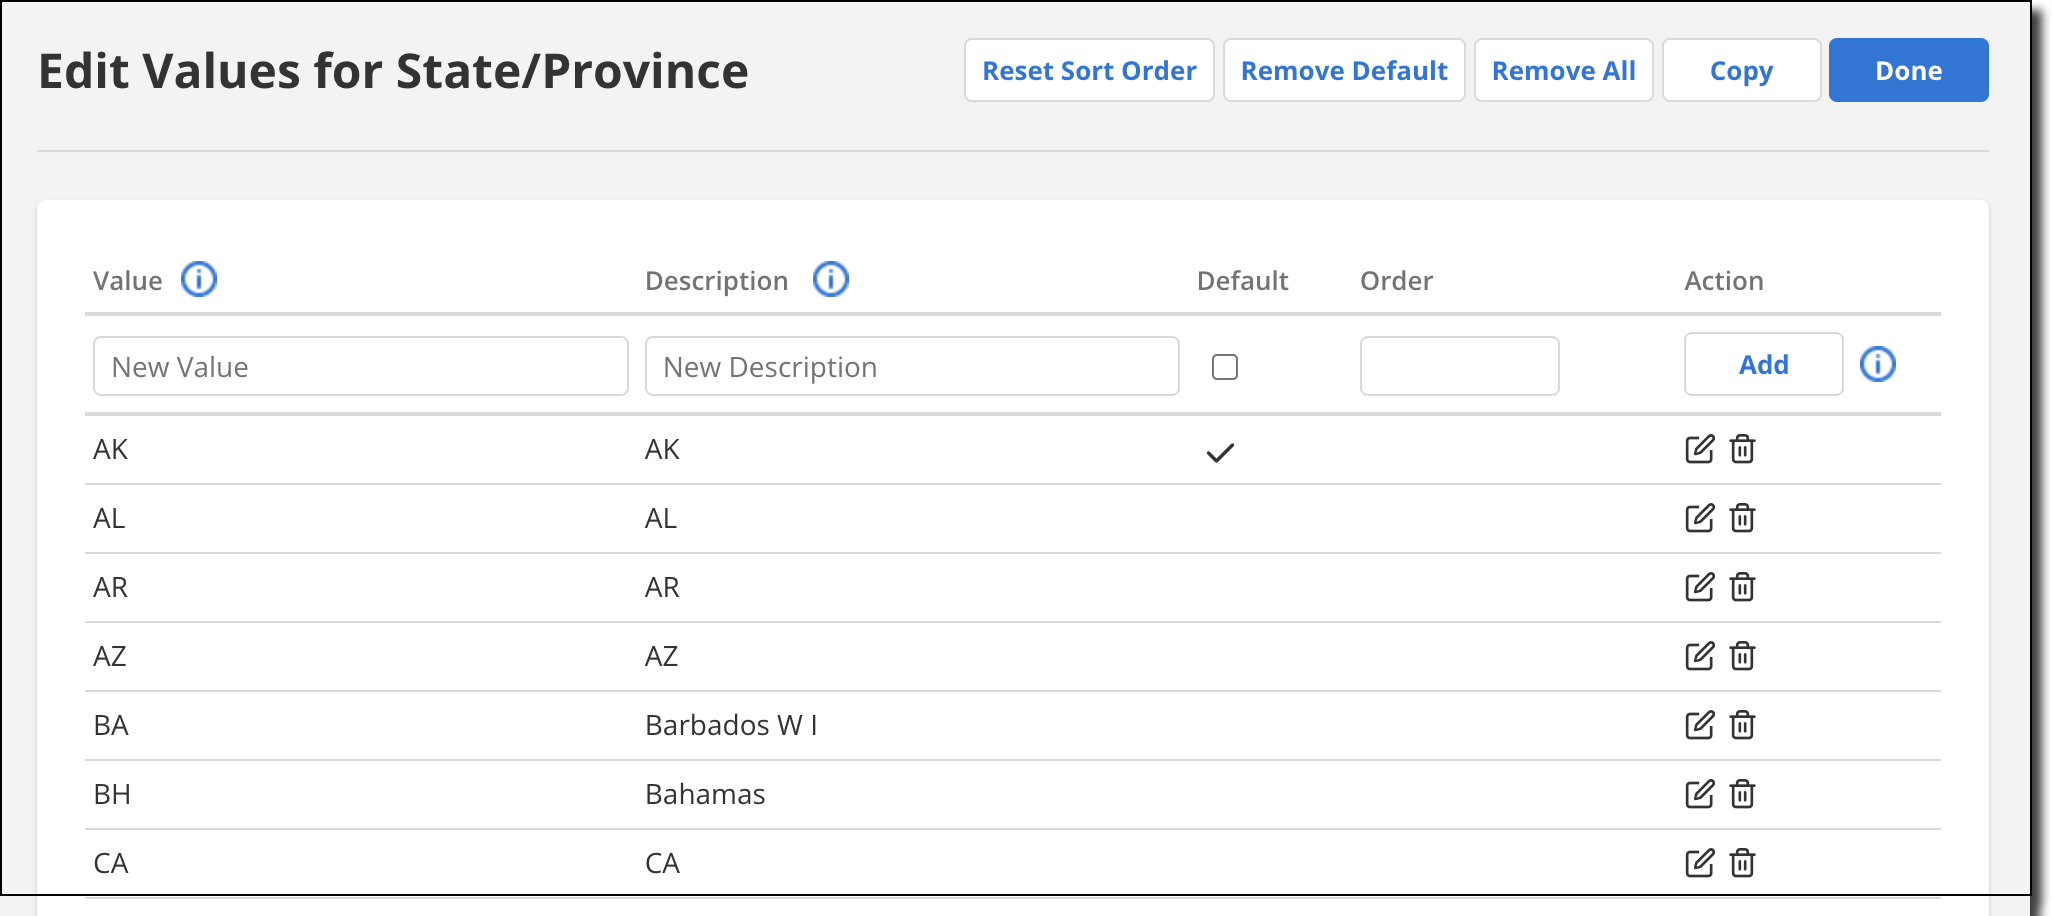
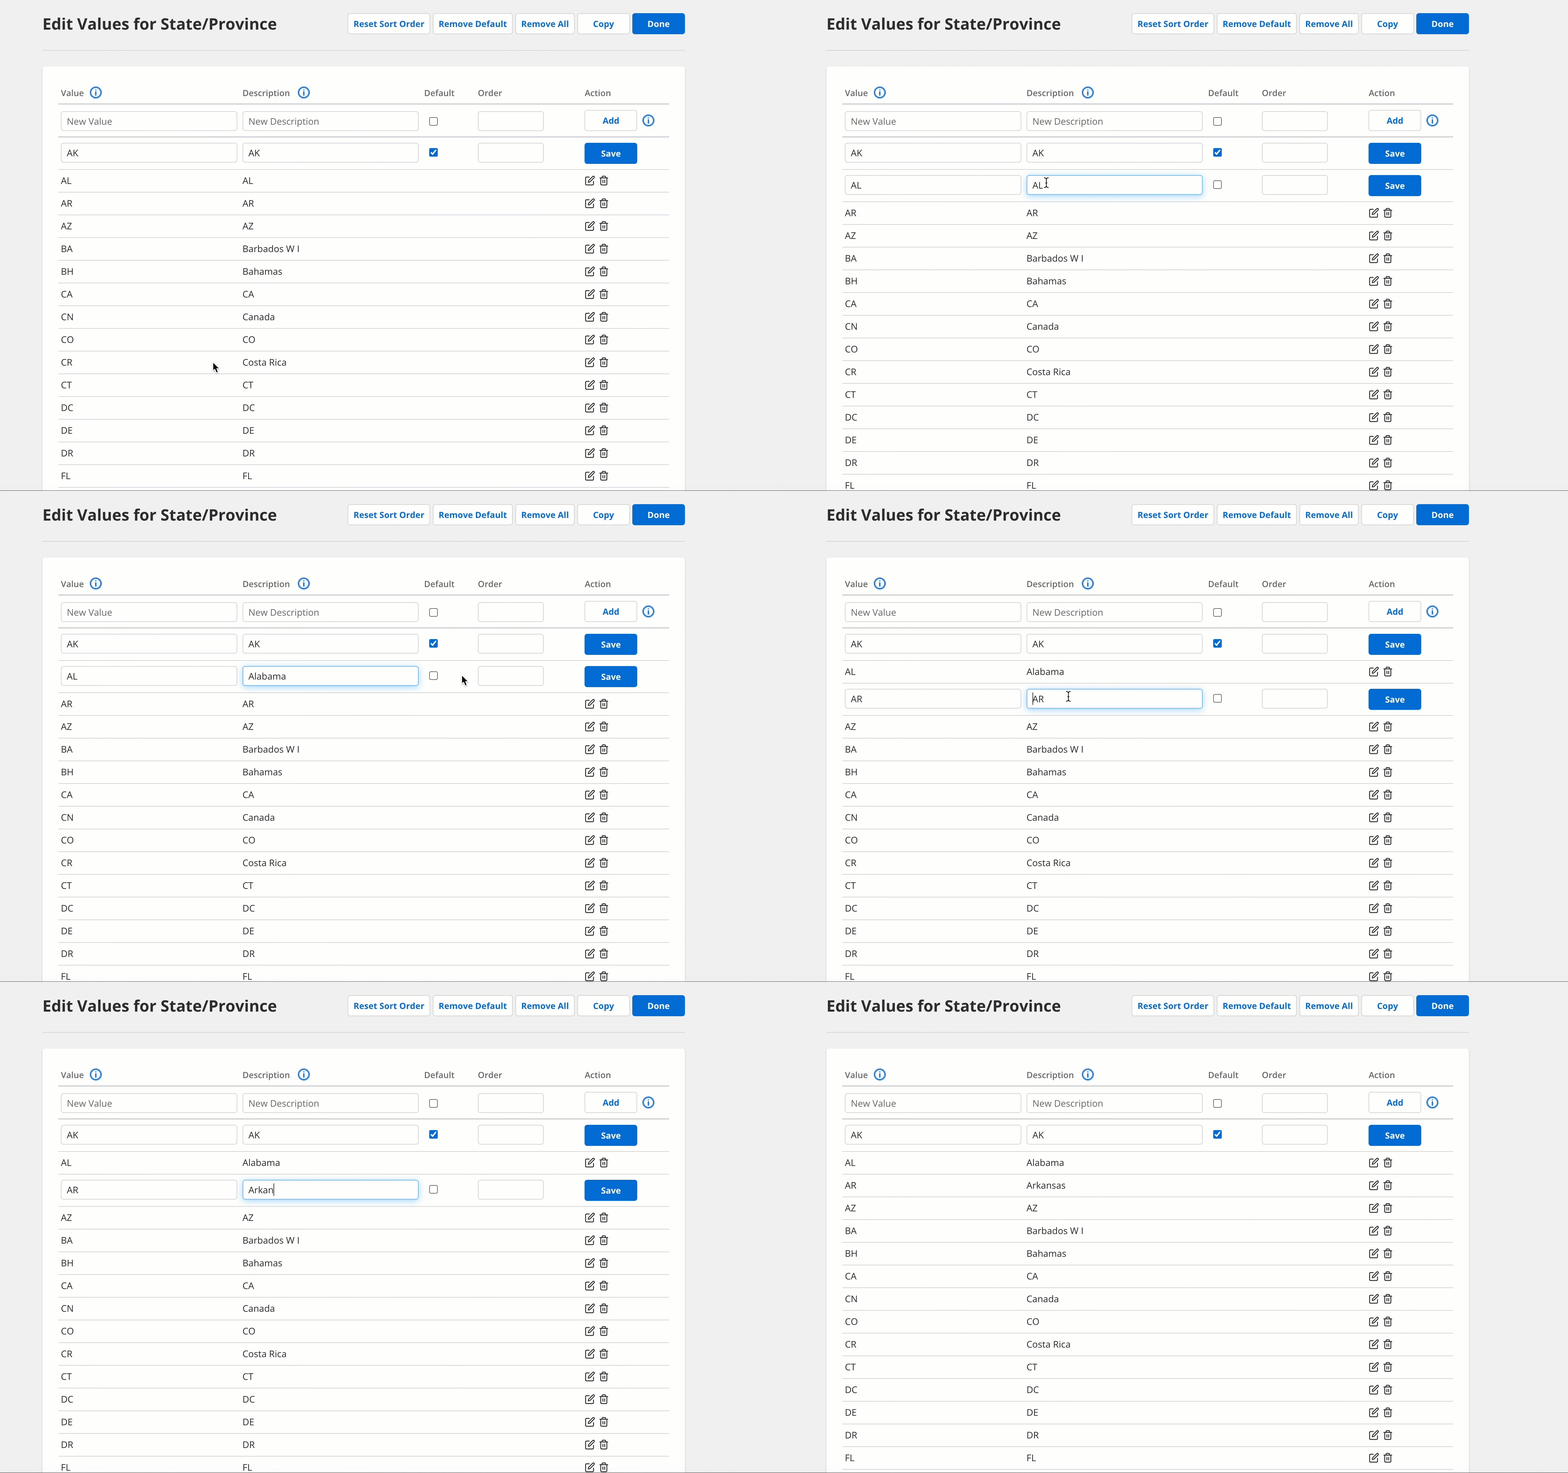
On the Edit Values page, enter a value and description for the new item. The Value is the identifier in the database; the Description is the name your members see in lists. Click the Add button. (To delete a list item, click the Delete button at the end of the row. To edit a list item, click the item to change it to an editable field. Then type your edits and click Save.)
Caution
If you need to modify an existing list item, change the Description only. Never modify the database value. If you need the value changed, contact the Flexmls Customer Success team (cpr@flexmls.com).
To specify the default selection, click the list item you want to be the default selection. This turns the list item into an editable field, and it displays a checkbox under the Default column. Select the Default checkbox and click Save. The default selection will be marked with a checkmark under the Default column. If the user does not select an option from the list during listing entry, the default selection will be used.
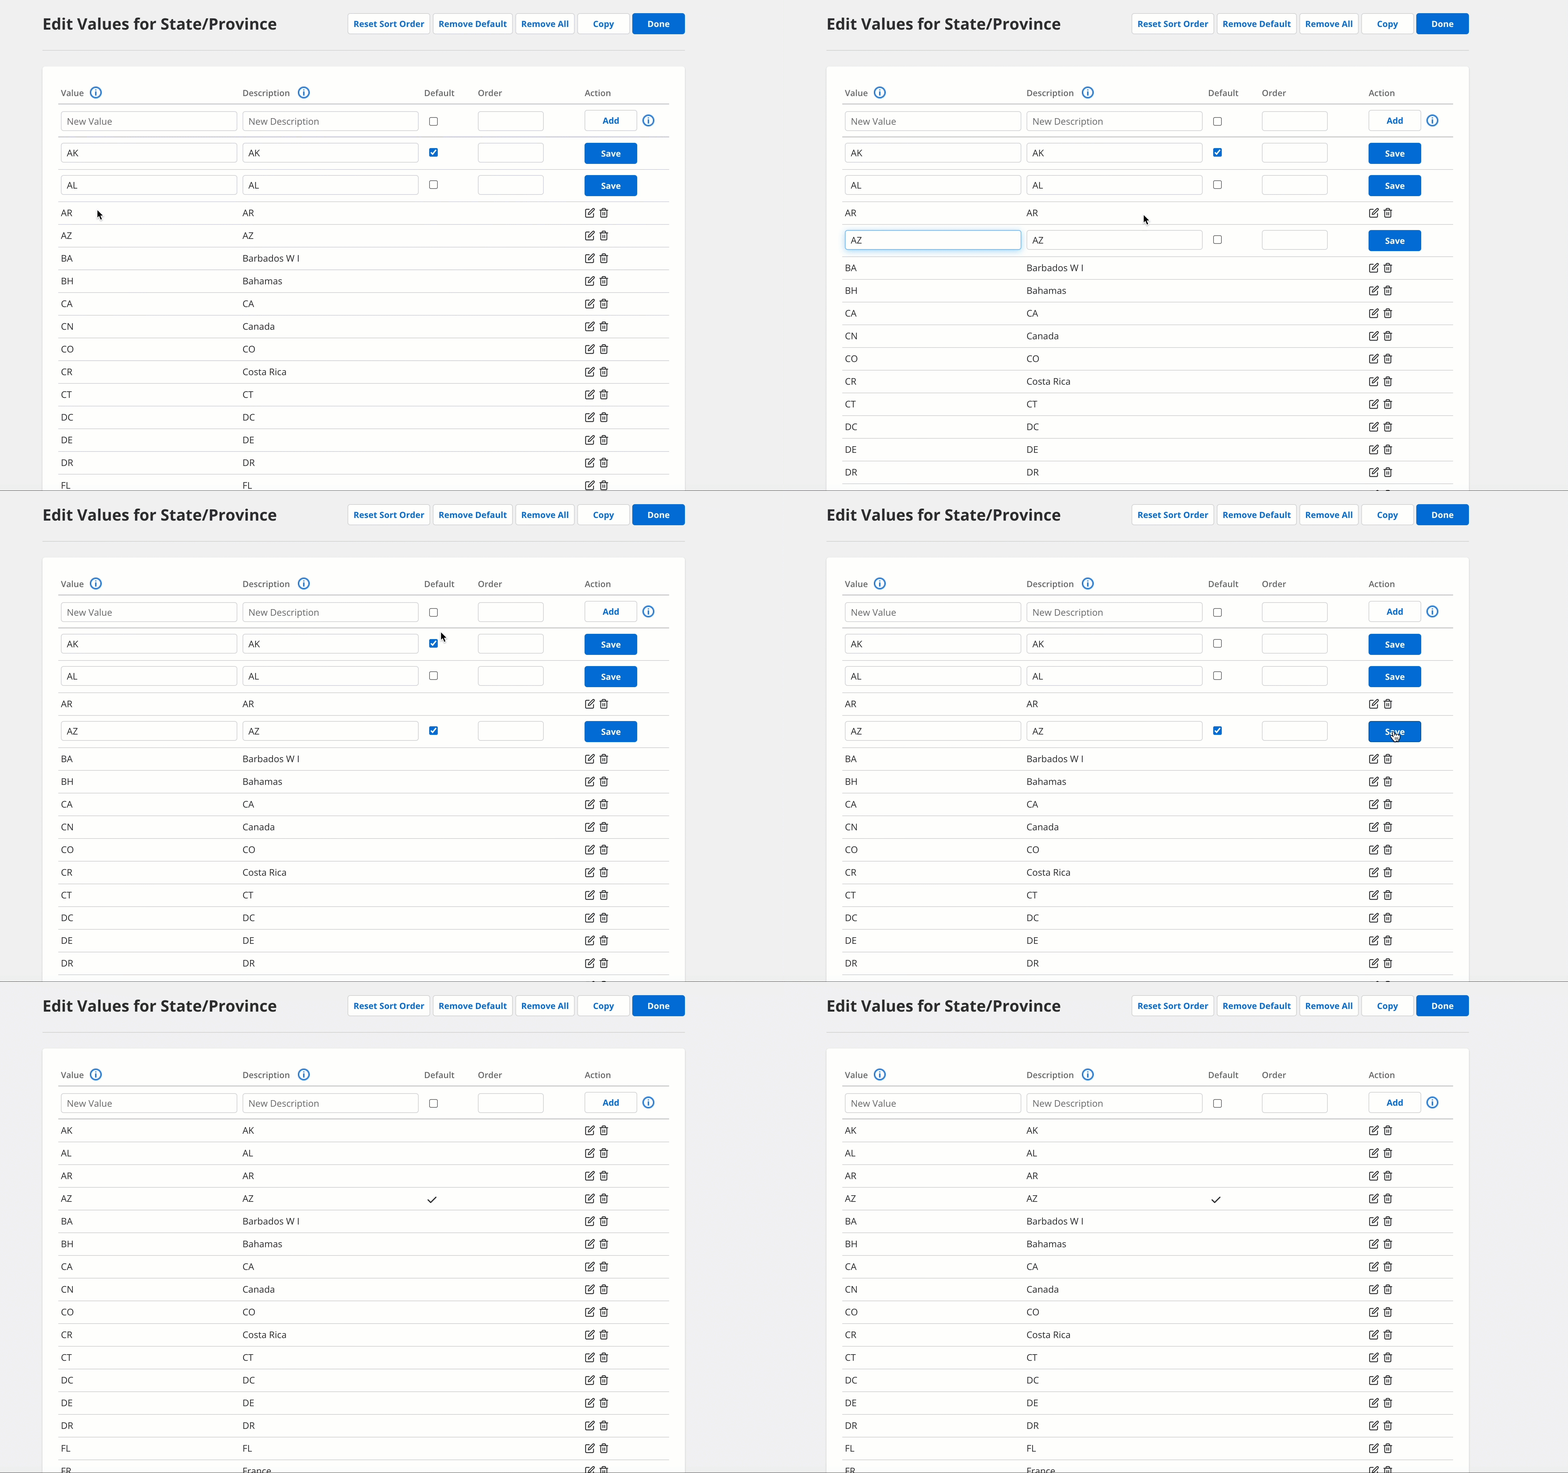
You may want to include a blank or "Select One" option as the default to prevent incorrect information from being added to listings. If you add "Select One" as the default, users will be required to open the list and make a selection. If you do not add this option, members may accept the default value when entering listings, which may not be correct. To add a "Select One" option, leave the Value blank and type Select One as the Description. Set the order to 1 and click the Default check box.
Use the Order column to specify the order in which items to appear. To specify the order, click a list item to turn it into an editable field. In the Order column, type the number you want the list item to appear, and click Save. If the Order column is not used, the items will appear in alphanumeric order. If you change the sort order for an existing item, click Update Table to apply the changes.
When you have finished adding items, click Done.
To reset the sort order of list items, click Reset Sort Order. To remove the default selection, click Remove Default. To remove all list items, click Remove All.
To copy a list item to another property type, click Copy. Select the list item value you want to copy in the dropdown menu, and select the property type you want the list item value copied to.
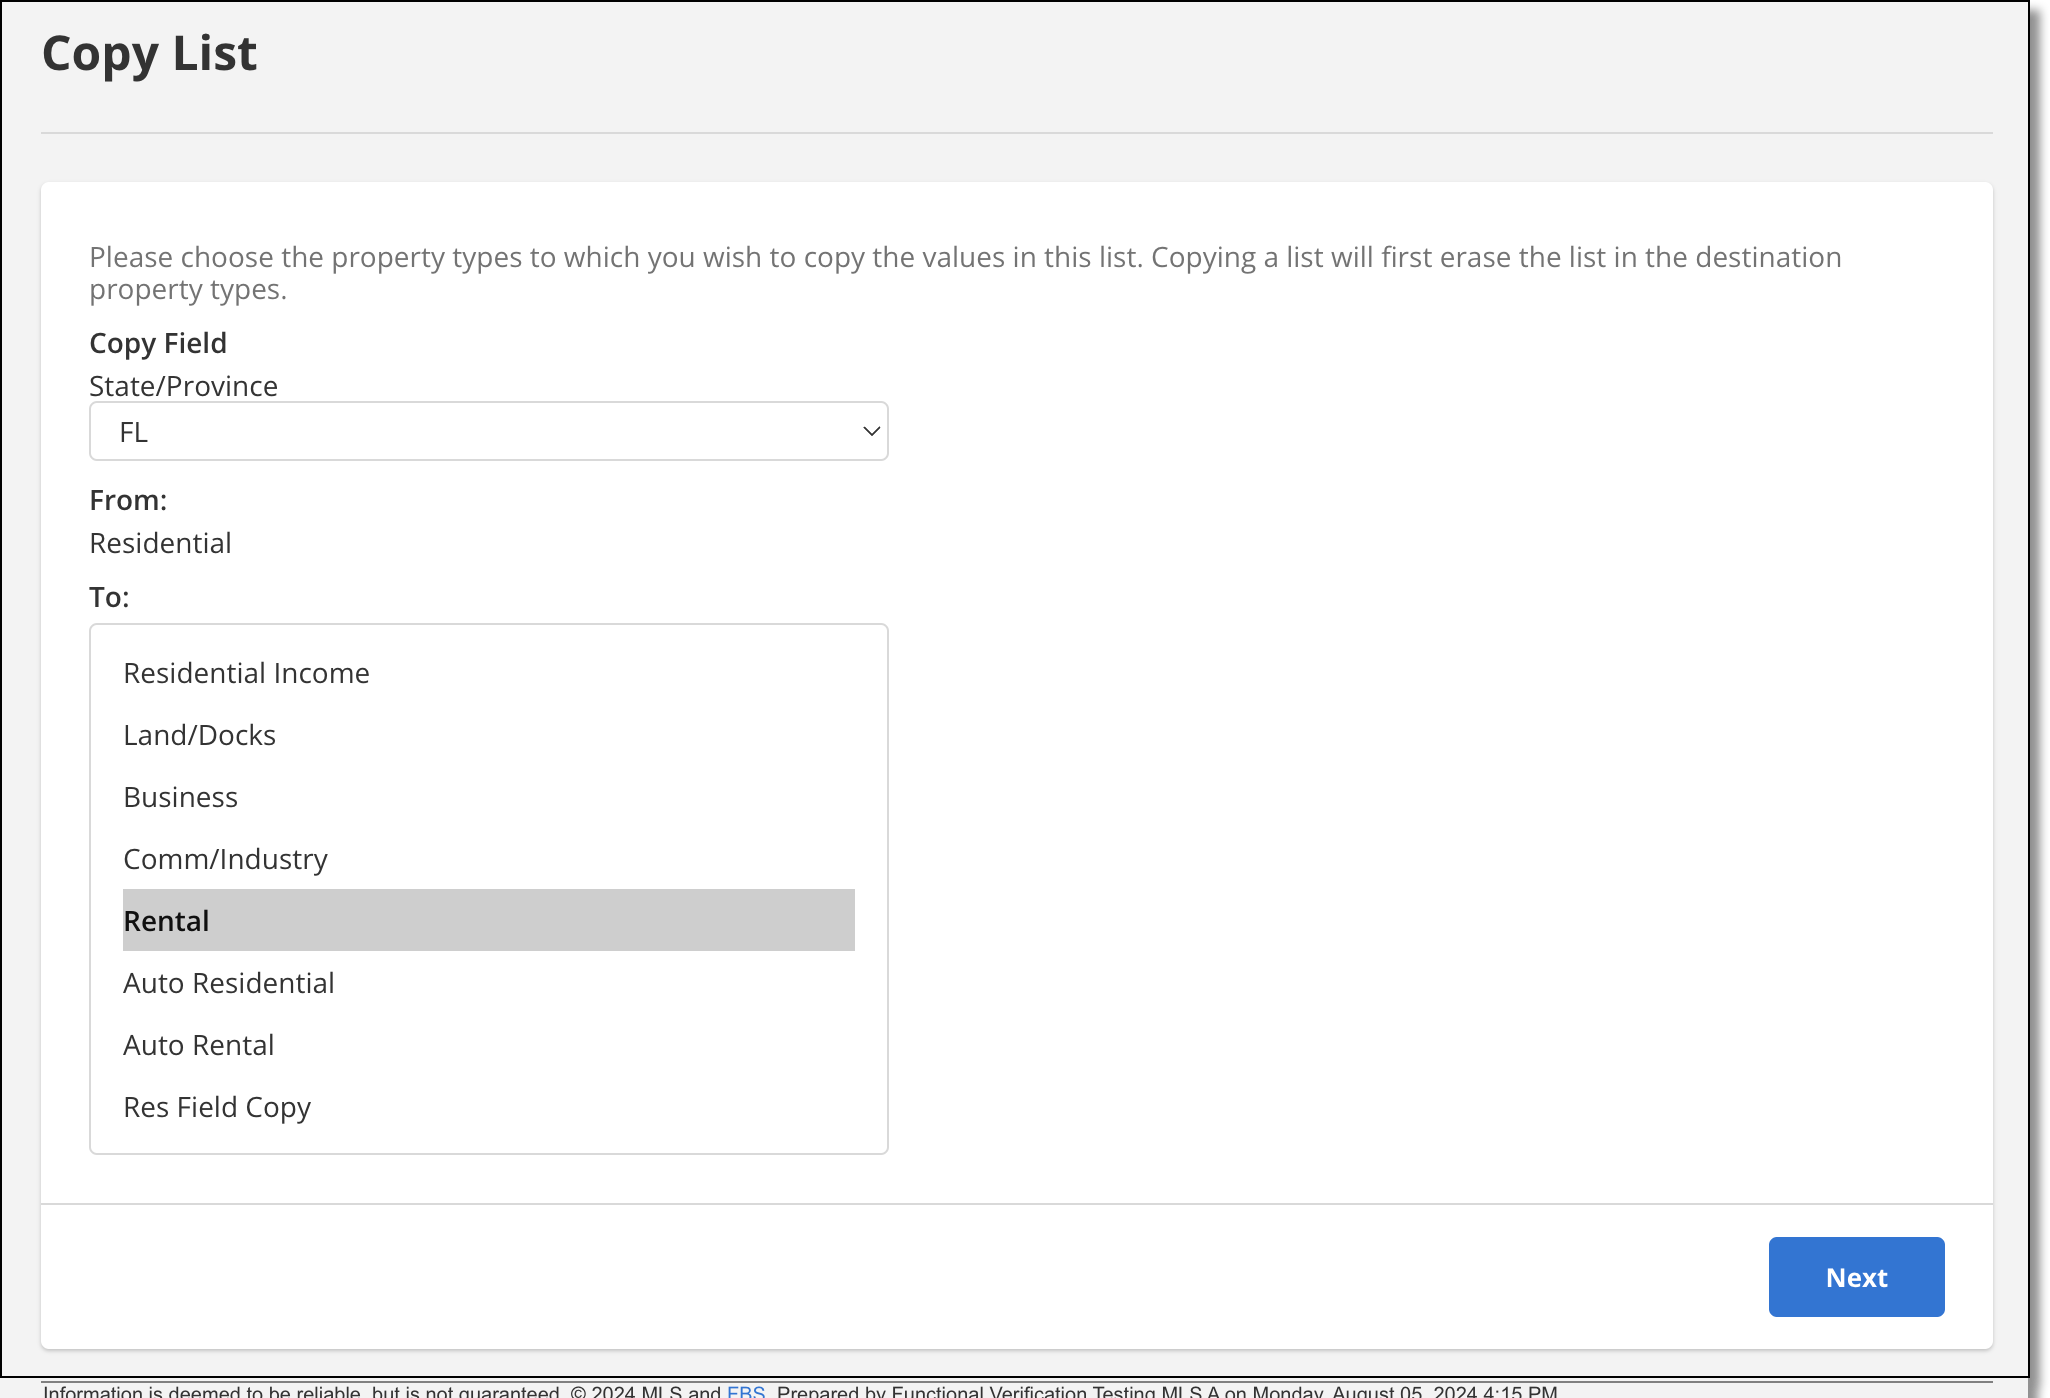
Click Next to proceed. Review and confirm your selections and click Next to update the list. Once the list has been updated, you can click List Editor to return to the Edit Values page.