Transfer a Member to a Different Office
Use the following procedure to transfer a member account to a different office. For information about transferring a team account to a different office, see Transfer a Team.
Tip
The following Guided Help tours are available for this function in Flexmls. When you click on a link, an instance of Flexmls will open in a new browser tab and instruction bubbles will guide you through the process.
First, locate the member record for the member that you are transferring. Click Change User under Users on the Admin menu, then click Find and enter at least three characters. Matches will appear in the box below the search criteria.
Click on the name of the person you want to transfer, then click the Edit button.
Next to the Office field, click Transfer this member to a different office.
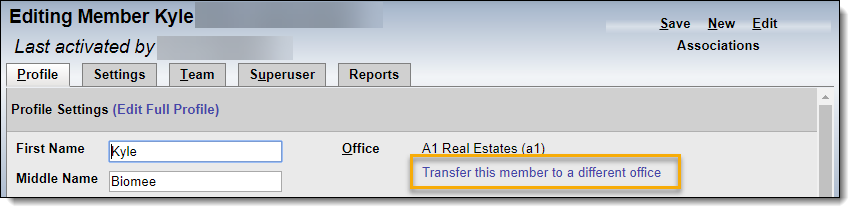
On the Change Office page, find the destination office. Type at least three characters of the office name and then click Find.
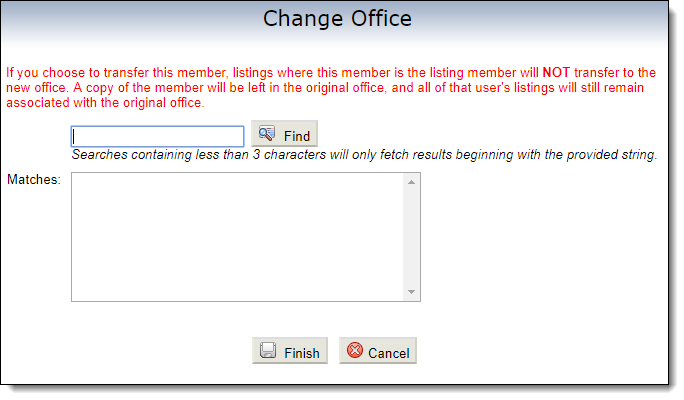
Click the name of the destination office and then click Finish.
A warning prompt will appear, informing you that the user's listings will not be transferred. Click the OK button to continue. The Edit Member page will be displayed again, and the new office name will be displayed on the page.
Note
If needed, you can transfer the member's listings using a separate process. For more information, see Transfer a Listing.
Click the Save button at the top of the Edit Member page. If you do not click Save, the user will not be transferred.
Note
If the member you are transferring has access to superuse as other accounts, their superuser access will be automatically removed when you transfer the user.