Contact Details Tab
Click on a contact name on the Contact Management page to view and edit detailed information about the contact.
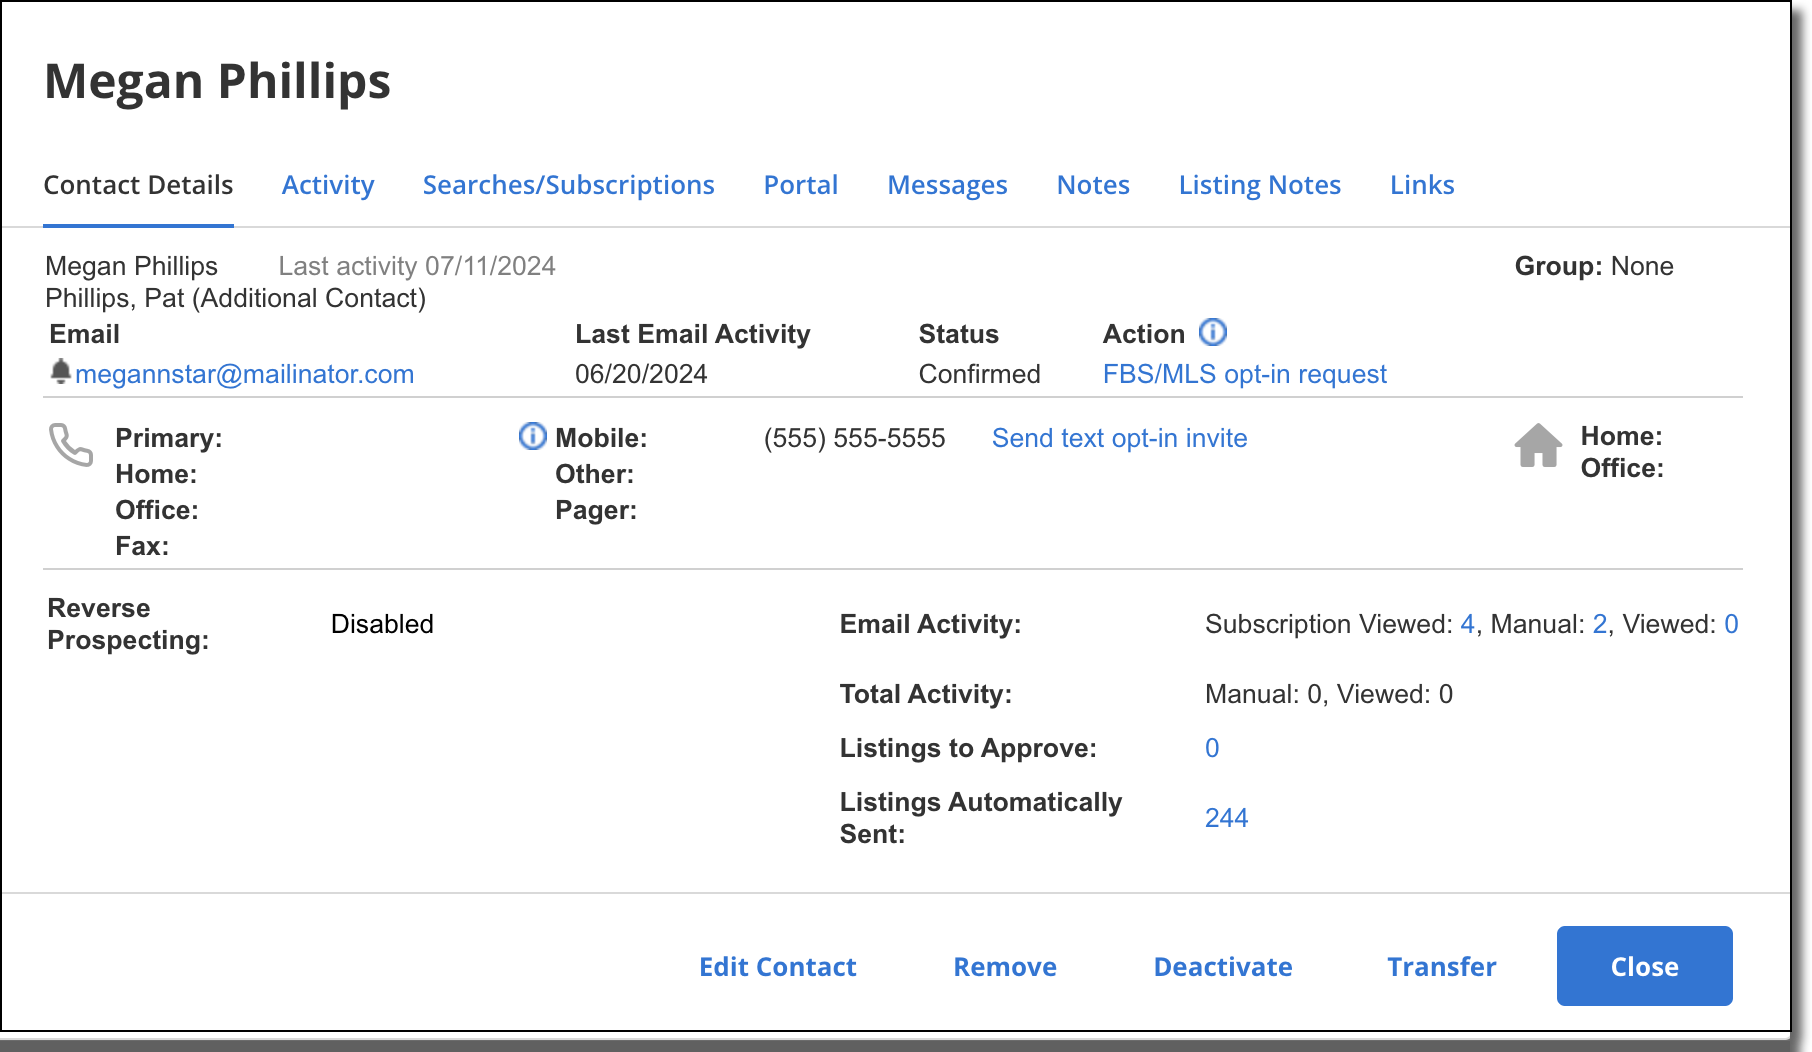
Use the Contact Details tab of the contact details to view the contact's full name, phone numbers, addresses, group information, and reverse prospecting setting. To change these settings, click the Edit Contact button.
The Status field indicates the contact's opt-in status. Possible statuses include Pending Opt-In, Undeliverable, Confirmed, Opted Out, or Inactive. For more information, see Opt-In Status Report.
You can view the number of manual emails that have been sent to the contact, and the number of times those emails have been viewed by the contact. (The Email Activity row displays active links, and the Total Activity row displays a full history of emails to the contact.)
Contact Groups
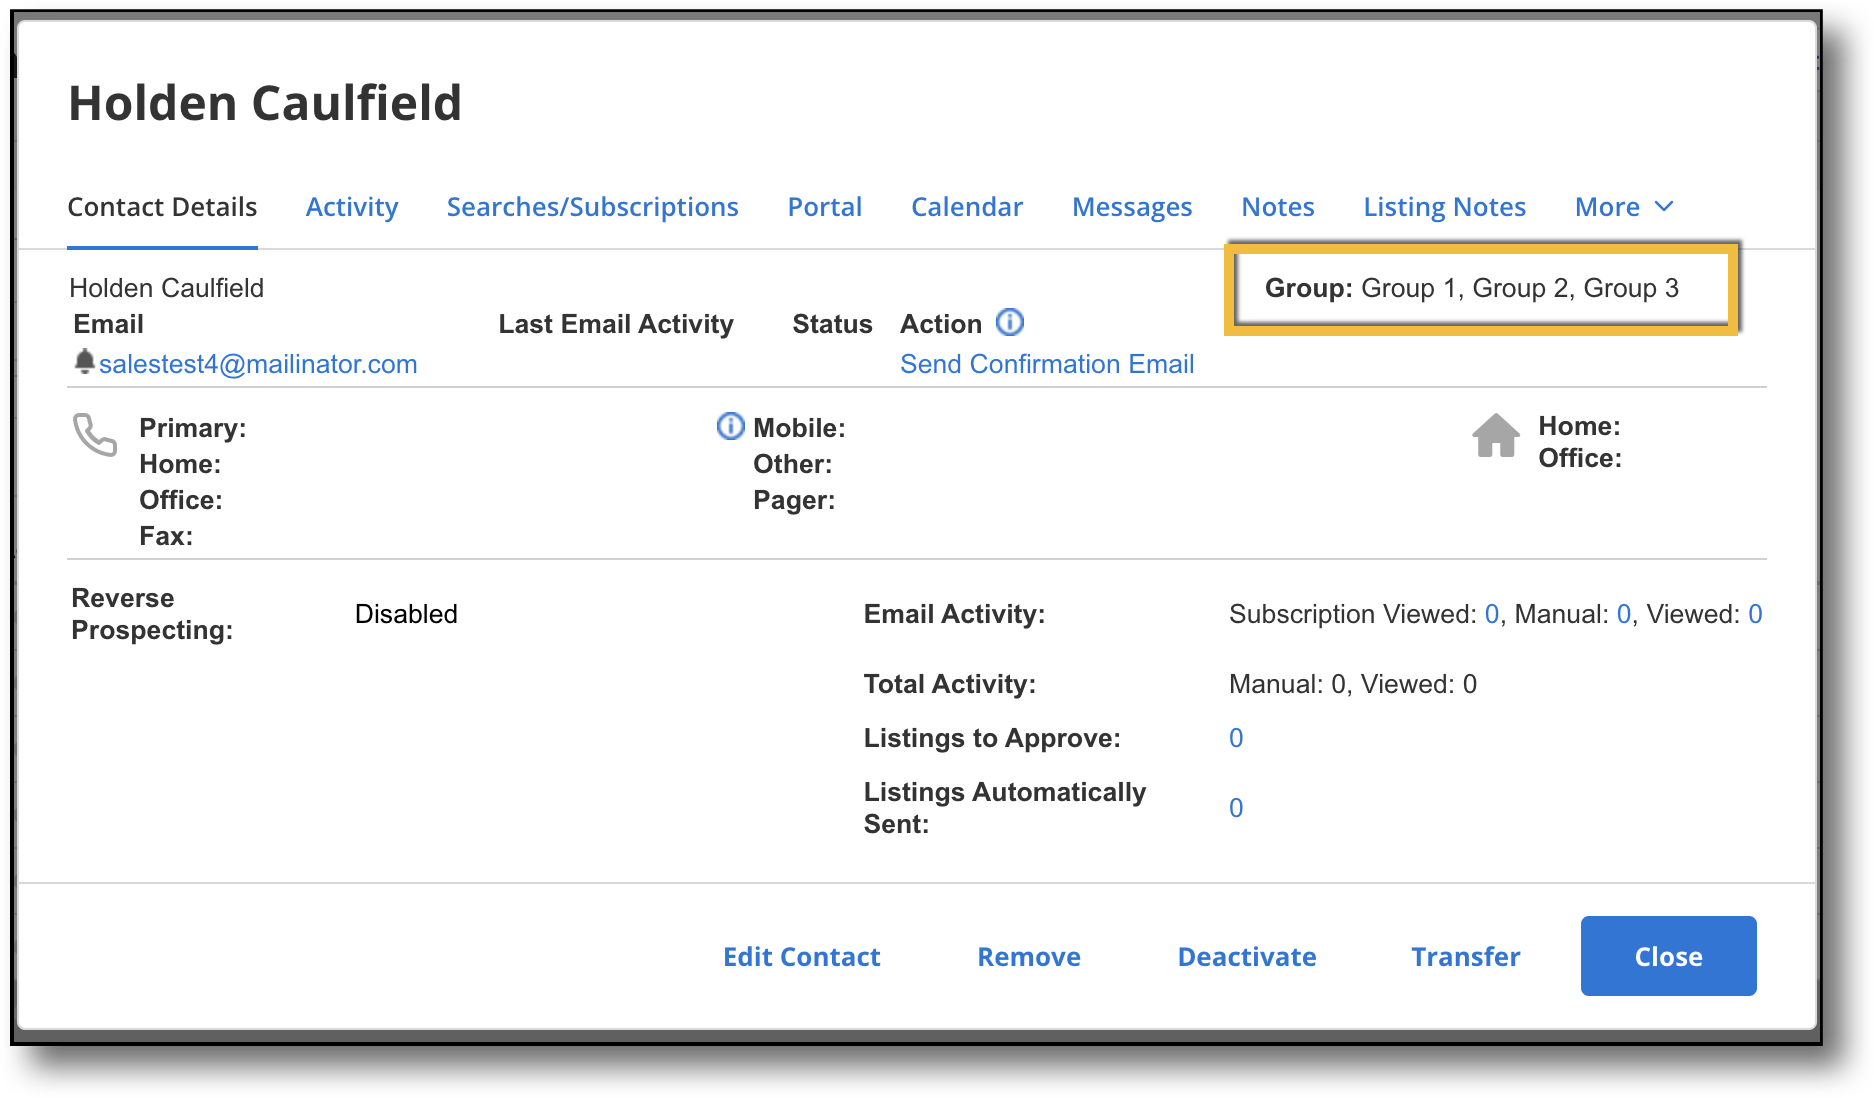
Contacts can be associated with a group for better organization. A contact can belong to multiple groups. To view which group(s) a contact belongs to, select a contact in your contact list. The Groups field lists all groups that that contact is associated with.
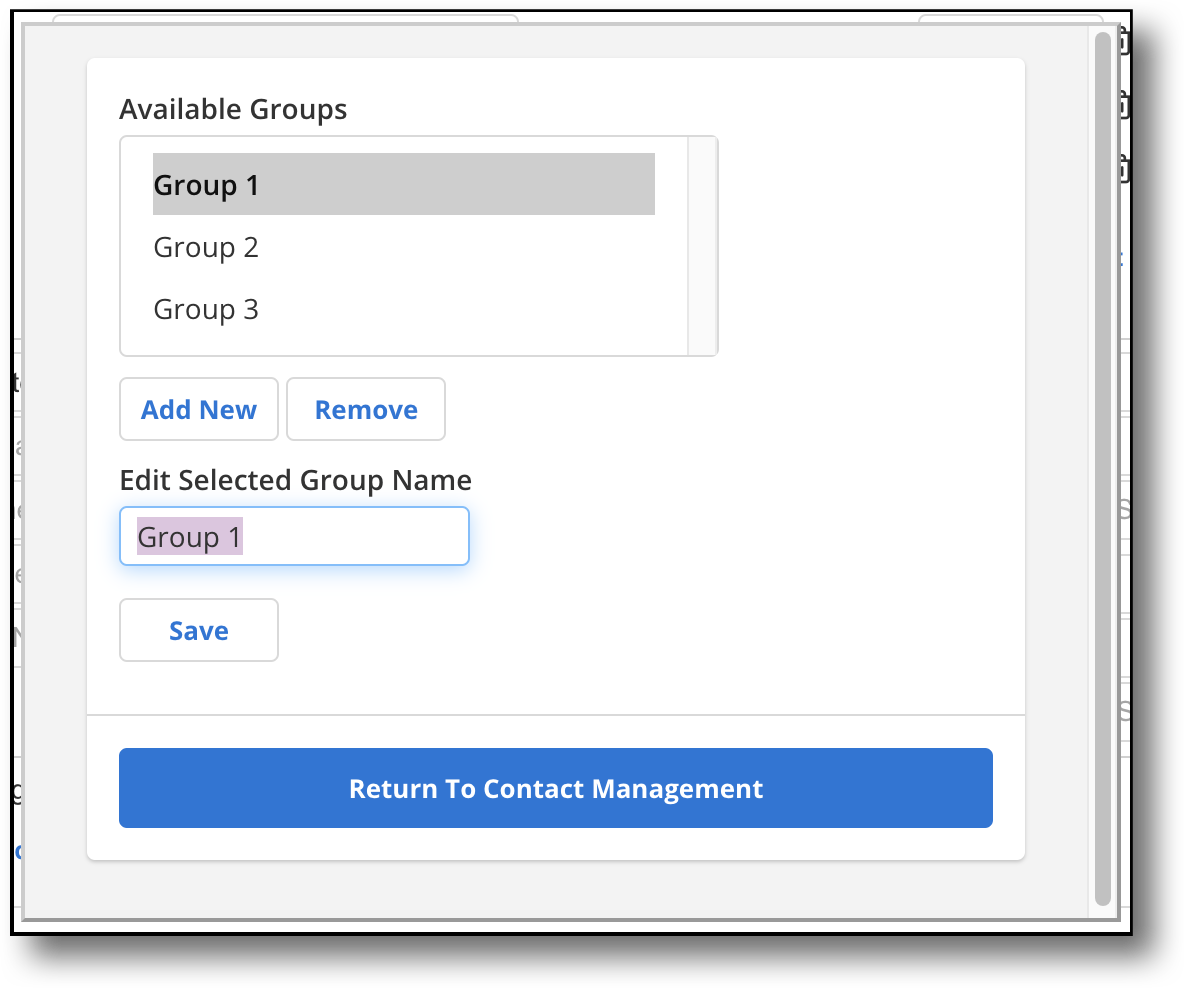
To create a new group, select a contact in your contact list, and click Edit Contact. In the Groups section, click Edit Group List. This brings up a pop-up window that lists available groups. Click Add New to create a new group. Type in a group name, and click Save to add the new group to the group list. Click Return to Contact Management to go back to the Edit Contact window.
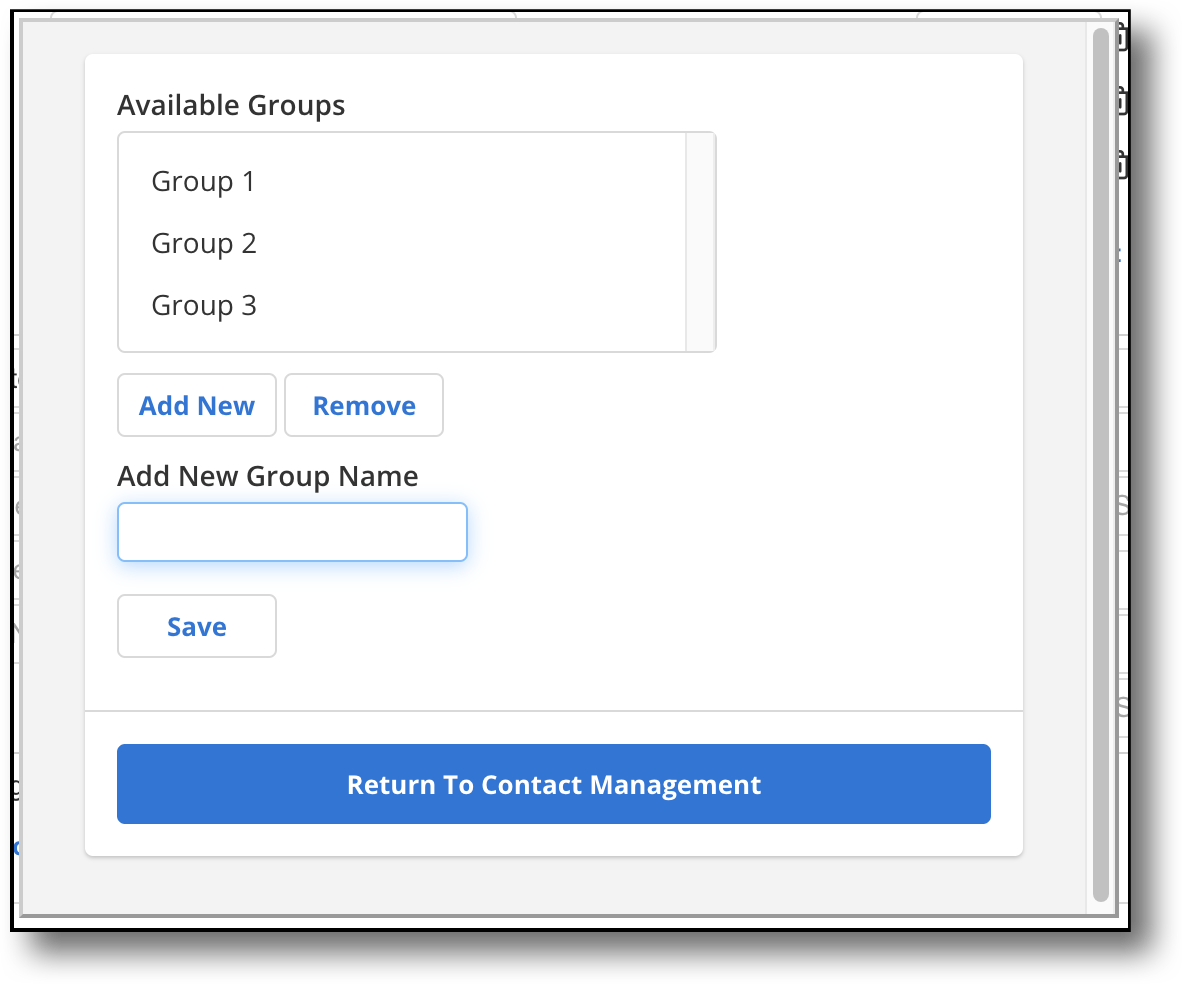
In the Edit Group List window, you can also edit a group. Select a group in the group list, and enter any changes to the group name under Edit Selected Group Name. Click Save to apply the changes. To remove a group, select a group from the group list and click Remove.
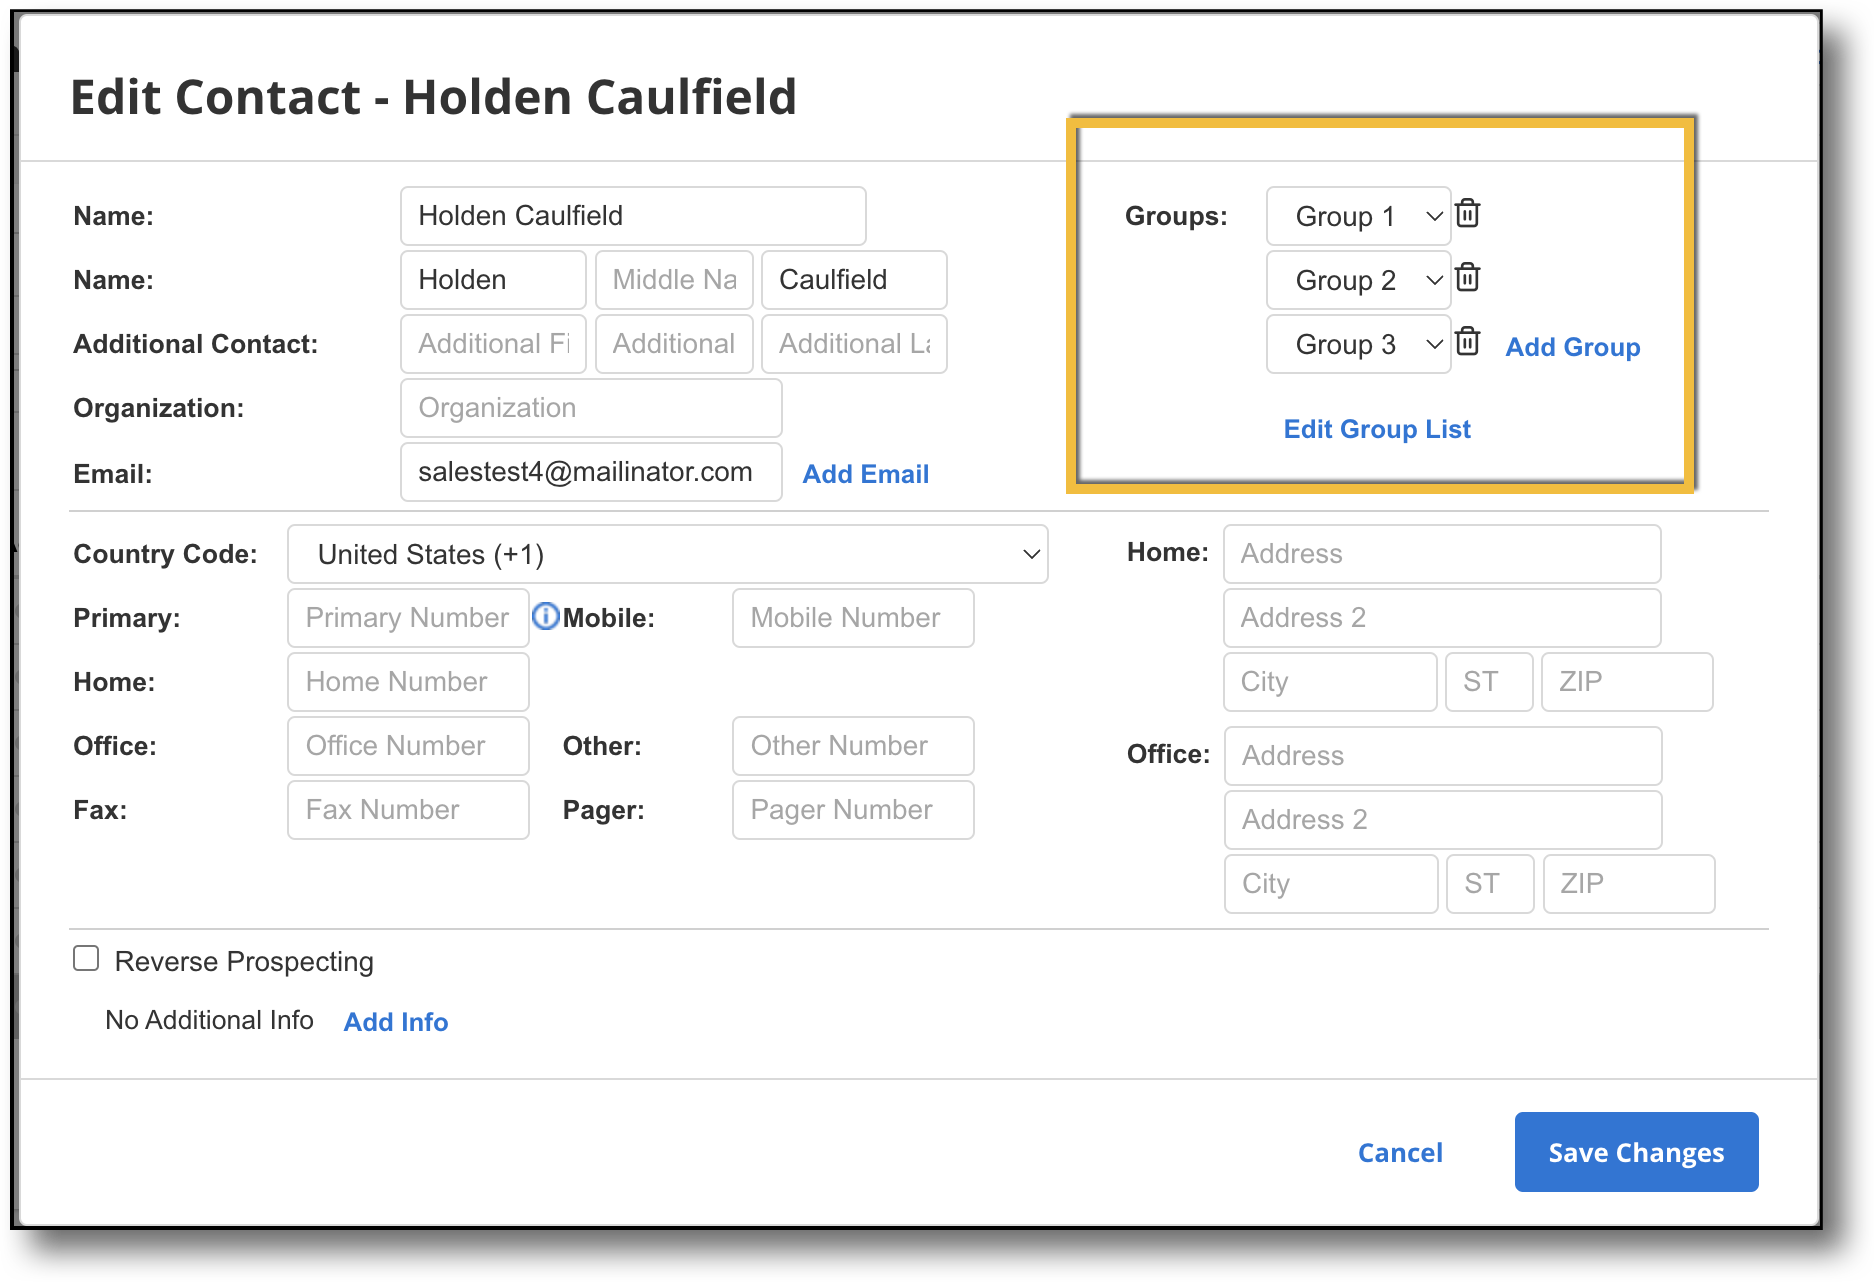
To add a contact to a group, select the contact you want, and click Edit Contact. In the Groups section, click Add Group. This prompts a group field to appear, with a dropdown menu where you can select the group you want that contact to be associated with. You can click Add Group multiple times to add a contact to multiple groups.
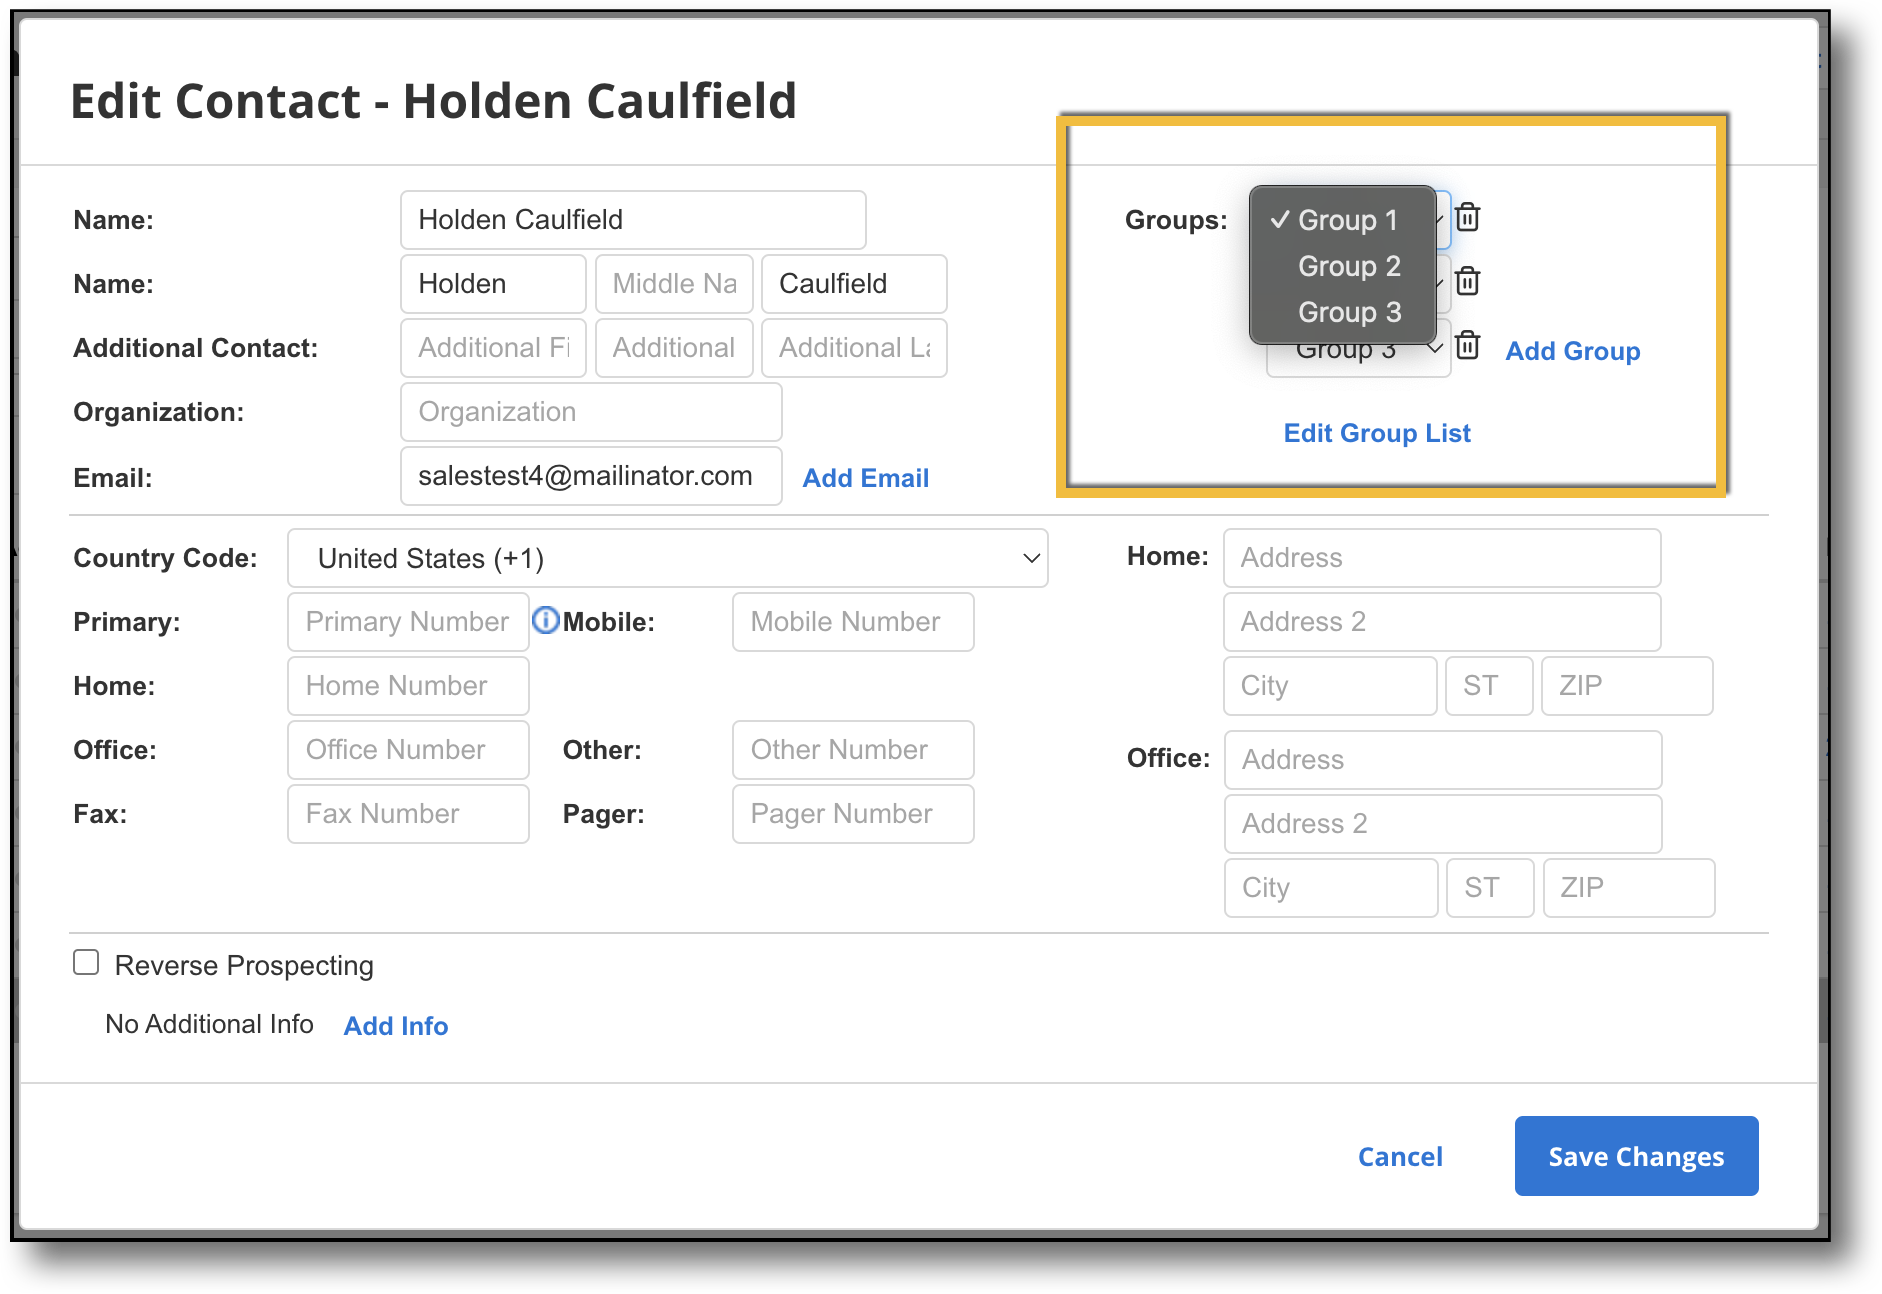
To remove a contact from a group, select the contact you want, and click Edit Contact. In the Groups section where the contact's groups are listed, navigate to the group from which you want the contact removed, and click the trash can icon.
Add Multiple Email Addresses
To add multiple email addresses to a contact, click Edit Contact. In the Email field, click Add Email and enter the email address in the text box that appears. Select the Notify checkbox next to the additional email addresses to enable those email addresses to also receive subscription notifications. Once you have finished adding additional email addresses to a contact, click Save Changes.
Reverse Prospecting
To allow the searches related to this contact to be used in reverse prospecting for the rest of the MLS, click the Reverse Prospecting checkbox. In the event of a reverse prospecting match, only your information will be revealed, not the contact's information. For more information, see Reverse Prospecting.