Customer Flyers
Use customer flyers to create professional, clean-looking, one-page flyers that you can print or email to clients. You can also select a customer flyer format to view listing details from a search results page. Customer flyers come with predefined layout templates to make setup quick and easy.
Tip
The following Guided Help tours are available for this function in Flexmls. When you click on a link, an instance of Flexmls will open in a new browser tab and instruction bubbles will guide you through the process.
To access customer flyers, go to the Custom Reports page by clicking on My Reports under Preferences on the menu. To edit an existing customer flyer, select it from the Available Report Definitions list and click Edit.
To create a new customer flyer, click New on the Custom Reports page and select Customer Flyer. Select a predefined report layout by clicking on it. Different templates have different layouts for listing information, listing photos, and branding information. For more information about the available templates, see Customer Flyer Templates.
Once you have chosen a report template, you can modify the report’s appearance, edit the fields in each container, and save the report.
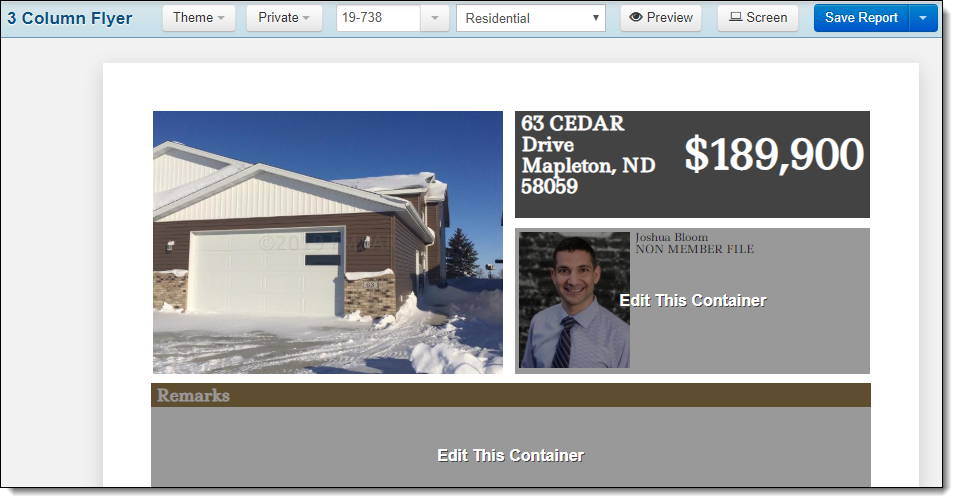
The layout templates for customer flyers are composed of information blocks, or containers. These containers are of fixed size and location to ensure that flyers remain on a single page when printed. You can customize the appearance of a flyer by using the following options:
Theme – Select from preset color schemes. The selected theme will be applied to all your customer flyers.
Private – Select the Private, Public, VOW or IDX version of the flyer. The data shown on the flyer will change based on the access level that is required to view the information. For example, if data is Private, it will not be displayed on the Public version of the flyer.
MLS Number – Select a listing to use as an example as you build the flyer. Enter a specific MLS number or click the drop-down arrow to choose a random listing.
Property Type – Click the drop-down arrow next to the property type to select the property type for the flyer. Different property types will have different available fields.
Preview (Edit) – Click the Preview button or Edit button at the top of the flyer to toggle between edit and preview modes. By default, the flyer will be displayed in edit mode so that you can customize the content of the containers. Use preview mode to see how the finished flyer will look.
Screen (Print) – Click the Screen button or Print button at the top of the flyer to toggle between screen and print modes. By default, the flyer will be displayed in screen mode and the contents will automatically resize to fit your screen. Use print mode to see what the flyer will look like when it is printed.
To change an individual listing report rather than changing the base format of the report, see Edit an Individual Listing Report.
In edit mode, you can add or change the fields that are displayed in any container that is labeled Edit This Container.
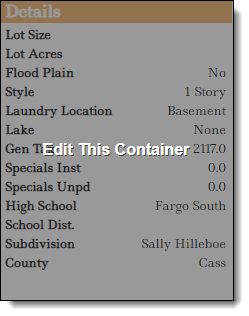
After you click to edit a container, you can see the container type at the top of the page. Long Text Containers can include individual data fields and detail groups. Short Text Containers can include only individual fields. Photo Containers automatically display the top photos for the listing and are not editable. Branding Containers include contact information and an image from the member's profile.
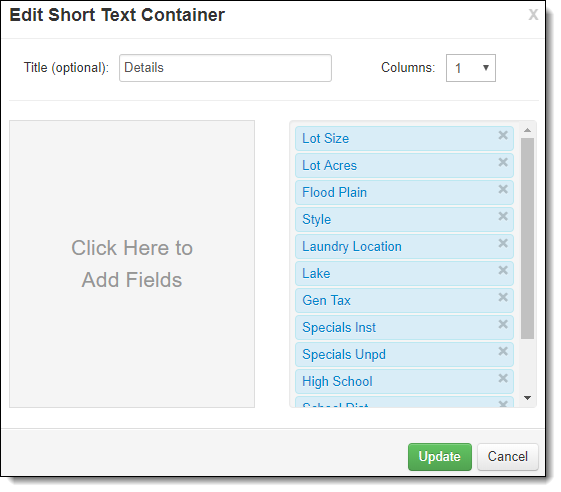
Each type of container has different modifiable attributes. For text containers, you can modify the following attributes:
Title – Click in the Title (optional) box and type the title that will appear in the flyer.
Columns – Set the number of columns of information that will be displayed in the container.
Fields – Use the left-hand column to add fields to the container. Scroll through the available fields or search for a field by typing the field name in the lookup bar. Click on a field to add it to the container. Selected fields appear in the column at the right. Drag and drop fields to rearrange their order. Remove a field by clicking the X to the right of the field name.
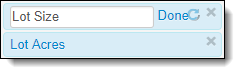
Field Labels – After adding a field to a container, you can modify the field label by clicking on the name and typing. After you have made your changes, click Done.
When you are done editing the fields in a container, click the Update button at the bottom of the page to return to the Customer Flyers page.
Note
In print mode, if the fields that you have selected do not fit in the allotted container space, you will receive a warning and the container will turn red on the flyer editing page. Fix the overflow by removing fields or by changing the number of columns. An overflow does not prevent you from saving the flyer. When viewed in screen mode, containers with overflow will expand. When you print a flyer or view the flyer in print mode, overflowing content may be cut off.
To save changes to an existing flyer format, click Save Report.
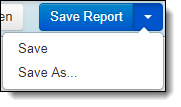
To save a new version of a flyer and give it a new name, click Save As. After saving the customer flyer format, you can use it when viewing listing details and when printing or emailing listings to clients.
If a customer flyer format is created by the MLS, company, office, or broker login, it is automatically inheritable. To create a flyer format that is not inheritable, click Save As and uncheck the Inheritable option. By default, Flexmls saves both a non-inheritable version of the flyer and an inheritable copy. To delete the inheritable copy, go to the My Reports page. Select the name of the inheritable flyer and click the Remove button at the bottom of the page.