Email Listings from Flexmls
Use this procedure to manually email listings to a contact.
Tip
The following Guided Help tours are available for this function in Flexmls. When you click on a link, an instance of Flexmls will open in a new browser tab and instruction bubbles will guide you through the process.
Use the search results page to find and select the listings that you want to send.
Click the Email button in the upper right corner of the page to send the selected listings via email.
Select to send the interactive version or the printer-friendly version of listing information.
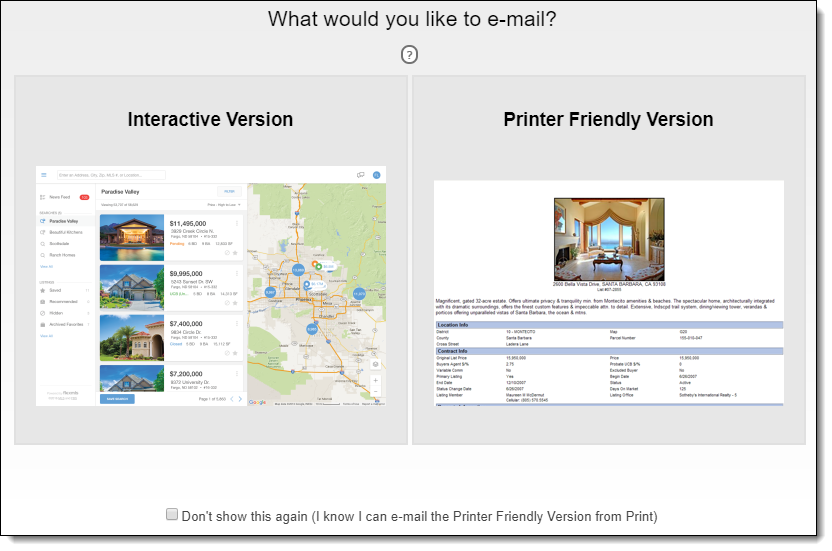
The interactive version includes a link to the search results that can be viewed in a browser. The email recipient can review the listing information, view media such as photos, view the listing report, and adjust items such as their mortgage calculator, if you make those available. The printer-friendly version includes a link to a printer-ready report.
To skip the selection page in the future, click the checkbox at the bottom of the page that says Don’t show this again (I know I can email the Printer Friendly Version from Print). After that, when you click Email, the interactive version will be sent automatically, and the selection page will not be displayed.
Note
If you select Don't show this again but change your mind later, you can reset the prompt on the General Preferences page. For more information, see General Preferences.
Choose to send the currently highlighted listing (Current Listing), only the listings you selected from the search results (Selected), or all listings from the search results page (All Results).
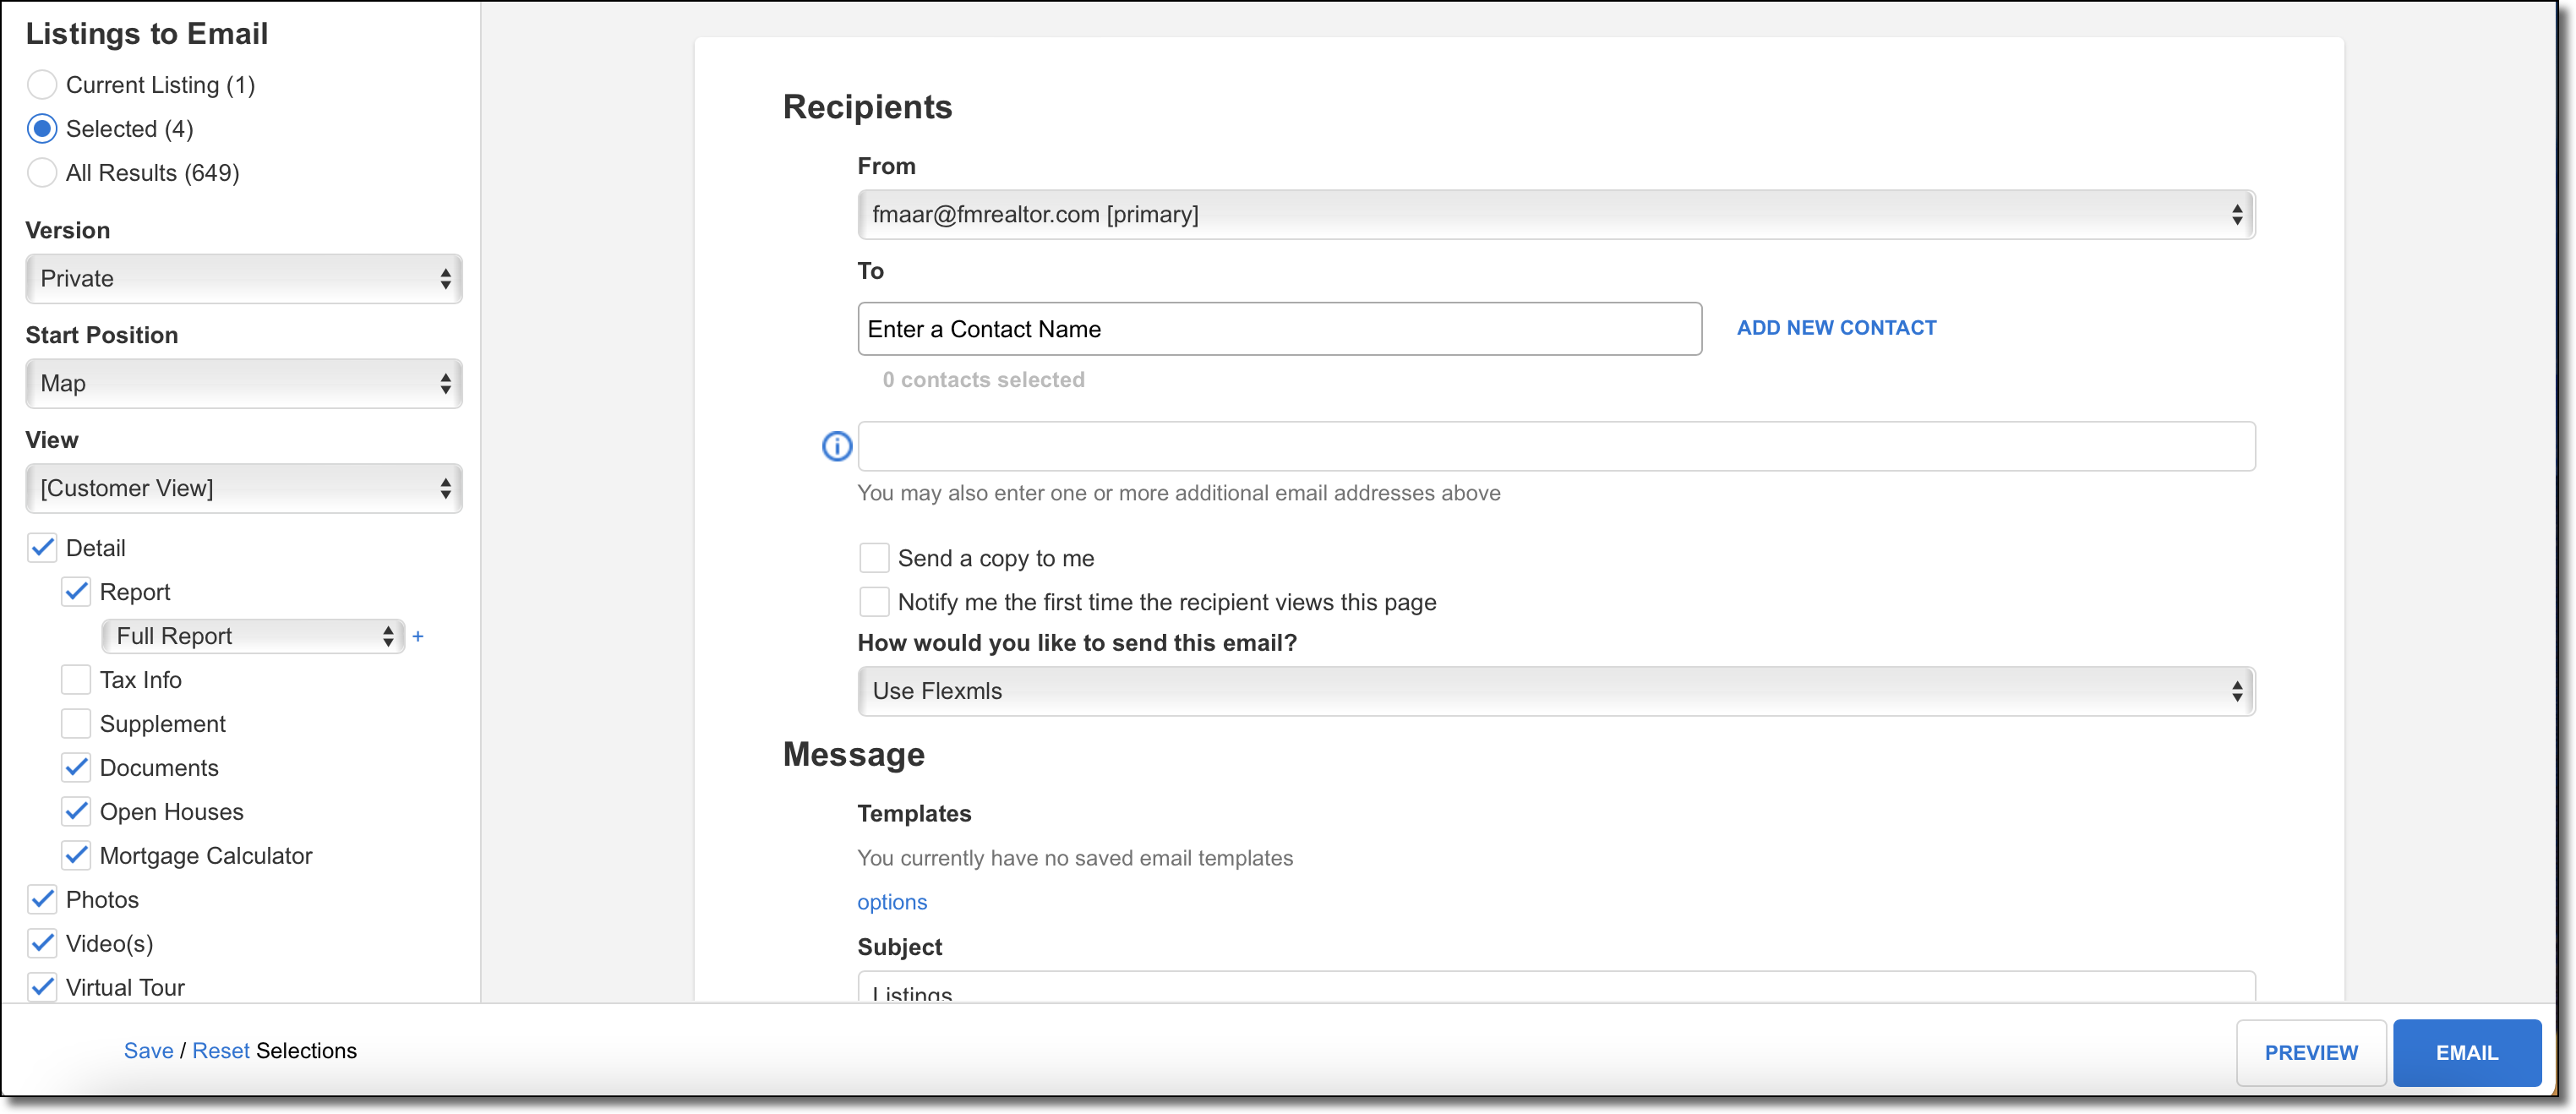
Select whether to send the public or private version of the report, if allowed by your MLS. Different information is available depending on which you choose. Typically, you would send a public report to a client, but you can send a private version to yourself or another agent.
In the left pane, select the types of information that the recipient can see.
Note
The default settings in the left pane are controlled by your General Preferences. For more information, see General Preferences.
The display options for the interactive version vary based on whether you are using Flexmls Portal or the classic portal.
If you are using the Flexmls Portal, recipients of the interactive report receive a link to a user-friendly listing that is easy to navigate and optimized for touchscreen devices. Select whether to include tax information, documents, and open house information in public reports. If you are sending a private version of the report, you have additional options that are similar to the options for the classic portal.
If you are using the classic portal, mail recipients receive a link to a search results page, where they can navigate among the tabs to view listing information. The List tab is automatically shown. You can select which other tabs and options to show. Select a view to control which columns of information are displayed. You can also select a start position, which is the tab that opens by default when the recipient clicks the link. Use the Branding option to display a banner-style business card on the search results page. The generic business card format includes your photo, name, and contact information.
If you are sending the printer-friendly version, the options are the same regardless of which version of the portal you are using.
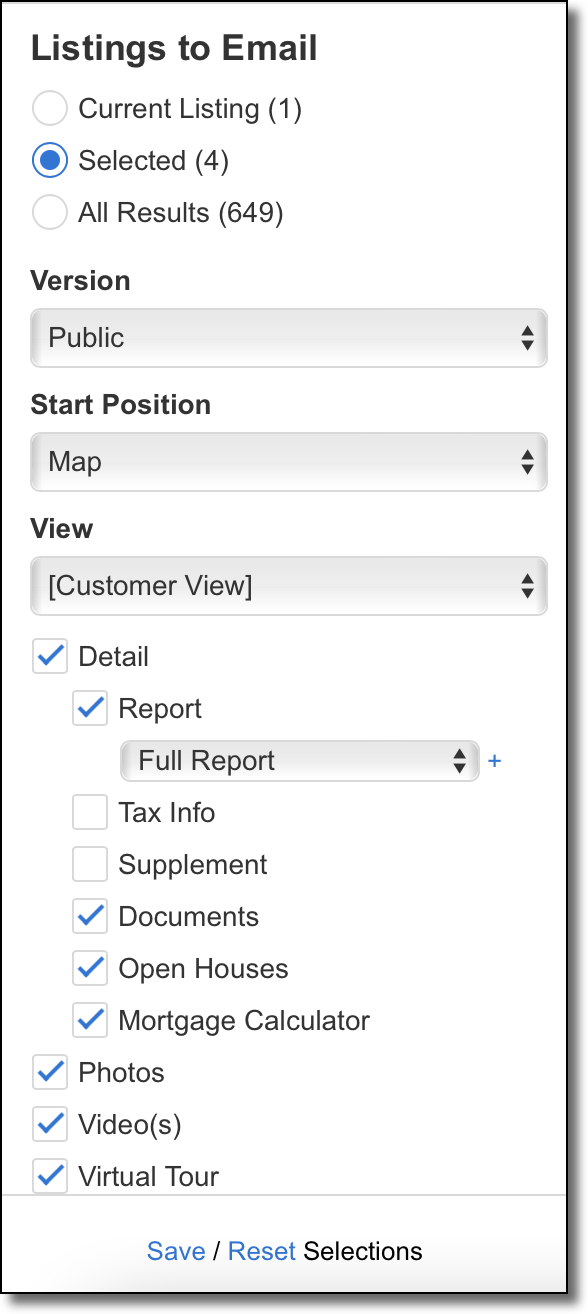
At the bottom of the left pane, you can save or reset your selections. To save your selections as the default for future emails, click the Save link at the bottom of the page. Click Reset to change the selections back to the system default. The Save and Reset options are not available if you are using Flexmls Portal and are sending a public version of listing information.

If you are sending the printer friendly version, click Email or Preview to show the message fields in the right pane.
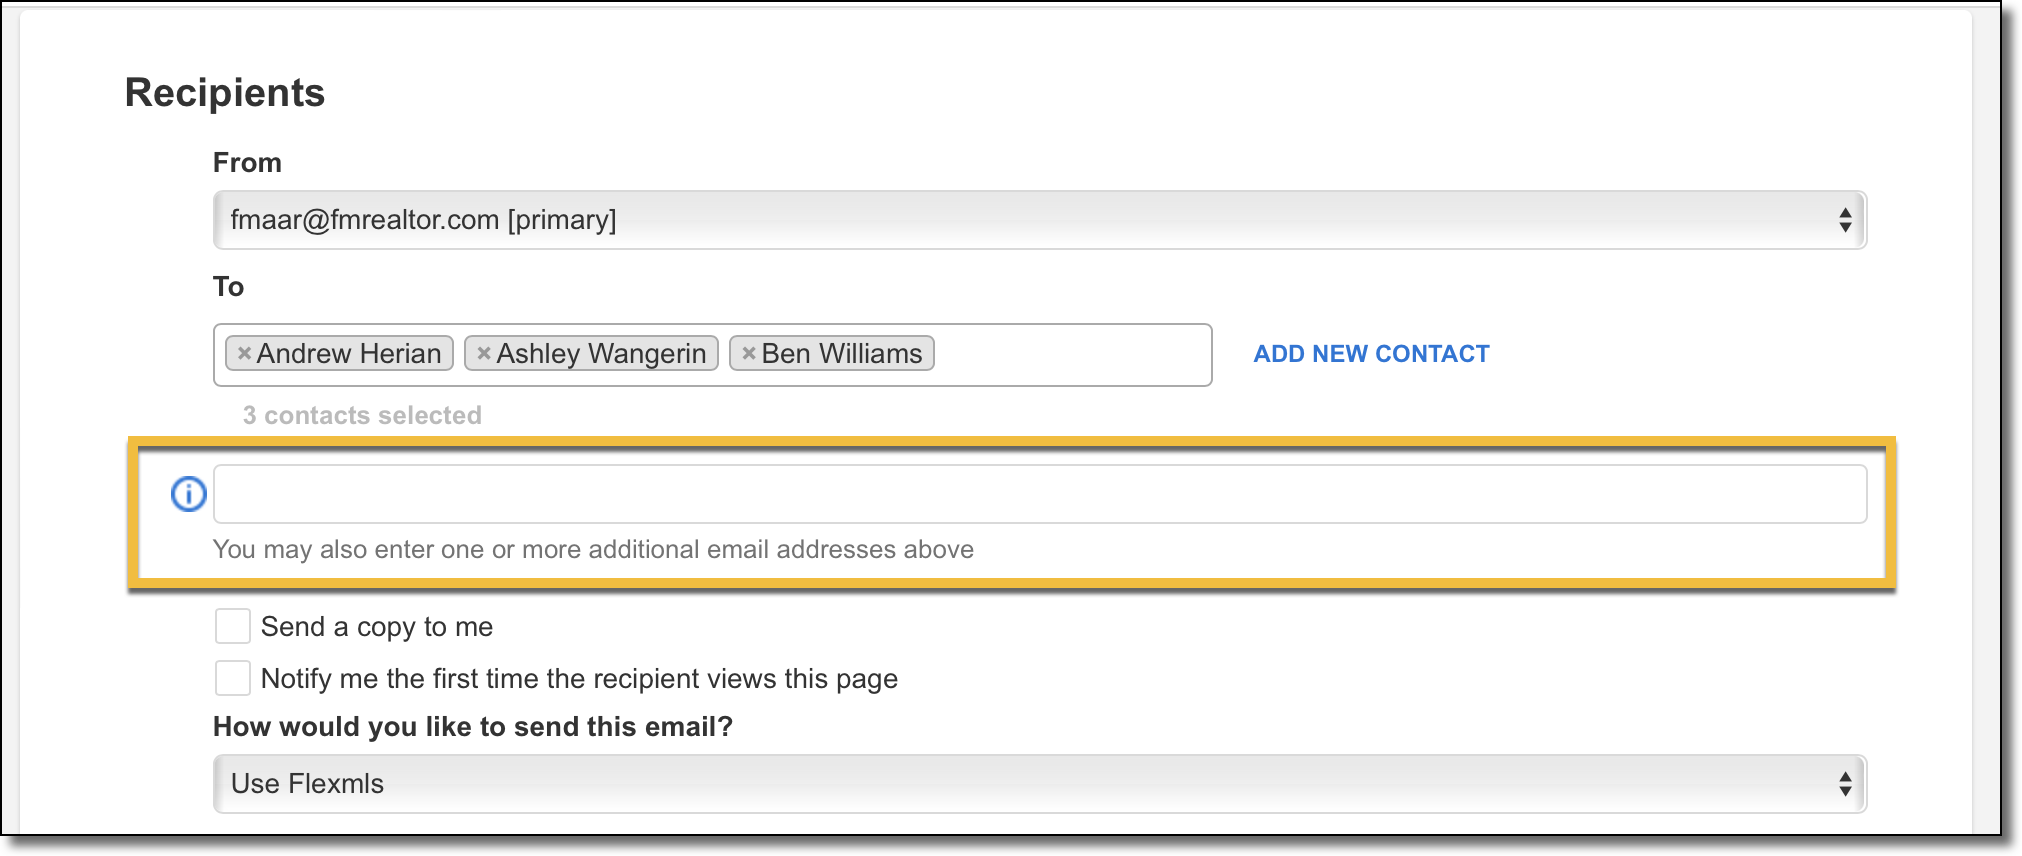
Choose the address to send the email from.
Select the recipients of the email. Select names from the available list of contacts. To add a contact to Flexmls, click Add New. When you are finished entering contacts, you can enter additional email addresses that are not associated with contacts in Flexmls.
If you want to receive a copy of the email, click Send a copy to me. Flexmls does not save message content, so if you want to refer to the message later, we recommend that you have a copy sent to you.
If you email a public version of listings and choose this option, your email will show the public version. However, as the agent, you will also have the option to see the private version of the listings when you click the link.
Note
If you open the agent-only version on the desktop version of Flexmls Web, you can add search criteria on the Edit Search tab. If you open the agent-only version on mobile, you cannot edit the search; you can access only the listings in the email.
To be notified when the recipient clicks the link to the listings, click Notify me the first time the recipient views this page.
You can send emails directly from Flexmls or use your installed email system, such as Outlook or Mozilla Thunderbird. If you do not have a local email client or are unsure, do not select the My email application option.
Type a subject line and compose your message. The message body has a 3,000-character limit.
You can select either HTML or Text format. HTML format allows you to apply font styles and and sizes. The Text format will send a plain-text email without formatting.
If you want to use the same subject line and message body in future emails, you can create a template. For more information about templates, see Create or Modify an Email Template.
Note
If you selected to send the email using your local email client, you can edit the subject line, message body, and signature using that program.
Below the message, you can choose to include a signature using your business card. For more information about creating a business card, see Business Cards.
If needed, click View Listings (or Preview if you are using the classic portal) to see a preview of what recipients will see when they click the emailed link.
If you selected the interactive version, the preview will open in a new page. To leave the preview, click Close Preview at the bottom of the page.
If you selected the printer friendly version, the preview will be displayed on the same page. You can make further edits to the content via the left pane.
Click Email to send the message (or Send Page if you are sending the printer-friendly version). If you chose to use your local email client, a message window will open in that program, where you can finish and send the message.