Subscriptions FAQ
The following are frequently asked questions about subscriptions in Flexmls.
Subscription emails show a preview of the listings that meet the search criteria for the subscription. The photo, address, price and status of each listing are included in the message body.
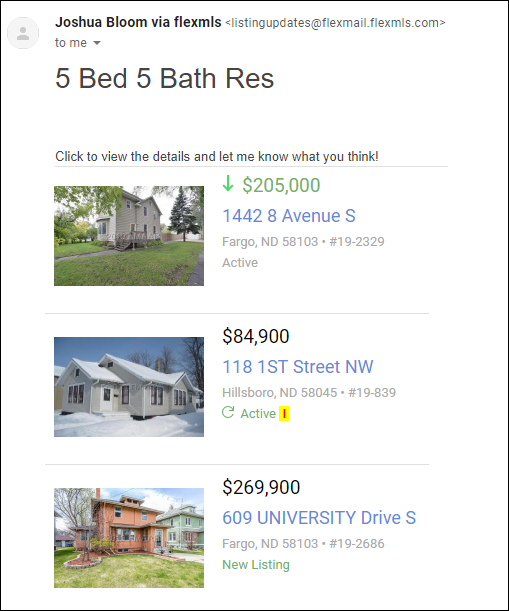
Depending on your settings on the Portal Preferences page, clicking a link in the email will open the specific listing, the results for the search associated with the subscription, or the contact's news feed.
Note
If you are set to receive an agent copy of the email, the information in the yellow box is visible only to you. The box will not appear in the client's version of the email.
The news feed is a feature of the client portal. If you are using the new Flexmls Portal, the news feed shows all listings that were sent to your client via a subscription. If you are using the classic portal, the news feed shows the last 50 listings that were sent to your client via a subscription.
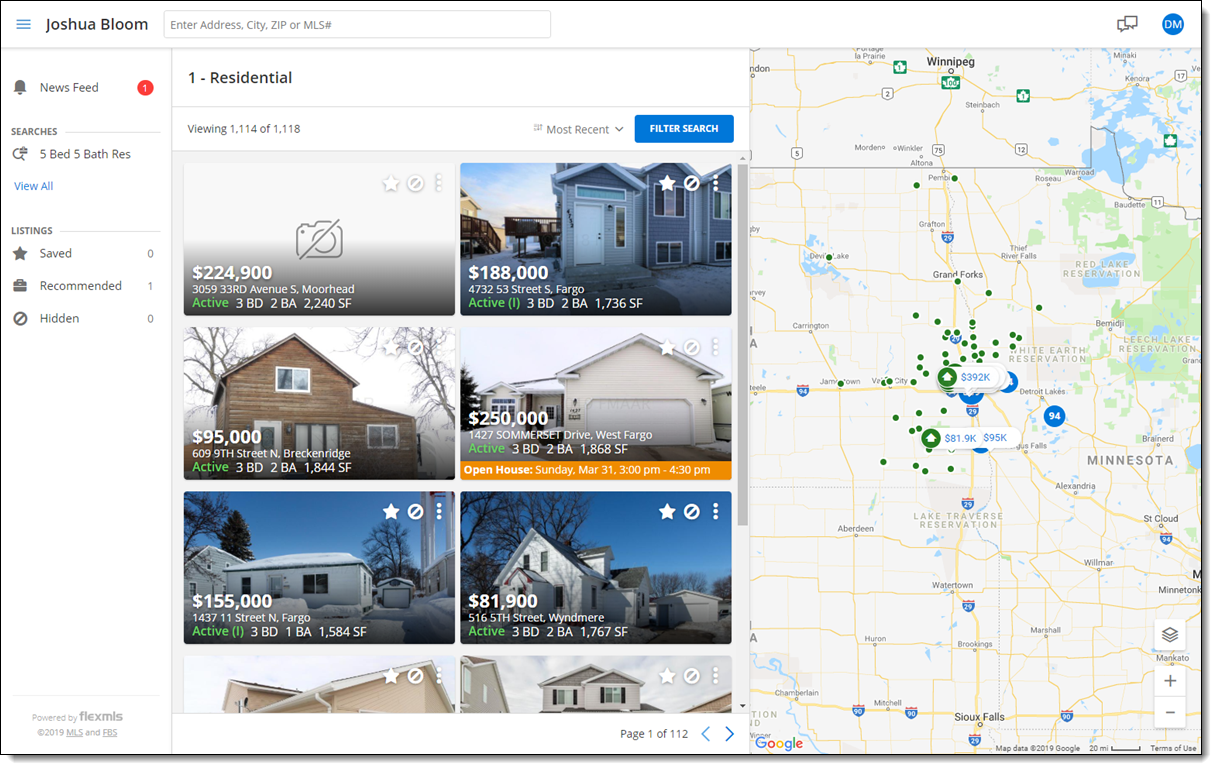
The appearance of the news feed will vary depending on whether you are using the classic portal or the new Flexmls Portal.
ASAP subscriptions do not send emails at scheduled times. Instead, emails for ASAP subscriptions are sent within minutes of a listing being updated in Flexmls, per the settings of your search. You can select the ASAP option when setting up or editing subscriptions.
If a listing that was previously included in a subscription email has changed so that it no longer matches the saved search, the listing will still be included in the client's news feed.
However, you can control which listing statuses are included in the news feed. For example, if you do not want Expired or Sold listings to be displayed, you can use the Portal Preferences page to omit those statuses by default. You can also change the setting for an individual contact by using the Portal tab in Contact Management.
To view the date, time, and content of a subscription email, click My Sent Emails under Contacts on the menu. Then click the Subscription option at the top of the page. The date and time for each sent subscription email will be displayed. To view the message content (the listings that were included), click the View link for the email.
To view listings that you sent to your contact manually, click the Manual option at the top of the My Sent Emails page and then click the View link for the email.
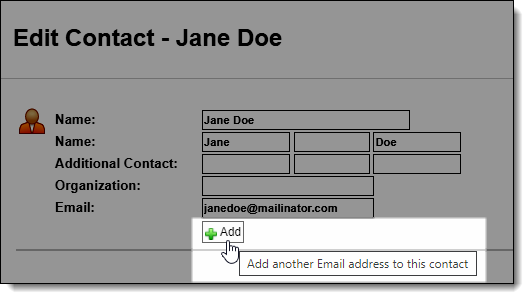
In Contact Management, click on the contact's name and then click Edit Contact at the bottom of the page. Then click the Add button next to the Email field to add another email address.
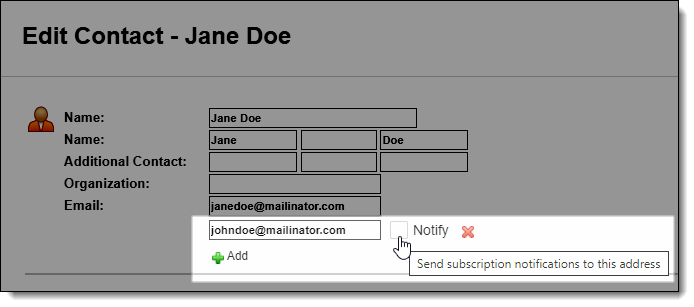
Next to the additional email address, mark the Notify check box and click Save Changes. The additional address will receive all subscriptions for the contact.
Yes. When you create a subscription for a contact, they will receive an opt-in request. By opting in, the contact confirms that they want to receive listings via email. Until they confirm by clicking the link, they will not receive any subscription emails.
Note
If you manually email a listing link to your contact, they can also opt in by clicking the emailed link.
Even if the contact has not opted in to receiving email notifications, they can view their listings in the news feed on the customer portal. Subscription opt-in is not required in order to access to the portal and news feed.
To verify whether a contact has opted in to subscriptions, view the contact's record in Contact Management. The following opt-in statuses are possible:
Confirmed - The contact has received an opt-in email and has confirmed that they want to receive future emails.
Opted out - The contact has received an opt-in email and has opted out of receiving future emails.
Pending - The contact has received an opt-in email, but has not responded.
Inactive - The contact received an opt-in email and opted in, but has not clicked an emailed link in 13 months.
If a contact is inactive or has opted out, you can click Send opt-in request in the Action column to send another opt-in request.
Note
You can resend the request only once, so you may want to notify the contact before resending the opt-in email.
To view the opt-in status of all contacts, click Opt-In Status under Contacts on the menu. See Opt-In Status Report for more information.
If your contact continues to click links in subscription emails or continues to access their news feed, their subscription will remain active indefinitely. A subscription will be inactivated if the contact has not clicked any emailed links or viewed their news feed in 13 months.
Every week, you will receive an email showing you the subscriptions that will expire (become inactive) within the next 14 days. You can also view inactivated subscriptions by clicking Subscriptions under Contacts on the menu. Click the Inactive link to see all inactive subscriptions.
You can manually resend the subscription opt-in email to an inactive contact. If the recipient chooses to opt in again, they will resume receiving subscription emails. For more information, see Opt-In Status Report (Inactive Tab).
When you set up a subscription for a contact, you have the option to receive an agent copy of the email that is sent to your contact. You can also receive an email when the contact clicks a link in a subscription email.
To quickly remove agent notifications from subscriptions, click the checkboxes next to the subscriptions, then use the buttons at the top of the page. You can remove the following types of notifications:
Remove Agent Notification – Stop receiving an agent copy of each email that is sent via the subscription.
Remove Contact Click Notification – Stop receiving a notification email when the contact clicks a link in a subscription email.
If you are using the classic portal, the default display settings for subscription emails are set in your Portal Preferences. If a contact is set up to use the client portal, you can override the default settings for that contact. Select the contact in Contact Management, click the Portal tab, and then click Change Settings at the bottom of the page. If a contact is not set up to use the client portal, you cannot override the default display settings for that contact.
If you are using the new Flexmls portal, a report format is not used. Listing information is optimized to be viewed on a computer screen.