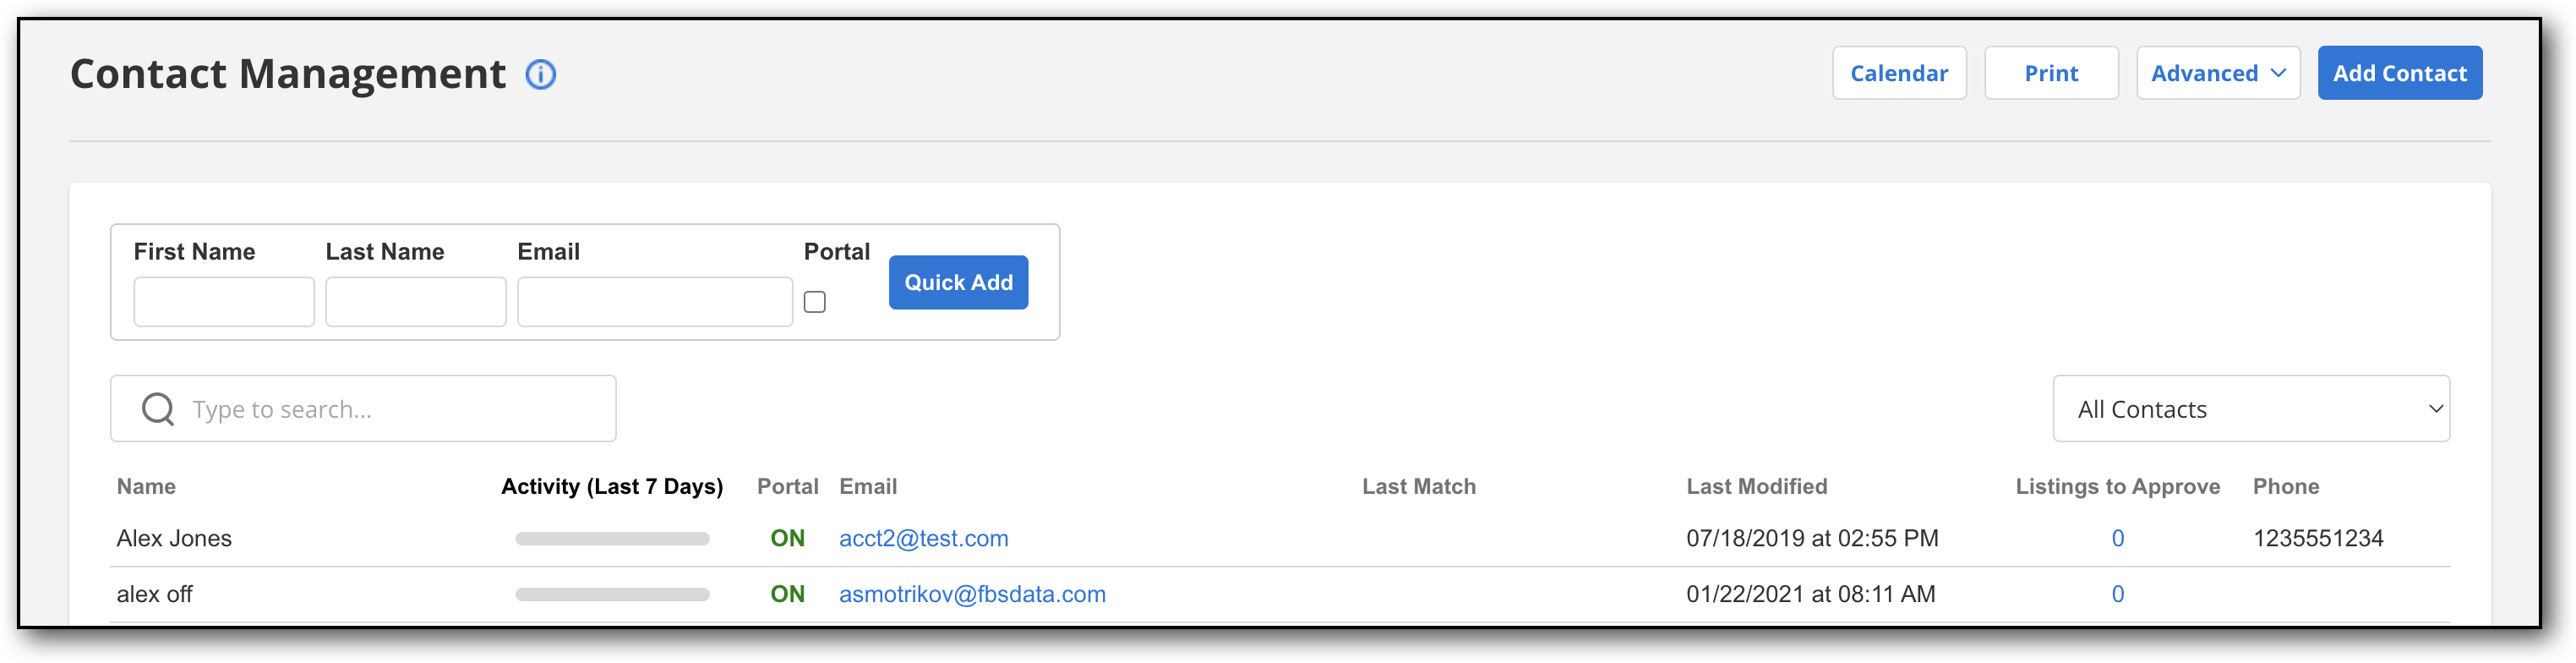
Contact Management
Click Contact Management under Contacts to open the Contact Management page, where you can add, edit or remove contact information. For information about deactivating or deleting contacts, see Deactivate or Remove a Contact.
Tip
The following Guided Help tours are available for this function in Flexmls. When you click on a link, an instance of Flexmls will open in a new browser tab and instruction bubbles will guide you through the process.
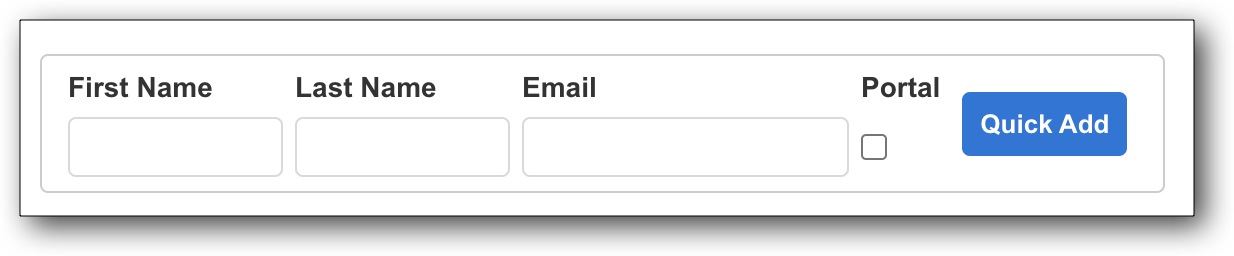
To quickly add basic information about a contact, use the Quick Add bar at the top of the Contact Management page.
Note
Click the Collapse button  to hide the Quick Add bar. You can also use the Advanced menu on the Contact Management page to restore or hide the Quick Add Bar.
Enter the contact’s first name, last name, and email address in the Quick Add bar.
Click the Portal checkbox to create a client portal for the new contact and send an invitation.
Click the Add button to add the contact.
Click the Add Contact button on the Contact Management page to create a new contact, including a mailing address and detailed contact information. For more information, see Contact Details.
Enter name, contact, and organization information for the contact.
Enter an email address for the contact. To enter multiple email addresses, click the Add button next to the Email field. The first email address is the primary email address and will be the default for subscription notifications. Click the Notify option next to additional contact email addresses to enable those addresses to receive notifications.
To add a contact to a group, click Add and select a group from the list. Click Save Changes when you are finished adding the contact to groups. To remove a group from a contact, click the X next to the group name.
Note
Contacts can be associated with groups for better organization. To add, edit, or remove available groups, click Edit Group List. To add a new group, click Add New, type a name in the Name field, and then click Save. To edit the name of an existing group, select the group in the list and type a new name in the Name field. To remove a group, select the group in the list and click Remove.
To have the searches related to this contact used in reverse prospecting for the rest of the MLS, click the Reverse Prospecting checkbox. In the event of a reverse prospecting match, only your information will be revealed, not the contact's information.
For more information about reverse prospecting, see Reverse Prospecting.
Click Advanced on the Contact Management page to view additional options for working with contacts.
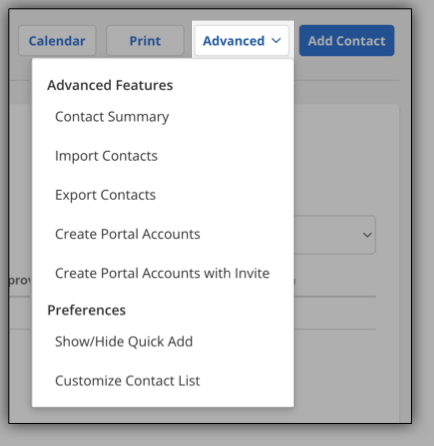
The following options are available:
Contact Summary - The Contact Summary report displays activity for portals, messages, emails, and searches for each contact. This report is also accessible from the main Contacts menu. For more information, see Contact Summary Report.
Import Contacts - Upload an existing address book into the system. Use the Browse button to locate your address book, select the delimiter used, then click Upload File. For more information, see Import Contacts into Flexmls.
Export Contacts - Export your contact information into a comma-separated values (.csv) file.
Create Portal Accounts - Generate portal usernames and passwords for all contacts.
Create Portal Accounts with Invite - Generate portal usernames and passwords for all contacts and send email invitations to all contacts. The default email message in your portal preferences will be sent to all contacts.
Show/Hide Quick Add - Toggle between showing and hiding the Quick Add bar.
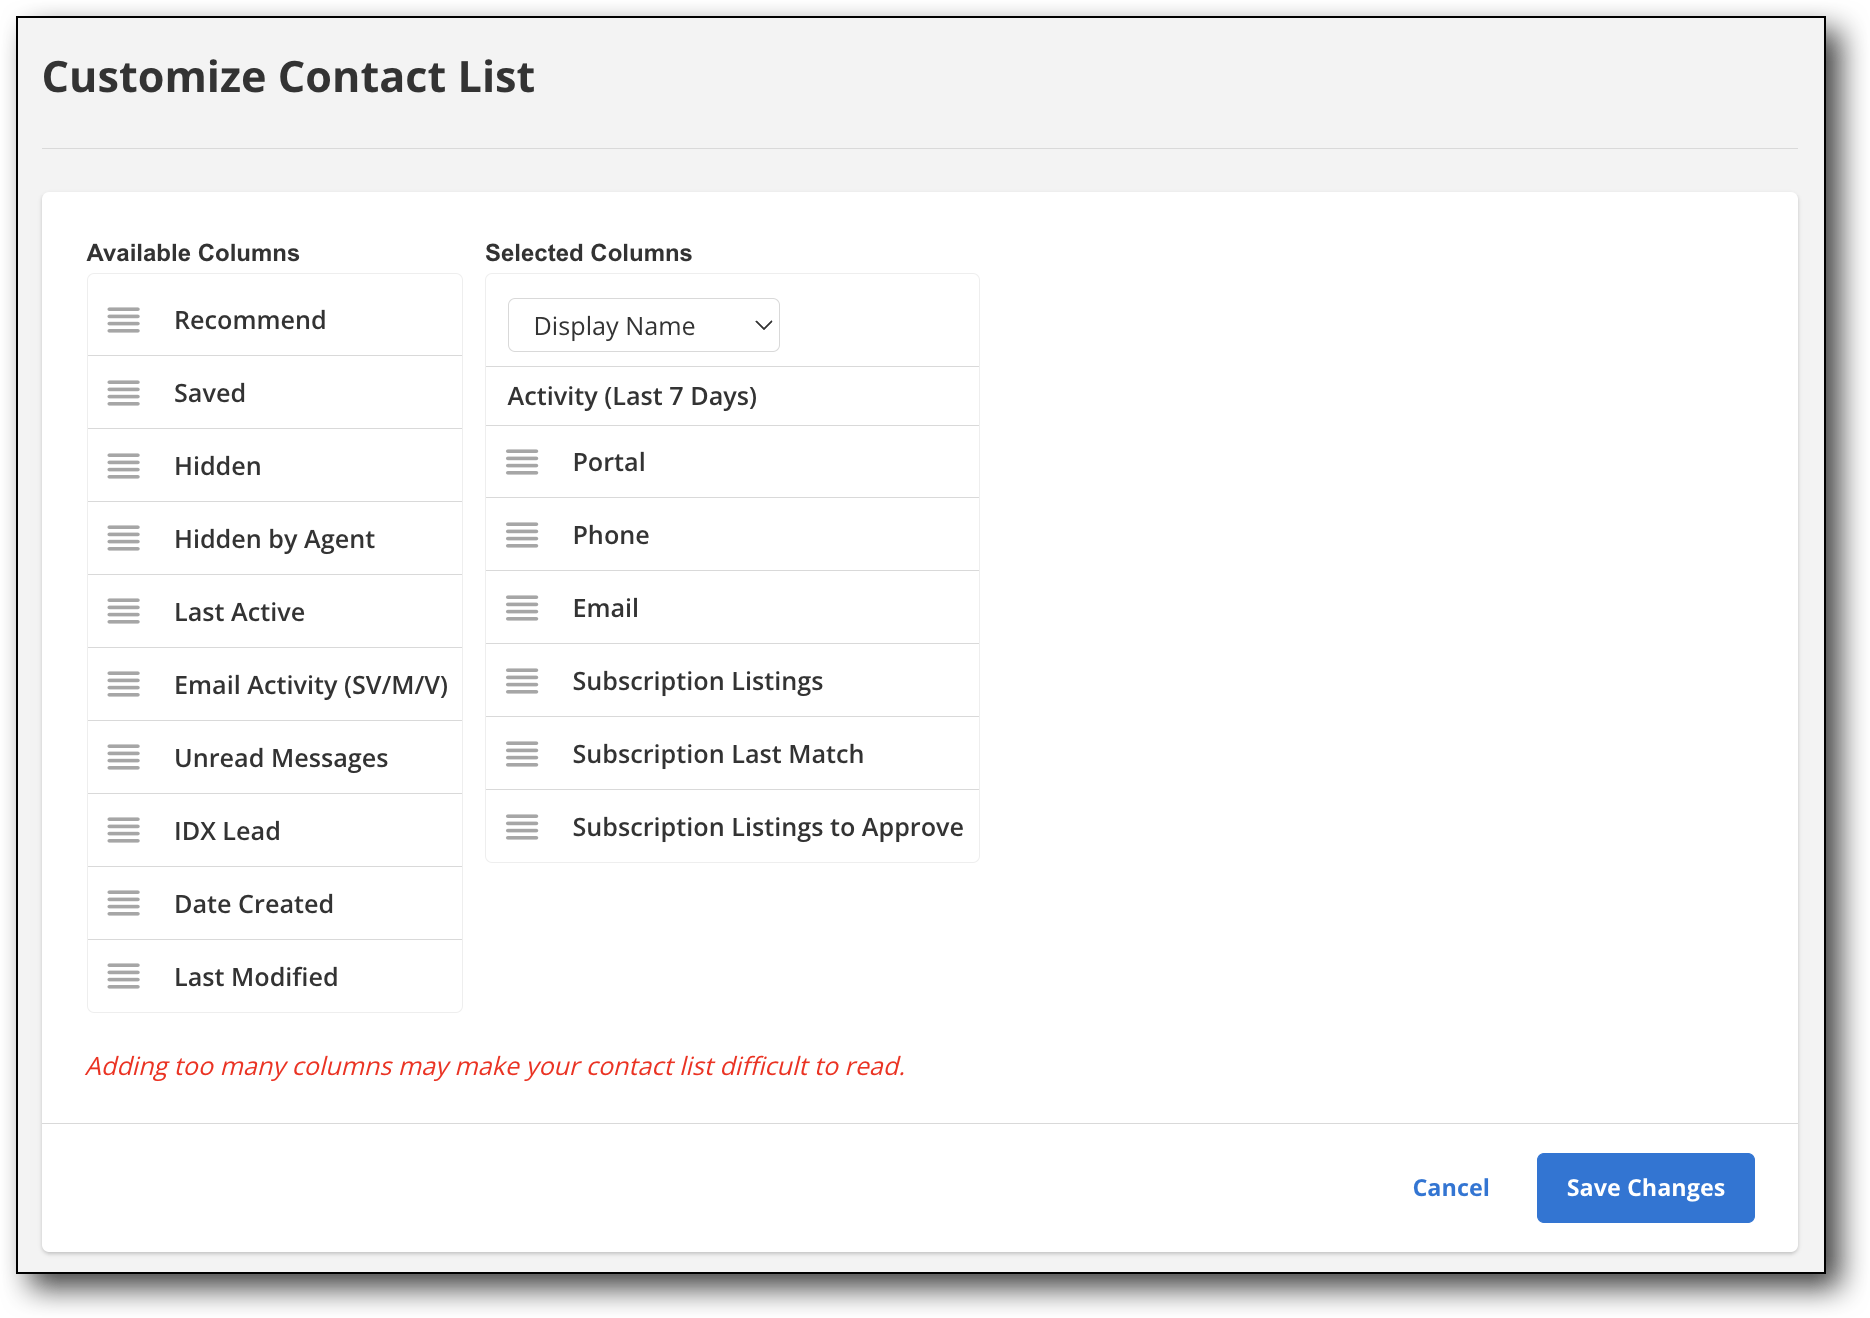
Customize Contact List - Customize which columns appear on the Contact Management page. For example, you can add columns for portal activity or emails. Columns that are not currently in use are displayed on the left side under Available Columns, while columns currently in use are displayed on the right side under Selected Columns. To customize the columns that appear, click the hamburger button to drag and drop the items from Available to Selected. You can also drag and drop to customize the order in which these columns appear. Note that adding too many columns may make the contact list difficult to read, depending on your screen size.
When you send emails to contacts from , the system verifies that the recipient’s email address is valid before sending the email. If any of your contacts has an invalid email address, a blue Action Required banner appears at the top of the Contact Management page.
Click View Email Addresses in the banner to edit or remove invalid email addresses. The following options will be available:
Edit - Enter a new, valid email address and click Save. This option is available for both primary and secondary email addresses.
Remove - If the email address is secondary, you can click Remove to remove the address from the contact’s record. After removing one or more secondary email addresses, click Done.