Change User Settings
Click Change User under Users on the Admin menu to change the settings for an office or member. Click the Find button to list all members in your MLS or enter at least three characters to search for a specific member. Matches will appear in the box below the search criteria.
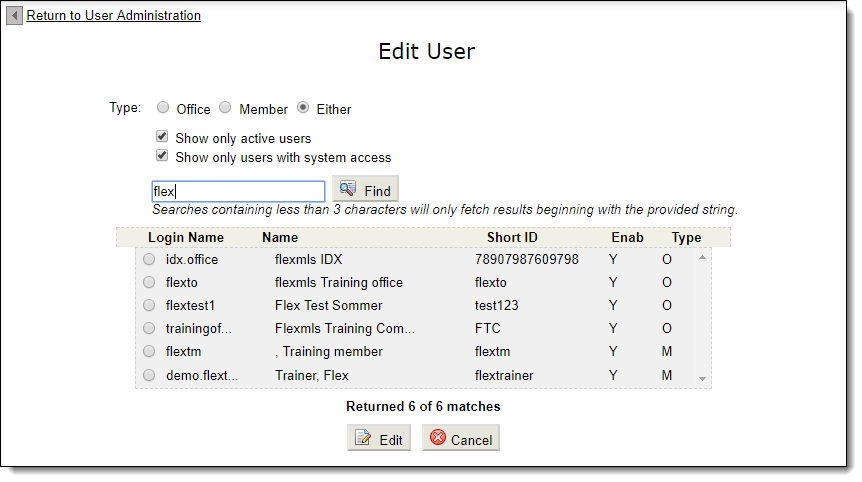
Select a member and click Edit or double-click on a member name to open the Edit Member page. The Edit Member page includes the same tabs as the New Member page for setting user properties. In addition, it includes a Reports tab, where you can run reports for the selected member.
Tip
Refer to the Change a User's Settings Guided Tour for a step-by-step walkthrough on changing user settings.
If you prefer to use keyboard controls to navigate among the tabs and features of the New Member and Change Member pages, use the key combinations shown in the table below.
Command | Keyboard Shortcut |
|---|---|
Save | Ctrl + Shift + S |
Edit | Ctrl + Shift + E |
New | Ctrl + Shift + N |
Change Office or New Office | Ctrl + Shift + O |
New Member | Ctrl + Shift + M |
Profile Tab | Ctrl + Shift + P |
Settings Tab | Ctrl + Shift + G |
Team Tab | Ctrl + Shift + T |
Superuser Tab | Ctrl + Shift + U |
Company | Ctrl + Shift + C |
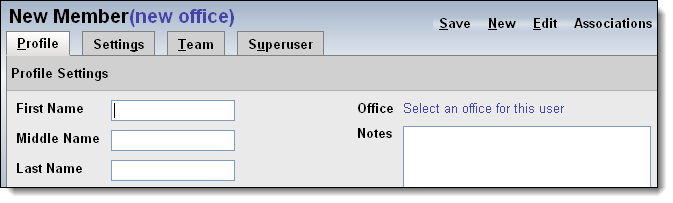
On the Profile tab, enter the member’s primary profile information. Enter the user's name, create or automatically generate a login name and password, enter a short ID, and select which office to associate with the member.
Note
Once a user has a short ID and can add listings, do not change the short ID.
Designations
Designations allow you to set up certification options that users can acquire. Additionally, some features of Flexmls allow you to display or send a message exclusively to agents who have certain designations. For more information, see Member Designations.
Associations
If your MLS includes multiple associations, select the primary association that the user is a member of. Select the Member check box for each additional association that the user belongs to.
To add, edit, or remove associations, click the Associations link at the top of the page.

Existing associations are listed in the Associations box. The number of users currently assigned to each association is displayed in parentheses after the association name.
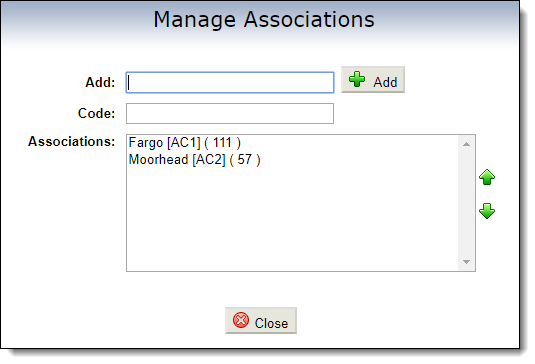
To create a new association, type the name in the Add box and then click Add. To edit an association, select it from the list, type the new name, and click Save. To remove an association, select it and click Delete. When you are finished making changes to associations, click Close to return to the Profile tab.
Notes
Use the Notes section to record information about the user for future reference. (For example, you might enter the date a user was deactivated or transferred.) Only personnel who are authorized to make changes to the account can view these notes. The user cannot see notes that you enter here.
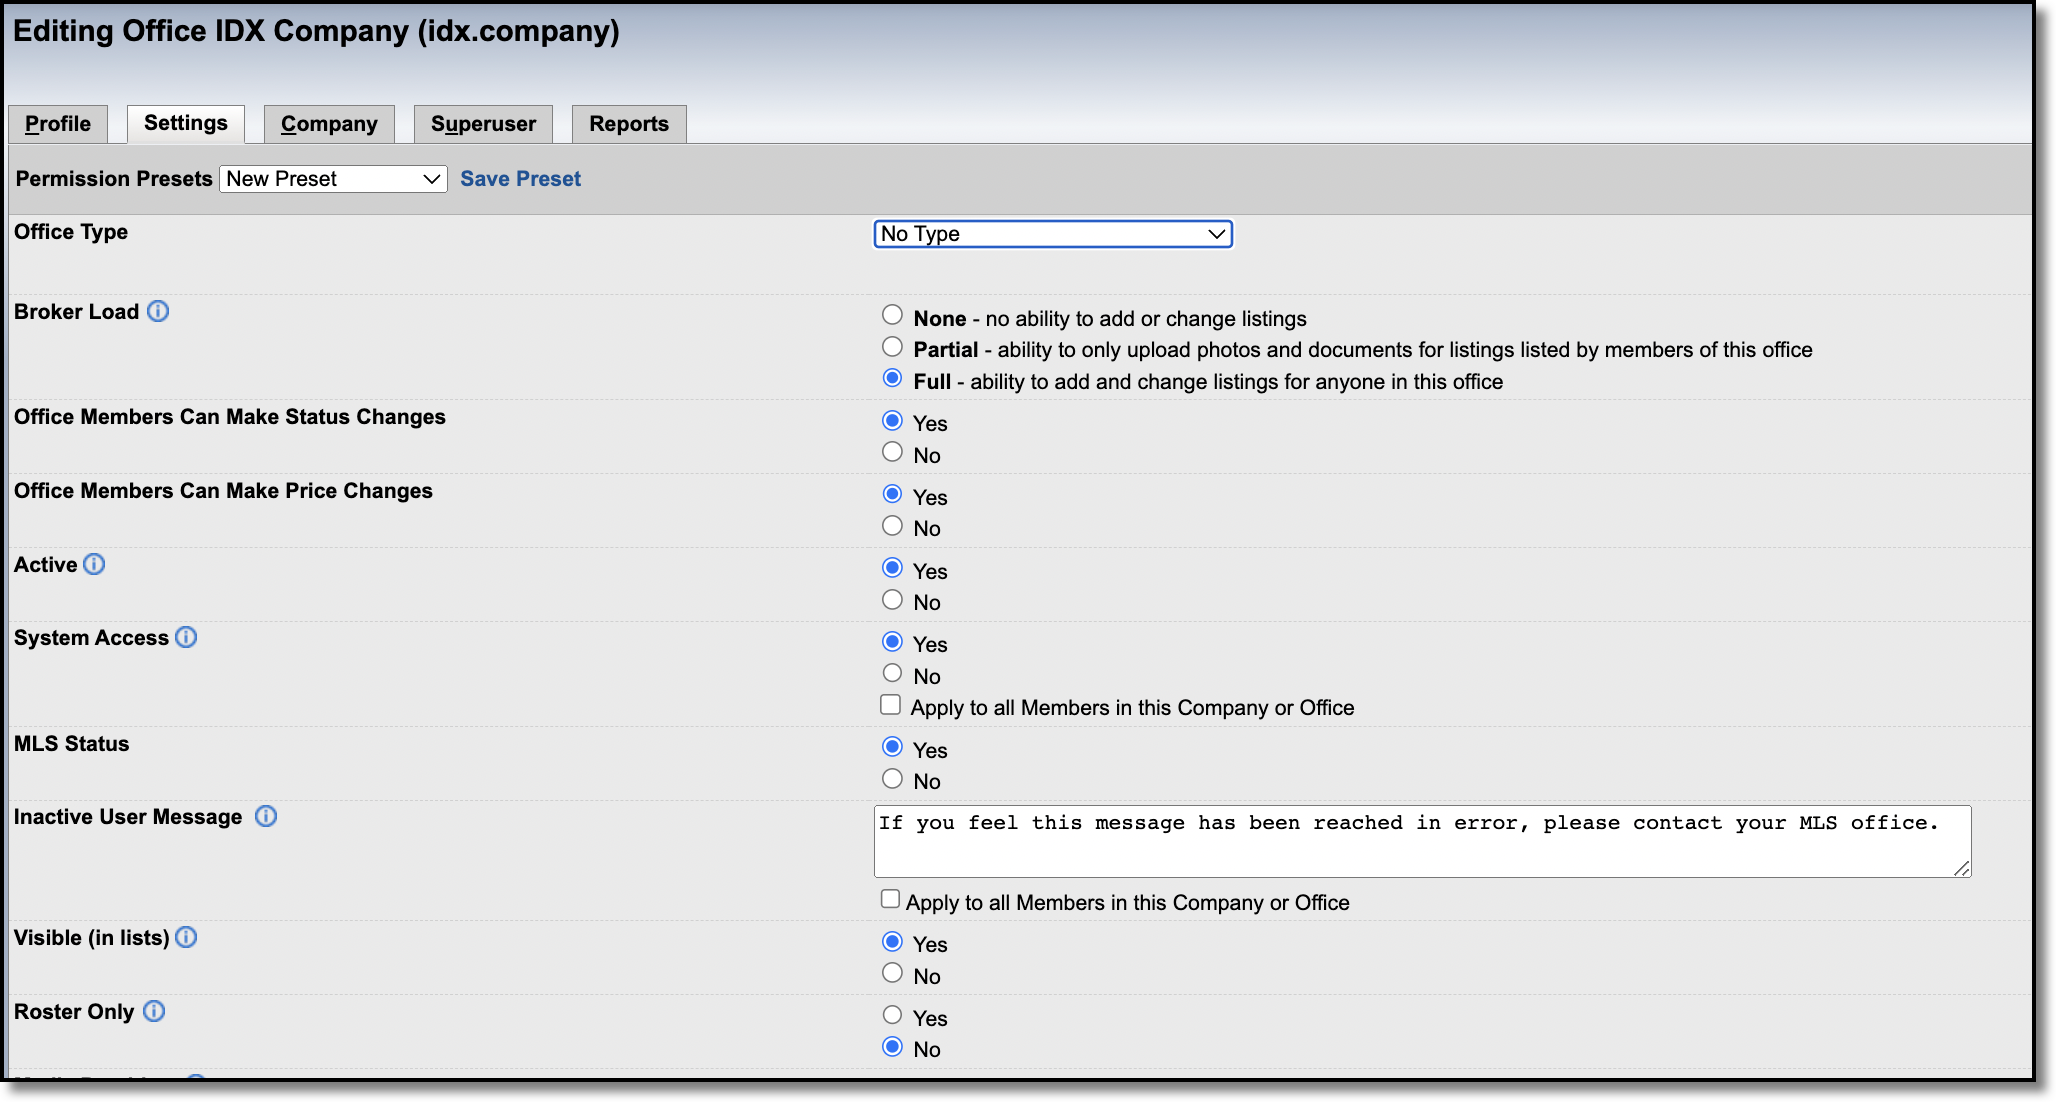
On the Settings tab, set the access level and permissions for the member.
Note
Press CTRL+F (Command+F on a Mac) and type a keyword to search for a specific setting in this help topic.
Permission Presets
You can save permission settings as a template that can be reused for members of the same type. For more information, see Permission Presets.
General Settings
Setting | Description |
|---|---|
Member Type | Select the member type, as determined by your MLS. For information about setting up member types, see Member Types. Selecting a member type may be required, depending on the settings of your MLS. |
Brokerload | Set the user's permissions for adding and changing listings. For more information, see Brokerload. |
Manage Showings For | This setting applies only if your MLS uses the built-in showing service in Flexmls. Members can manage showings for themselves, their office, or their company. |
Automatically approve this user's new listings | Use this setting to override the MLS default for automatic approval, if necessary. |
Active | This setting is intended for users that are no longer with the MLS. If set to No, the user will not be able to log in to Flexmls. This can also prevent the user from showing in lists, based on your MLS settings. |
System Access | This setting is intended to temporarily disable a user's account (for example, if they have unpaid dues). If set to No, the user will not be able to log in to Flexmls. However, their account will remain active and their clients will not notice an interruption (subscription emails will continue to be sent, for example). |
Inactive User Message | This setting allows you to set up custom messaging for disabled Flexmls accounts. You can set up the messaging for specific users or for all members of an office or company. With this message, a Flexmls user attempting to login can be notified why their account has been disabled, and can be informed of the steps they need to take in order to restore account access. NoteIf creating a custom message at the office/company level, there is an additional option to check the box labeled Apply to all Members in this Company or Office. If an office is closing, this setting allows you to customize one message to display for all members of that office. NoteMLSs have the option to set a custom default inactive user message. To do this, go to MLS Settings > User Administration. NoteAn account is disabled/inactive if either Active or System Access is set to No. |
Visible (in lists) | This setting is intended to hide an active user from member lookup functions such as the Office/Member Search, the list to select a co-listing member or co-selling member, and roster reports. |
Roster Only | If set to Yes, the user has access to the Office/Member Search only. They cannot access any other functions in the Flexmls system and they do not see any Menu options. |
Virtual Tour Provider | If set to Yes, the user has access to upload photos and virtual tours for any active listing in the MLS. They cannot access any other functions in the Flexmls system. Brokerload settings do not apply if this setting is set to Yes. |
Listing Maintenance Assistant | If the Listing Entry Assistant user type is enabled for your MLS, this option becomes available. If set to Yes, the user has access to add and edit incomplete listings on behalf of another member. They cannot access any other functions in the Flexmls system. You can select which other members' listings this user can work with. If you want to enable the Listing Entry Assistant user type in your MLS, contact the Flexmls Customer Success team (cpr@flexmls.com). For more information, see Listing Entry Assistants. |
Broker Tour Administration | If broker tours are enabled for your MLS, this option enables the user to administer broker tours. Broker tours are created for agents and brokers to view properties, and are managed by a tour administrator. If you want to enable broker tours/caravans in your MLS, contact the Flexmls Customer Success team (cpr@flexmls.com). For more information about broker tours, see Manage Broker Tours on the Flexmls Help website. |
FBS Billable | If set to Yes, the user will be included in the Billing Report. FBS uses this setting to determine the number of billable users each month. |
Status Restriction | Restrict the status types that the user can search and view. Each radio button explains which statuses are included. Select Custom to choose the individual statuses the user can search and view. |
Search Restricted to Zipcode | Restrict the user's searching to properties in a specific zip code. If set to No, the user can search for listings according to their Status Restriction setting. |
Search Restricted to Association | Restrict the user's searching to listings from their association only. The user's association is selected on the Profile tab. If set to Yes, the user cannot search for listings from associations where they are not a member. |
User Restricted by Property Type | Restrict the property types that the user can access. If set to Yes, the user can add or search for listings in only the selected property types. |
May Copy Listings | Indicate whether the user can copy listings. If set to Use MLS default setting, the user's access to copy functionality is based on the MLS setting. |
May Export Listings | If set to No, the user does not have access to the Export option when viewing listings. |
May Delete Listings | If set to Yes, the user can delete listings based on their brokerload. (The Remove option is available on the menu and when they are editing a listing.) This setting is not typically turned on for individual member accounts. NoteRemoving a listing does not completely delete it from Flexmls. Removed listings are assigned a status of Deleted, but they remain in the database. |
Non-Member Agent or Exception | This setting is typically used to designate an account to use on listings where the listing agent is not a member of your MLS. If set to Yes, the user is the designated non-member agent account. You can exclude it from the agent ranking when you run the Market Share option of the Saturation Analysis Report. (For more information about the report, see Saturation Report on the Flexmls Help website.) To allow members to select this account as the listing agent, the MLS setting Allow Non-Member agent to appear in listing agent role for members with brokerload privileges, offices and companies must also be set to On. |
Access to Message Board Editor | If set to Yes, the user has access to the Logon Message option under General on the Admin menu. This setting allows the user to post messages that users see when they log in to Flexmls. These messages also appear in the Message Board gadget. This setting is typically enabled only for MLS staff accounts. |
Ability to Upload and Edit Files in the MLS Intranet | If set to Yes, the user has access to the MLS Intranet Management option under General on the Admin menu. This setting allows the user to upload and edit files that are stored in the MLS Intranet. For more information, see MLS Intranet Management. |
Access to RETS Manager | If set to Yes, the user has access to RETS options on the Admin menu. For more information about these options, see RETS Administration. |
Access to MLS Preferences | If set to Yes, the user has access to the MLS Settings option under General on the Admin menu. Access to this page can drastically change how Flexmls operates, so be sure to grant this access to trusted MLS staff only. This option is typically used when you want to grant access to the MLS Settings, but do not want to grant access to other functions that are normally under the control of the administrative account. |
Access to Membership Maintenance Module | If set to Yes, the user has access to administrative functions for finding, adding, and changing users. They can also perform password resets and view user reports. Multiple Yes options may be available, depending on the user's brokerload. Some options are not available for certain brokerload levels. When you select Yes, additional options are displayed that allow you to grant or deny access to specific user maintenance settings. |
Receives Reasonableness Constraint Notification Messages | If set to Yes, the user will receive an email notification when a listing has been placed in moderation. This setting should be used only for MLS administrative accounts and other personnel who are authorized to verify moderated listings. For more information, see Listings in Moderation. |
Access Restrictions
Allow or deny internet service providers (ISPs) and IP addresses for the user. Use these settings in conjunction with Gumshoe Detective member tracking reports. For more information, see Member Tracking Reports.
The following options are available:
Deny Access from the ISPs and IP Addresses below - The member will have "open" access to Flexmls. They can access Flexmls from all ISPs and IP addresses except the ones that you exclude.
Allow Access from only the ISPs and IP Addresses below - The member will have "closed" access to Flexmls. They cannot access Flexmls from any ISPs or IP addresses except the ones that you allow.
Session Cookies
Click Clear Session Cookies to purge user sessions. Clicking this link will log a user out of all active sessions.
MLS Bulk Email Settings
If MLS email is enabled for your MLS, you can set bulk email options for the user. These settings apply only if the MLS setting Allow MLS to receive bulk emails is set to On. Your selection here will also change the bulk email settings in the user's General Preferences.
Access to function -The user can send bulk email.
Receives email - The user will receive bulk email.
Opt out - Opt the user out of all bulk emails.
Opt out of bulk Email subjects - Opt the user out of bulk emails with a particular subject line.
Emails are sent to those who have opted out - When this user sends a bulk email, it is sent to all users, even those who have opted out of bulk email.
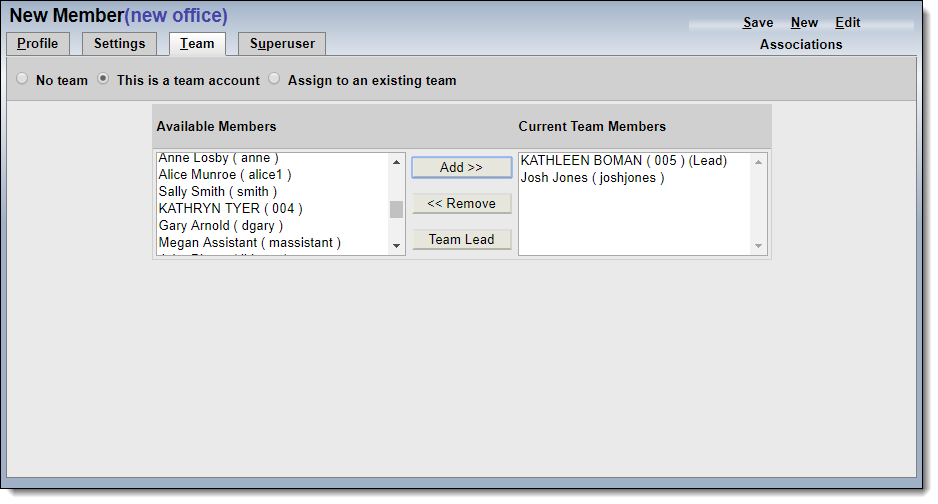
If teams are used in your MLS, the Team tab will be available when adding and editing users. Before making selections on the Team tab, you must assign the member to an office. Then you can make the member a team account or assign the member to an existing team.
If you select This is a team account, you can add and remove team members and designate a team lead.
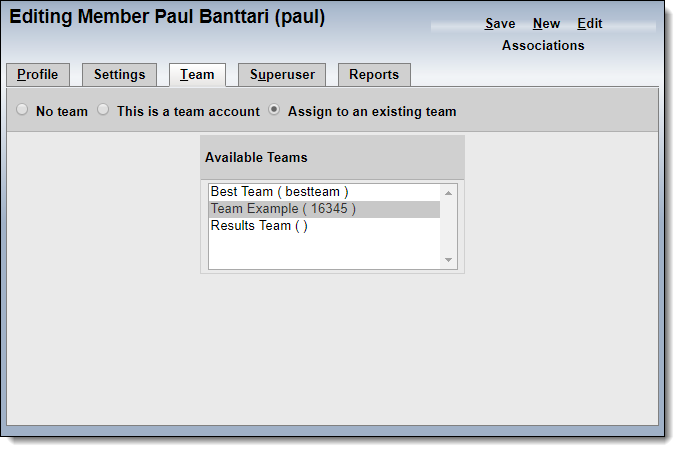
If you select Assign to an existing team, you can choose from the teams in the office that the user is assigned to. Click on a team name to add the member to that team.
For more information about team functionality, see Teams in Flexmls.
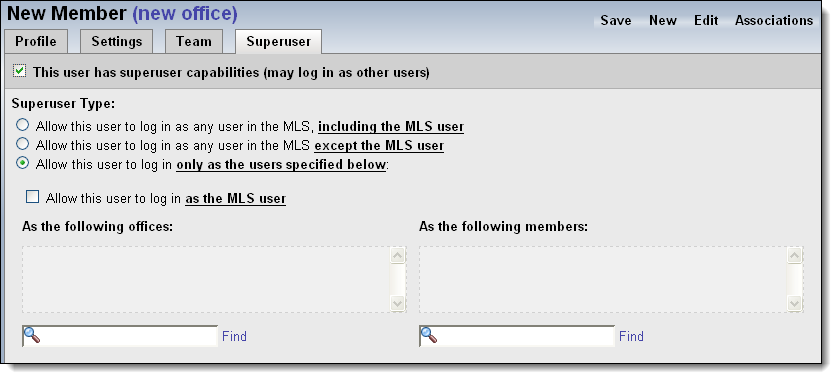
On the Superuser tab, you can grant the member the ability to log in as other users. For more information about superusing, see Superusing in Flexmls.
Use the radio buttons to select the level of access you want the member to have. You can allow the member to log in as another member, as several members, or as any MLS user.
To select specific users or offices, click Allow this user to log in only as the users specified below. Use the text boxes to enter search criteria and press Enter or click Find to locate an office or member. Click on an office or member name to add it to the list.
When you are finished making selections, click Save to save the member. Click New to add a member or click Edit to open the editing page for an existing member.
Tip
The following Guided Help tour is available for this function in Flexmls. When you click on a link, an instance of Flexmls will open in a new browser tab and instruction bubbles will guide you through the process.
On the Reports tab, you can view and run reports about the user account.
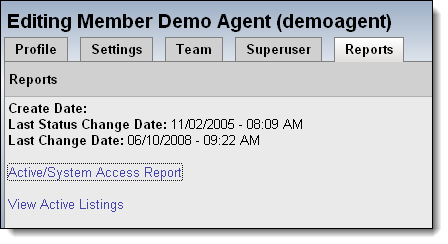
The following reports are available:
Active/System Access/Transfer Report - Shows the change history for the user account.
Users individually allowed to superuse as this user - Lists the users who can superuse as this user.
View Active Listings - Shows all of the user's active listings.
IP Address Report - Shows IP addresses the user has accessed Flexmls from in the past seven days.